×

Travertine Pavers: Benefits, Drawbacks, and Best Uses Outdoors

Travertine pavers have a way of making an outdoor space feel settled and intentional, almost like it has always belonged there. The stone reads “natural” at a glance, yet it still feels refined, which is why it shows up everywhere from compact courtyards to resort-style pool decks.

At the same time, travertine is not a set-it-and-forget-it material. The same pores and character that give it warmth also shape how it performs around grease, leaves, sprinklers, and hard water. If you know what you are buying and install it correctly, travertine can be a confident, long-term choice.

What travertine pavers are (and why they look different)

Travertine is a natural limestone formed by mineral-rich water. That origin story matters: it explains the signature holes, the soft veining, and the tone range that sits comfortably in desert palettes and classic Southwestern architecture.

Those small surface voids are not a defect. They are part of the stone’s personality, and they can be left open for a more organic look or filled for a smoother appearance. Finishes also change the vibe and the traction. Outdoors, most projects favor tumbled or honed surfaces over polished ones.

The advantages that make travertine popular outdoors

Travertine earns its reputation by combining comfort and curb appeal in a way many manufactured pavers struggle to match. It can look high-end without feeling flashy, and it tends to age gracefully when it is cared for.

A few benefits stand out in real backyards, not just on sample boards:

  • Warm, natural color variation
  • Quiet elegance that pairs well with gravel, desert plants, and modern stucco
  • Cooler underfoot: lighter tones and natural porosity help reduce heat buildup on sunny patios and pool surrounds
  • Slip-friendlier texture: tumbled and honed finishes provide traction in wet zones compared with polished stone
  • Long service life: when installed on a proper base and sealed as needed, it can hold up for decades of foot traffic
  • Repair flexibility: individual pavers can be replaced more easily than a cracked slab

One more plus that homeowners notice quickly: travertine tends to make outdoor living feel better. When the surface is comfortable on bare feet and visually calm, people actually use the space more.

The trade-offs: where travertine asks more from you

Travertine’s drawbacks are not deal-breakers, but they do change how you plan the project. Most issues trace back to one reality: it is stone with pores, not a sealed, factory-finished product.

If you want travertine to stay crisp, you need a realistic view of staining risk, sealing, and where you place grills and planters.

  • Porosity and staining: oils, barbecue drips, fertilizer, and leaf tannins can sink in without a quality sealer
  • Edge chipping from sharp impacts
  • Maintenance rhythm: periodic sealing and pH-neutral cleaning keep the surface from dulling or blotching
  • Higher upfront cost than concrete pavers
  • Finish selection matters, since polished surfaces can be slick when wet
  • Freeze-thaw sensitivity in cold climates if water gets into the stone and expands

Travertine can also react poorly to harsh chemicals. Acidic cleaners and aggressive pressure washing are common ways people accidentally etch or roughen the surface.

Best uses outdoors (and where you may want a different material)

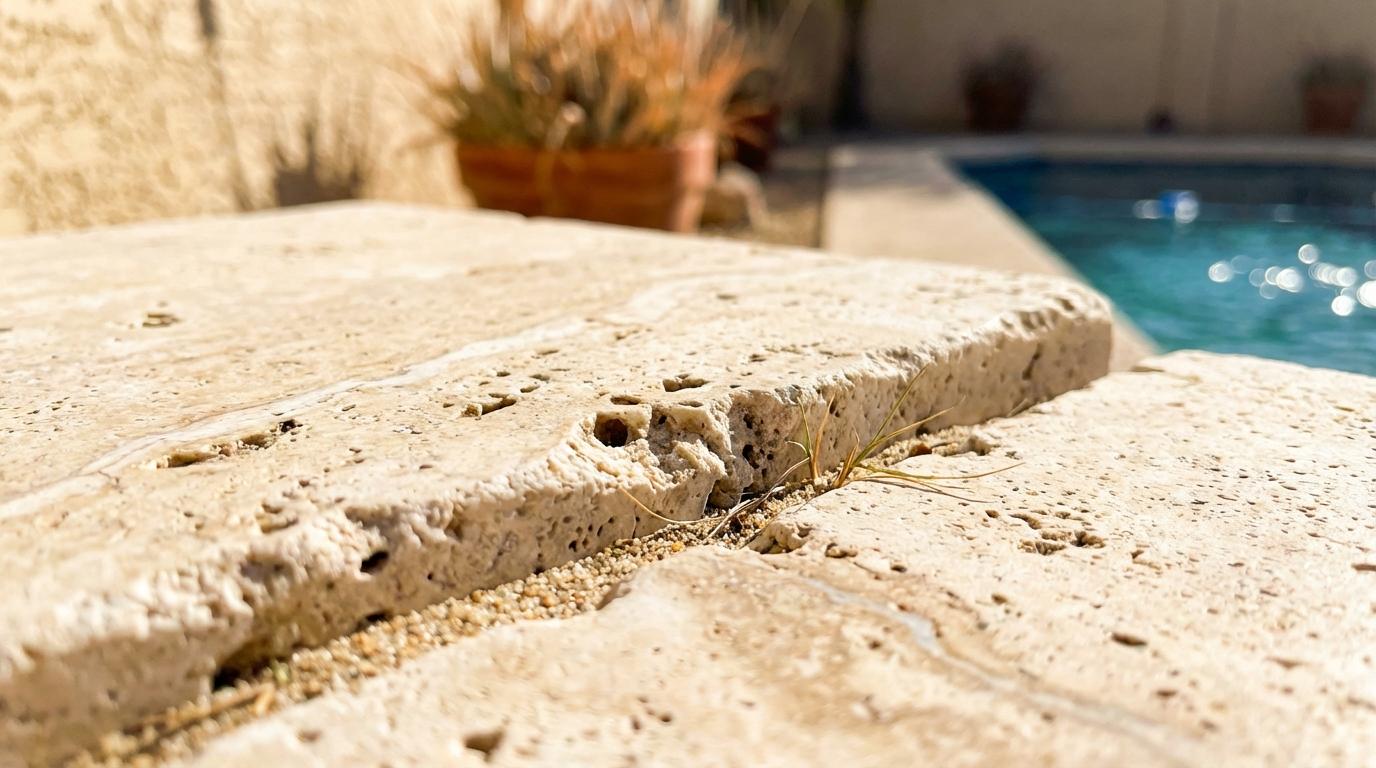
Travertine is often at its best when the goal is comfort, traction, and a relaxed, upscale look. It is a natural fit for outdoor living zones where people linger.

Pool decks are the classic example, because the stone can stay more comfortable under strong sun and the textured finishes help with grip around water. Patios and courtyards are close behind, especially when the home’s architecture benefits from warm neutrals rather than bold reds or stark grays.

Driveways can work too, but only when thickness, base preparation, and load expectations are treated seriously. For heavy vehicles or tight turning radii, many projects shift toward thicker stone, a reinforced base, or an alternate paver type.

Here is a practical way to match the application to the right travertine “spec”:

Outdoor area Recommended finish Typical thickness target Why it works well
Pool deck / spa surround Tumbled or honed 1.25 in (often thicker for coping) Comfortable surface temperature and reliable traction
Patio / outdoor dining Tumbled, honed, or brushed 1.25 in Premium look with good day-to-day durability
Walkways / garden paths Tumbled or brushed 1.25 in Natural texture, good drainage between joints
Steps / landings Textured finish with proper nosing detail Varies Safer footing and cohesive style with adjacent patios
Driveways Tumbled or honed, high-density stone 1.5 in to 2 in (project-specific) Can perform under vehicles when engineered correctly

In spaces with lots of grease, like an outdoor kitchen line, travertine can still be used, but it benefits from smart zoning. A small strip of more stain-resistant surface under a grill, paired with travertine around it, can keep the aesthetic while lowering risk.

Climate fit: desert heat, monsoons, and winter extremes

In hot, sunny regions, travertine is widely appreciated because it can stay more pleasant underfoot than many darker materials. In places like El Mirage and the broader Phoenix area, that comfort factor is not a minor perk. It affects how often a patio gets used from late spring through early fall.

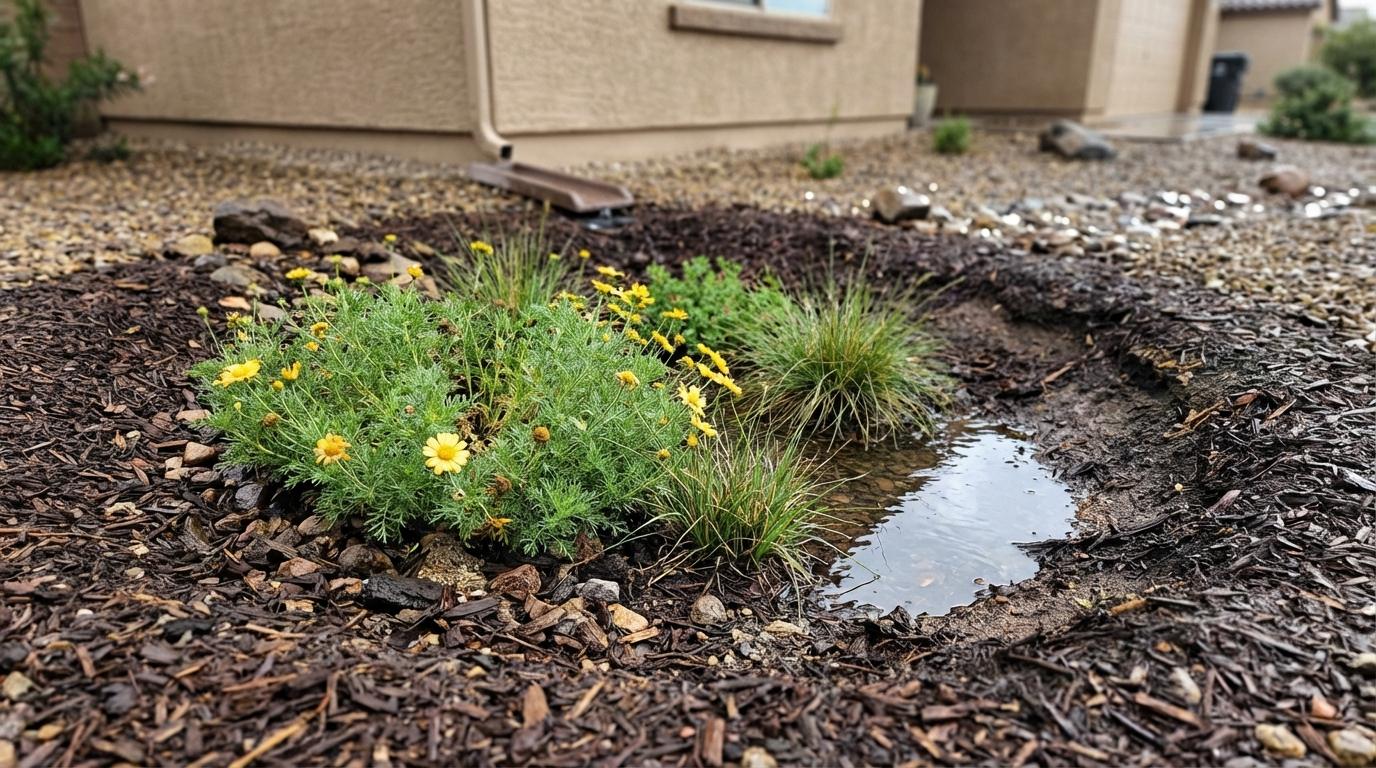
Rain is usually less of a structural concern than staining. Wind-driven dust plus monsoon water can push fine sediment into pores and joints, which is another reason sealing and good drainage details matter.

Cold climates introduce a different challenge: freeze-thaw cycles. If water enters the stone and freezes, it expands. Over time, that can lead to cracking or surface breakdown, especially with lower-density travertine. In those regions, dense stone selection, a well-draining base, and a consistent sealing plan are not optional.

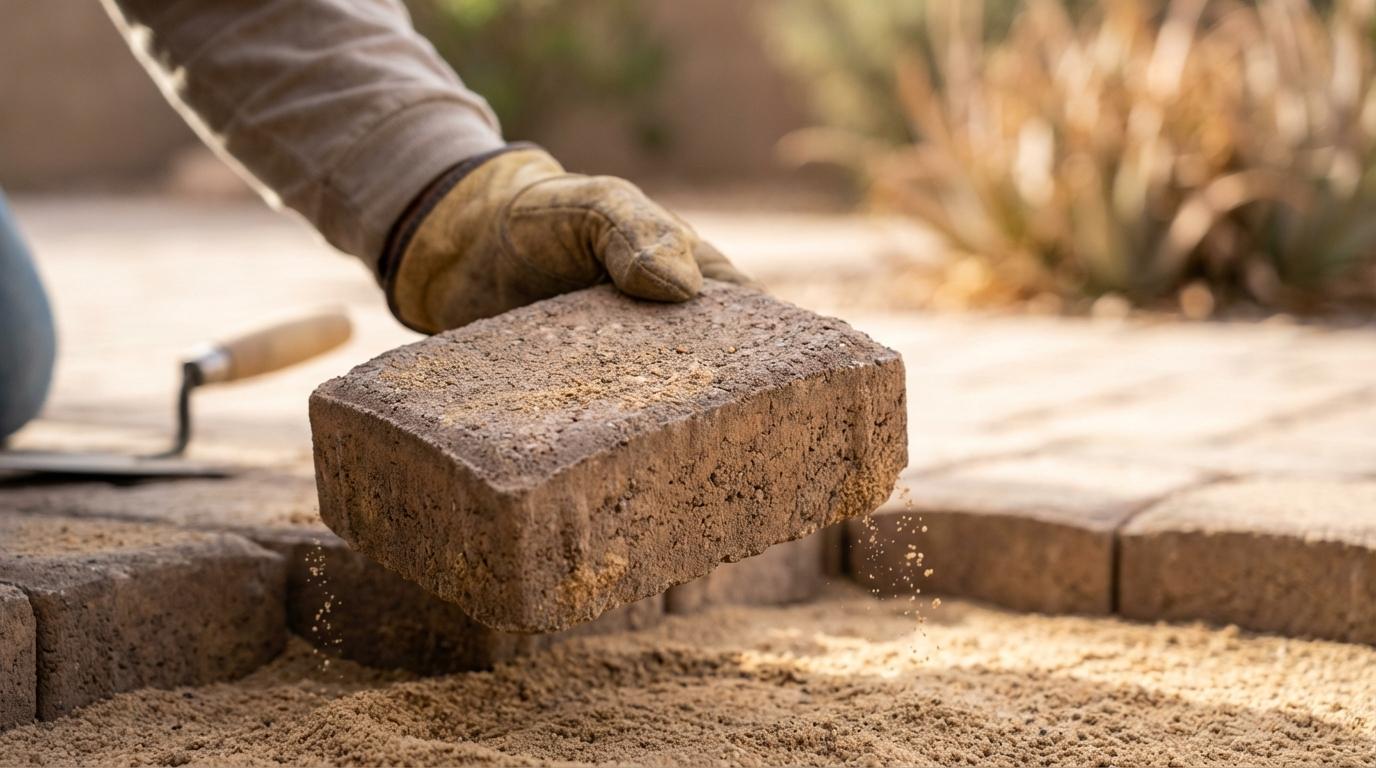
Installation details that decide whether travertine thrives

Travertine is unforgiving of shortcuts that might slide by with concrete pavers. The stone will not “hide” poor drainage, a soft base, or sloppy joint work for long.

A strong installation starts with excavation and compaction that match the soil and the expected load. Then comes a base that drains well and holds grade, edge restraints that actually restrain, and joints that resist erosion.

Sealer choice is also a performance choice. Many outdoor projects do best with a penetrating sealer that helps repel stains while still letting the stone breathe. The goal is not a plastic-looking shine. The goal is controlled absorption.

When travertine is installed around pools, details get even more important: slope away from the waterline, joint stability, and compatibility with pool chemicals. A good plan accounts for movement, drainage paths, and where water will repeatedly splash and evaporate.

A maintenance approach that feels easy because it is consistent

Travertine maintenance is straightforward when it is done on a schedule. The stone responds best to gentle cleaning and quick attention to spills, instead of occasional aggressive “rescue” scrubbing.

Most homeowners do well with a simple routine:

  1. Sweep or blow debris regularly, especially leaves and soil that can stain after watering
  2. Wash with a pH-neutral cleaner as needed, then rinse thoroughly
  3. Re-seal on a cadence that matches exposure and use, often every 1 to 3 years in hard-working areas

A few habits make a noticeable difference over time: use furniture pads, avoid dragging metal legs, and keep planter drainage from constantly wetting the same spot. Near grills, a mat designed for high heat and grease control can protect the stone without changing the look of the whole patio.

Cost and value: what you are really paying for

Travertine is usually priced above concrete pavers, both for material cost and for the craftsmanship it demands. Many homeowners still choose it because it can deliver a “finished” look that supports resale appeal and daily enjoyment.

Value is not only about the day-one budget. It is also about how long the surface stays attractive, how comfortable it feels in peak heat, and whether the space becomes a place you actually want to spend time.

If the budget needs flexibility, it is common to phase work: install travertine in the highest-impact area first, then expand later with matching stone, complementary pavers, or gravel and planting.

Choosing travertine with confidence

Travertine is a strong pick when you want a natural surface that looks timeless, stays comfortable in the sun, and supports a premium outdoor design. It is less ideal when the space will be constantly exposed to oil, harsh cleaners, or freeze-thaw stress without a plan for sealing and drainage.

A helpful next step is to review your layout with an installer who works with both hardscape and drainage, since pitch, base preparation, and joint strategy often matter as much as the stone itself. In the El Mirage area and nearby Arizona communities, Pro Natural Landscape LLC installs travertine and other outdoor surfaces as part of full-service landscape and hardscape projects, offering free estimates and financing options through Hearth for qualifying projects.

Pavers vs Concrete Patio: Cost, Durability, and Maintenance Compared

A patio is never just a surface. It is a structural system that has to manage load, drainage, heat, and years of foot traffic while still looking intentional next to your home. When homeowners compare pavers vs. a poured concrete slab, the first number they see is the install price per square foot. The better question is what that price buys you over the next 10, 20, or 40 years.

In Arizona communities like El Mirage, that long view matters. Intense sun, monsoon bursts, shifting soils, and irrigation overspray can punish shortcuts. A patio that is planned well feels effortless to use and stays that way.

The “cost” of a patio is really the cost of a system

Concrete and pavers are installed differently, and those differences show up in both the invoice and the future repair plan.

A typical concrete patio is a monolithic slab: subgrade prep, formwork, reinforcement (sometimes), pour, finish, then curing. You are paying for speed and simplicity. When it is done well, it looks clean and performs well. When something moves underneath it, the slab has only one way to respond.

Interlocking pavers are modular: excavation, a compacted aggregate base, bedding sand, pavers set in a pattern, edge restraints, joint sand (often polymeric), then compaction. You are paying for detailed labor and more materials. The reward is flexibility, because a modular surface can be adjusted and repaired in sections.

The biggest pricing misunderstandings happen when the comparison treats both options as just “surface material” instead of “surface plus engineered base.”

Typical installed price ranges (and why they vary)

National pricing surveys commonly land in these broad ranges:

Item (Installed) Typical Concrete Range Typical Paver Range What that range usually reflects
Cost per square foot $4 to $15 $10 to $30 (high-end can reach $50) Finish level, site access, excavation depth, base requirements
20×20 patio (400 sq ft) $2,000 to $6,000 $3,800 to $6,800 Basic slab vs. standard paver system
Repairs over time (typical pattern) Fewer small fixes, occasional big one More small tune-ups, rare major redo Crack risk vs. joint upkeep

Those numbers overlap on purpose. A basic paver layout with easy access can compete with decorative concrete with coloring, stamping, saw cuts, or demolition work. The center of gravity is still consistent: concrete tends to win the initial budget line, while pavers tend to win on adaptability.

After you have a baseline range, pricing usually swings based on a handful of variables:

  • Access and staging: Tight side yards and limited wheelbarrow paths raise labor time for either material.
  • Base depth and compaction: Poor soils, drainage needs, or heavier use can call for a thicker, better-compacted base.
  • Design and cutting: Curves, inlays, borders, steps, and multiple elevations add cutting and layout time.
  • Drainage strategy: Spot drains, swales, tie-ins, and slope correction change excavation and grading scope.
  • Permits and demolition: Some jurisdictions treat slabs differently than dry-laid systems, and removal of existing concrete is its own line item.

A useful way to think about it: concrete pricing is often sensitive to finish and site work, while paver pricing is sensitive to layout complexity and base construction.

Cost breakdown: materials are only half the story

Many homeowners compare a pallet of pavers to a truck of ready-mix and assume that is the whole decision. Labor and preparation usually decide the final number.

Concrete can look deceptively inexpensive because the installation steps are consolidated. Pavers distribute the work into more steps and require precision repeatedly across the whole surface.

A clear estimate should spell out what is included, not just the top-layer choice. When a quote is light on excavation depth, compaction method, edge restraint details, and drainage plan, the low number can become expensive later.

Durability: cracking, settling, and what “failure” looks like

Both patios can last for decades when installed correctly. They fail differently, and that difference shapes the real-life experience of ownership.

Concrete is strong in compression and handles daily patio loads easily. Its common weakness is cracking. Some cracks are cosmetic hairlines. Others telegraph movement, poor subgrade support, or water-related undermining. Control joints and reinforcement help manage cracking, but they do not promise a crack-free slab.

Pavers are individual units, so they do not “crack across the whole patio” in the same way. If the base settles in a spot, you see a low area, a slight lip, or a loose unit. That is a problem, yet it is localized. A good crew can lift and reset that section without touching the rest of the field.

In hot, high-UV environments, appearance durability also matters. Concrete can discolor, show stains, or develop surface wear if it is not sealed and cared for. Many pavers are manufactured with stable pigments, and natural stone tends to keep its character even as it weathers.

A patio that is easy to repair is often the patio that lasts the longest in practice.

Maintenance is not “more” or “less,” it is a different schedule

Neither option should feel like a weekly chore. The difference is what you maintain.

Concrete maintenance tends to be occasional but important: keeping the surface clean, sealing periodically, and addressing cracks early so water intrusion does not widen the problem. If a slab needs resurfacing or replacement, that is a bigger event.

Paver maintenance is lighter-touch but more frequent: sweeping, rinsing, watching joint sand, and managing weeds at the joints if they appear. Sealing is optional for many owners, though it can help with color richness and stain resistance.

Here is a practical side-by-side view:

Task Pavers Concrete
Routine cleaning Sweep, rinse, occasional pressure wash Sweep, rinse, occasional pressure wash
Sealing Optional, often every 2 to 5 years if chosen Often recommended every 3 to 5 years
Weeds Possible at joints if joint sand breaks down Rare except at cracks or slab edges
Repair style Replace or reset a small area Patch cracks, resurface, or replace larger areas
“Looks new again” Swap stained units, refresh joint sand, optional color sealing Clean, re-seal, overlay or resurface if worn

If you want the lowest-effort weekly routine, concrete often feels simpler. If you want the lowest-drama repair path, pavers often feel calmer.

After you decide which maintenance profile fits your household, it becomes easier to choose confidently.

  • Sweeping and quick rinse-offs
  • Joint sand touch-ups
  • Periodic sealing
  • Crack monitoring
  • Spot repairs after drainage events

Design flexibility: where pavers tend to pull ahead

A patio is part architecture, part landscape. That is where pavers routinely justify their higher starting price.

With pavers, patterns and borders can visually “square up” a yard that is not perfectly square. Color changes can define a dining zone, a fire feature zone, or a walkway connection without adding walls. Small shifts in texture can reduce slip risk and make transitions feel deliberate.

Concrete has options too, including broom finishes, exposed aggregate, staining, and stamping. The constraint is that the design is locked into one slab. If tastes change or an addition is built later, revising concrete often means demolition or a top-layer overlay.

In neighborhoods where outdoor living is a selling point, design clarity matters. A patio that looks intentional tends to photograph well, and it signals that the rest of the property was cared for with the same discipline.

Repair scenarios: what happens years after installation?

Picture two common “real life” moments.

One: a heavy rain reveals a low spot where water wants to sit. With pavers, a section can be lifted, base corrected, and reset. With concrete, the fix is more limited: drainage changes around the slab, grinding, overlays, or replacement depending on severity.

Two: a stain from rust, grease, or plant tannins becomes an eyesore. With pavers, you can sometimes clean it, flip the unit if appropriate, or replace a small area. With concrete, stain removal can work, yet it can also leave a shadow that never fully disappears without resurfacing or recoloring.

Long-term ownership is less about avoiding every problem and more about choosing problems that stay manageable.

What drives value in El Mirage and similar Arizona communities

Heat, dust, and water use influence patio choices more than many homeowners expect.

Light-colored surfaces can reduce heat absorption, making a patio more comfortable for bare feet and pets. Drainage control matters because monsoon downpours can move fines under hardscapes and create settlement. Irrigation overspray can lead to efflorescence or algae in shaded corners, especially when water schedules are not tuned.

This is where professional planning earns its keep: grading, compaction, and water management are not glamour items, yet they decide whether your patio still feels flat and solid years later. Many family-owned landscaping teams in the West Valley emphasize exactly this point, because durability is built into the base long before the top surface goes down.

A decision guide that respects both budget and ambition

If you are choosing between pavers and concrete strictly on the install total, concrete will often look better. If you are choosing based on lifespan flexibility, pavers tend to shine. The best fit depends on how you will use the space and how you want to maintain it.

A quick decision framework can help:

  1. Budget-forward refresh: Choose a straightforward concrete patio with a clean finish and a sealing plan, then invest saved dollars in shade, seating, or lighting.
  2. Long-horizon outdoor living: Choose pavers when you want design control and a patio that can be adjusted or expanded without redoing everything.
  3. High-visibility entertaining space: Choose pavers when pattern, borders, and transitions matter as much as the square footage.
  4. Low-interruption property management: Choose pavers when you prefer small, localized repairs over the risk of a disruptive slab replacement.

Getting accurate numbers from an estimate

Online ranges are helpful, yet your property’s constraints set the true cost. A quote that is truly comparable should specify square footage, excavation depth, base materials, compaction approach, drainage slope, and finishing details.

If you are collecting bids, ask each contractor to explain what is happening below the surface and how water will move away from the home. Ask how repairs are handled if a section settles. Good communication here is not a luxury; it is part of quality control.

Many homeowners also like to keep options open with financing for larger outdoor projects, especially when bundling a patio with lighting, irrigation adjustments, gravel, or a walkway connection. In the El Mirage area, some contractors offer free estimates and financing options through providers like Hearth, which can make it easier to choose the patio you actually want rather than the one that merely fits this month’s cash plan.

Backyard Drainage Solutions: How to Fix Standing Water and Runoff

Standing water in a backyard rarely comes from “too much rain” alone. It usually comes from water meeting a surface that cannot absorb it fast enough, plus a layout that gives runoff nowhere safe to go. The good news is that drainage problems are often very fixable, and the best fixes tend to make the yard more usable, more resilient, and easier to maintain.

In places like El Mirage and surrounding Arizona communities, you can see both extremes: long dry stretches that harden soil, followed by intense storms that drop a lot of water in a short time. That pattern rewards yards built with clear flow paths, healthy soil, and a few smart capture points.

Why backyards pool water (even when it “should” drain)

Start by separating symptoms from causes. A soggy patch is the symptom; the cause is usually one of these:

  • A low spot where water naturally collects after grading changes, settling, or previous construction.
  • Compacted soil from foot traffic, equipment, or years of irrigation, which blocks infiltration.
  • Clay or caliche layers that act like a lid, forcing water to move sideways instead of down.
  • Runoff concentration where roof water, side yards, or hardscape funnels flow into one area.
  • Irrigation problems including overspray, broken heads, or a valve that never quite shuts off.

After a storm, look for “shiny routes” in the soil or gravel where water clearly traveled. Those routes tell you where to intercept and redirect flow with the least disruption.

A one-afternoon diagnosis that saves weeks of trial and error

Before digging trenches or buying materials, take an hour to map what is actually happening.

Walk the yard in light rain if possible, or right after a storm. Note where water enters (downspouts, side gates, driveway edges), where it speeds up, and where it slows down.

Then do a simple infiltration check in the problem area:

  1. Dig a hole about 10 inches deep.
  2. Fill it with water once to pre-wet the soil.
  3. Fill it again and watch how long it takes to drain.

If water still sits in the hole many hours later, the soil is telling you that “soak it in here” is not a reliable plan without amendments or an overflow outlet. That pushes you toward conveyance (grading, swales, piping) rather than relying on infiltration alone.

A few field clues make diagnosis faster:

  • Ponding that hugs the house can be a grade issue, and sometimes a foundation risk.
  • Water that appears days after rain often points to irrigation, shade, or a slow subsurface layer.
  • Muddy water moving across the surface suggests erosion potential, meaning velocity control matters.

Quick fixes that change the very next storm

Some of the most effective drainage moves are modest, as long as they are placed correctly.

Start at the roofline. Gutters and downspouts are powerful plumbing, and when they dump next to a wall or into a tight side yard, you get concentrated flow and rapid ponding. Downspout extensions, splash blocks, or a hard-piped connection to a safe discharge point can transform a yard without touching the lawn.

After that, focus on keeping water moving across the surface in a controlled way. Many yards can be improved by resetting a small grade at the trouble spot, adding a shallow surface channel, or reworking gravel so water does not hit a “speed bump” and stall.

A few dependable early wins:

  • Downspout extensions
  • Cleaning clogged gutters and yard drains
  • Re-aiming irrigation heads away from walls
  • Adding mulch to bare soil to soften raindrop impact and slow crusting

These steps do not replace structural drainage when the site needs it, but they often reduce the volume and speed that the bigger system has to handle.

Structural drainage solutions that last

Lasting drainage is usually a combination, not a single feature. The right mix depends on soil behavior, available fall (gravity slope), and what you want the yard to feel like day to day.

After you identify where the water should go, you can choose tools that either (1) move water away or (2) hold water briefly and let it soak in safely.

A practical way to choose is to weigh these site factors:

  • Soil behavior: Does water soak in within a day, or does it linger?
  • Space: Can you spare a few feet for a swale or rain garden, or is the yard tight?
  • Outlet options: Is there a legal, lower discharge point available, or must the yard store water onsite?
  • Storm style: Short intense bursts call for capture and overflow planning, not just infiltration.

Grading and swales (surface shaping)

Positive drainage away from structures is foundational. Even a 1 to 2 percent slope away from the home can prevent water from lingering where it causes the most damage. When a yard is larger, a shallow vegetated swale can guide runoff along a deliberate path, slowing it while still moving it.

Swales can be subtle. They do not need to look like ditches. With the right contour and planting, they read as a gentle landscape line that happens to carry stormwater when needed.

If the yard is steep or water arrives fast, add erosion control at high-energy points (downspout outlets, turns, transitions) using rock, gravel, or reinforced turf zones.

French drains (subsurface collection and conveyance)

A French drain is a gravel-filled trench with a perforated pipe that collects water and routes it away. It is especially helpful when you have a consistent wet strip, a low area that cannot be regraded enough, or a transition where surface water keeps reappearing.

In heavier clay soils, a French drain should not be expected to “soak everything into the ground.” It needs a real outlet, either to a safe discharge location or to another structure that can store and release water slowly.

Details that separate a durable French drain from a short-lived one include proper slope, a clean gravel envelope, and fabric use that prevents soil fines from clogging the system.

Dry wells (infiltration chambers)

Dry wells are underground chambers that receive runoff, commonly from roof leaders, and let it infiltrate over time. They can be excellent when soils drain well and there is enough depth and separation from structures.

They can also disappoint when soils are tight or layered. If a test hole shows slow infiltration, a dry well can become a buried bathtub. In many areas, permitting or specific setback rules may apply, so planning matters.

Rain gardens (bioretention)

A rain garden is a shallow planted depression that temporarily holds runoff and filters it through soil and roots. The best rain gardens drain within 24 to 72 hours, so they do not stay soggy or invite pests.

This is where drainage becomes an aesthetic upgrade instead of a hidden fix. With the right plant palette, a rain garden reads as intentional planting, not a utility feature. In arid climates, it can also support healthier plants by catching storm pulses that would otherwise leave the property.

Permeable paving and gravel systems

Permeable interlocking pavers, open-joint systems, stabilized decomposed granite, and well-built gravel paths allow water to pass through instead of sheet-flowing into the lawn.

The base layer is the real engine here. A correctly prepared aggregate base stores water temporarily and releases it into the soil, reducing runoff peaks during heavy storms.

This approach shines in patios, walkways, side yards, and utility corridors where turf struggles anyway.

Comparing popular options at a glance

A clear comparison helps you avoid overbuilding. It also helps you combine methods sensibly, like grading that feeds a rain garden, paired with a French drain only where saturation persists.

Solution Best for Soil fit Relative cost Ongoing maintenance
Regrading, surface slope correction Water against the house, broad sheet flow issues Any (works even in clay) Low to medium Low
Vegetated swale Moving runoff across the yard without erosion Any (plant choice matters) Low to medium Low to medium
French drain with outlet Persistent wet strips, low spots, subsurface seepage Good in most soils (needs outlet in clay) Medium Low (inspect, occasional flush)
Dry well Capturing roof runoff where infiltration is strong Best in sandy or loamy soils Medium to high Low to medium (inspect sediment)
Rain garden Treating and soaking runoff while adding planting Best when it drains within 48 to 72 hours Low to medium Medium (weeding, mulch)
Permeable pavers or gravel build Reducing runoff from patios, walkways, side yards Any, with correct base Medium to high Medium (keep joints clear)

Making drainage feel like part of the landscape

The highest-performing drainage systems rarely look like “drainage systems.” They look like a yard that was shaped and planted with water in mind.

Two design moves do a lot of work:

  1. Slow, spread, and sink where possible: gentle grades, wider flow paths, planted basins.
  2. Collect and carry where necessary: subsurface piping, discreet channels, defined discharge points.

In practice, many Arizona properties benefit from mixing both. Intense storms can exceed infiltration rates, even in decent soil, so having a planned overflow route matters. A rain garden with a subtle overflow to a swale, or a French drain that discharges into a rock-lined basin, keeps the yard calm when storms are not.

Maintenance routines that keep drainage working

Drainage systems fail quietly. A little sediment, a few seasons of leaf litter, or a clogged emitter can turn a good design into a recurring mess. A simple calendar keeps performance steady.

After you have a drainage plan in place, keep it reliable with habits like these:

  • Seasonal inspection: Walk the system before storm season and after major rain.
  • Gutter and downspout cleaning: Clear debris so roof water goes where you planned.
  • Surface reset: Rake displaced gravel, refresh mulch, and repair small rills before they grow.

If you have subsurface drains, add cleanouts where practical. They make it possible to flush lines and confirm flow without excavation.

When it makes sense to bring in a professional team

Drainage looks simple until you factor in grades, utilities, soil behavior, and where water is legally allowed to go. A professional assessment can prevent costly missteps, especially when water sits near structures, flows toward neighboring property, or requires significant earthwork.

A local, full-service landscaping contractor can also coordinate the pieces that often overlap: grading, paver work, irrigation adjustments, gravel installation, and planting. For property managers and businesses, that coordination is often the difference between a quick fix and a durable site improvement.

Pro Natural Landscape LLC, a family-owned team serving El Mirage and nearby communities, typically approaches outdoor projects as integrated systems, not isolated tasks. That mindset fits drainage work well because the best results come from shaping the land, managing runoff sources, and building surfaces that handle storms gracefully. If budget timing matters, asking about free estimates and available financing options (including programs offered through providers like Hearth) can make it easier to schedule the right scope instead of settling for repeated temporary patches.

A strong starting plan for most backyards with standing water

If you want a simple path to action, start with the steps that carry the least risk and reveal the most information. Fix roof drainage and irrigation issues first. Confirm how your soil actually drains. Then choose one primary strategy, either surface shaping or subsurface collection, and pair it with a secondary feature that improves how the yard uses water, like a rain garden or permeable path.

The yard does not need to be perfectly dry in every corner to be successful. It needs to move water away from structures, avoid muddy dead zones, and handle storms without drama. Once those goals are met, the rest becomes an opportunity to make the outdoor space feel better every day, rain or shine.