×

How Landscaping Can Increase Home Value (What Projects Pay Off Most)

A well-planned landscape does more than make a home look attractive. It can shape buyer perception, increase everyday usability, and signal that the property has been cared for with intention.

That matters because real estate value is rarely about square footage alone. Buyers respond to the full experience of a home, and the yard is often the first chapter of that story.

Why landscaping increases home value

Landscaping affects home value in three direct ways: first impressions, function, and property protection. A clean, cohesive front yard makes a house feel more inviting before anyone reaches the front door. Virginia Tech Extension has summarized research showing that attractive landscaping can raise perceived home value by about 5% to 11%, depending on design quality and plant composition.

That number makes sense when you think like a buyer. If the lawn is patchy, shrubs are overgrown, irrigation is visibly failing, or the walkway looks tired, people start wondering what else has been neglected. If the exterior feels polished and practical, the house tends to feel more valuable before the interior even enters the equation.

Landscaping also adds value when it creates usable outdoor space. A shaded seating area, a paver patio, a defined path to the entry, or lighting that makes the yard usable after sunset can make the property feel larger and more livable.

Then there is the part many people miss. Grading, drainage, tree care, and efficient irrigation protect the property itself. Those upgrades may not always produce dramatic photo appeal, yet they support the kind of confidence that helps a home sell well.

After looking at the data and the way buyers respond to homes, the strongest value drivers tend to be:

  • curb appeal
  • visible maintenance
  • outdoor living space
  • healthy trees and plantings
  • water management
  • low-maintenance design

Which landscaping projects pay off most

National Association of Realtors data gives a useful starting point for homeowners who want a clear return, not just a prettier yard. In its 2023 outdoor features report, several landscaping-related projects stood out for value recovered at resale.

The pattern is encouraging. The best-performing upgrades are not always the most expensive ones. In fact, basic maintenance and well-chosen midrange improvements often outperform flashy custom features.

Home value ROI table for landscaping projects

Project Estimated value recovered Why it tends to pay off
Landscape maintenance 104% Fast visual improvement, relatively low cost, strong buyer response
Overall landscape upgrade 100% Combines curb appeal, cohesion, and front-yard polish
New patio 95% Adds functional outdoor living space with broad appeal
New wood deck 89% Strong in the right market, though climate matters
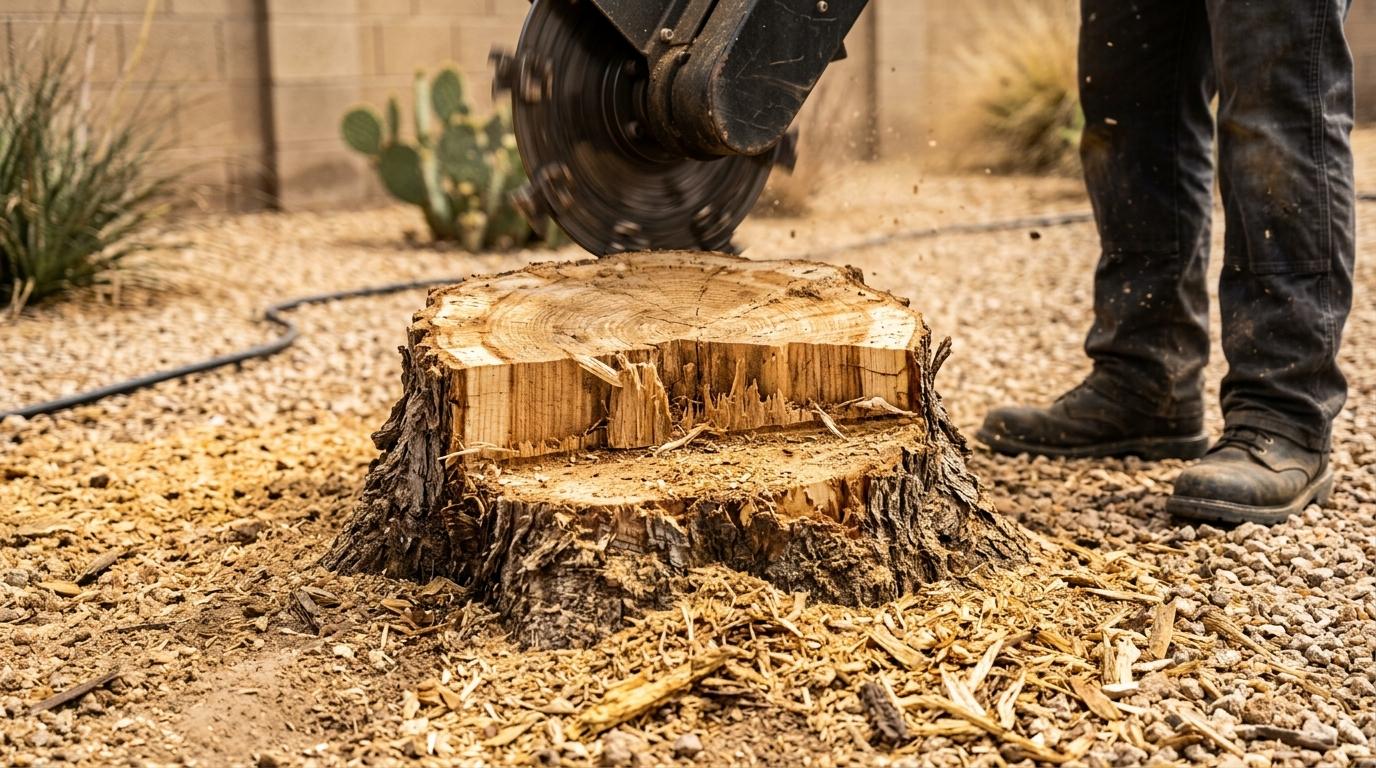
Tree care 87% Improves safety, sight lines, and appearance
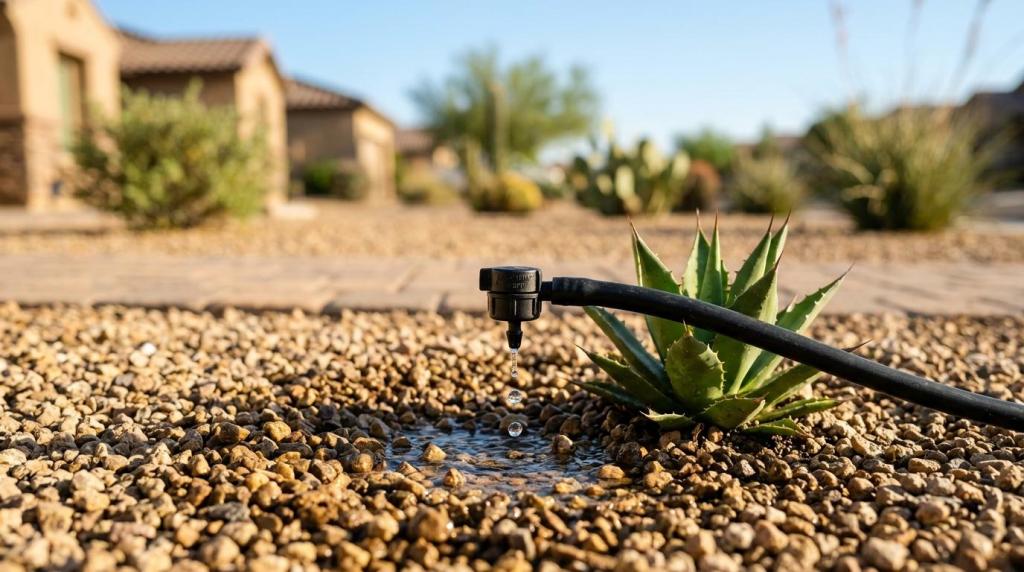
Irrigation system installation 83% Protects plant health and supports efficient watering
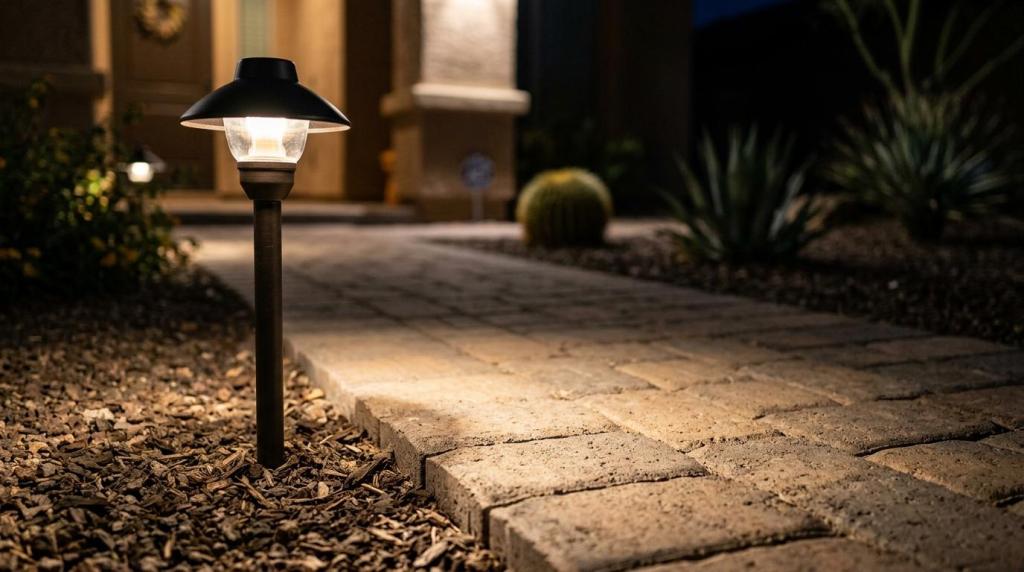
Landscape lighting 59% Best as a finishing feature rather than the main investment

A patio, walkway, or front entry refresh can make a home feel more complete. Tree care and irrigation speak to responsibility and long-term care. Lighting improves ambiance and safety, though it usually works best when the rest of the landscape already looks strong.

Why maintenance often produces the strongest return

Maintenance is not glamorous, yet it wins because it removes signs of neglect. That is why landscape maintenance topped the NAR list. Buyers notice the basics immediately, and they place real value on a home that looks ready to enjoy.

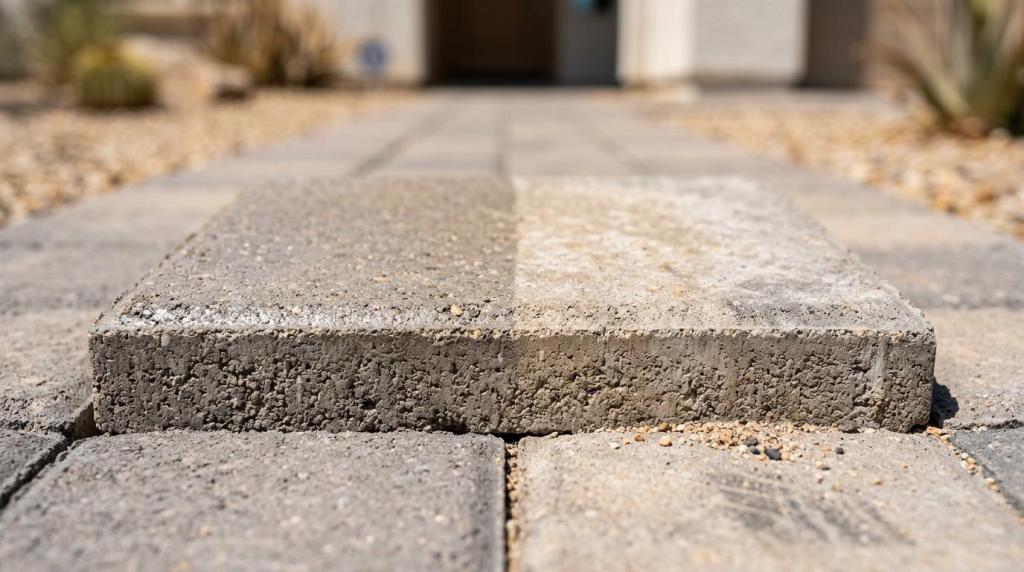
This is especially true before listing a home. Fresh gravel or mulch, clean edges, trimmed shrubs, weed removal, healthy irrigation coverage, and repaired pavers can shift the entire impression of the property without the cost of a full redesign.

When a yard is being prepared for value, the most effective maintenance items usually include:

  • Front beds: clean lines, fresh groundcover, restrained planting
  • Walkways and patios: repair uneven pavers, remove stains, clear weeds
  • Trees and shrubs: prune for shape, safety, and visibility
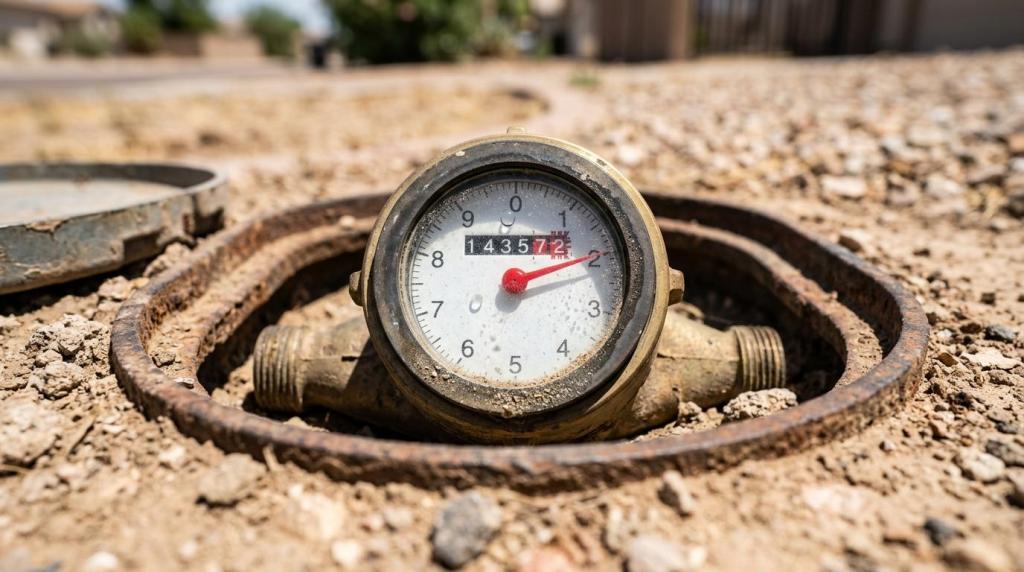
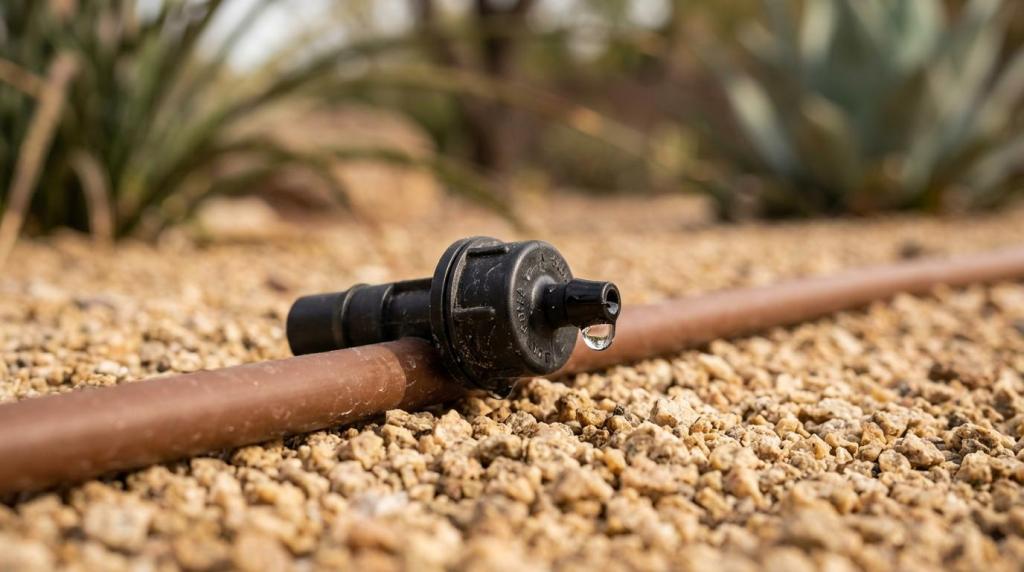
  • Irrigation systems: fix leaks, adjust timers, improve coverage

Which landscaping upgrades make the most sense in Arizona

Climate changes the value equation, and Arizona is a strong example. In El Mirage and nearby communities, buyers often respond best to landscapes that look sharp, handle heat well, and do not demand excessive water or constant upkeep.

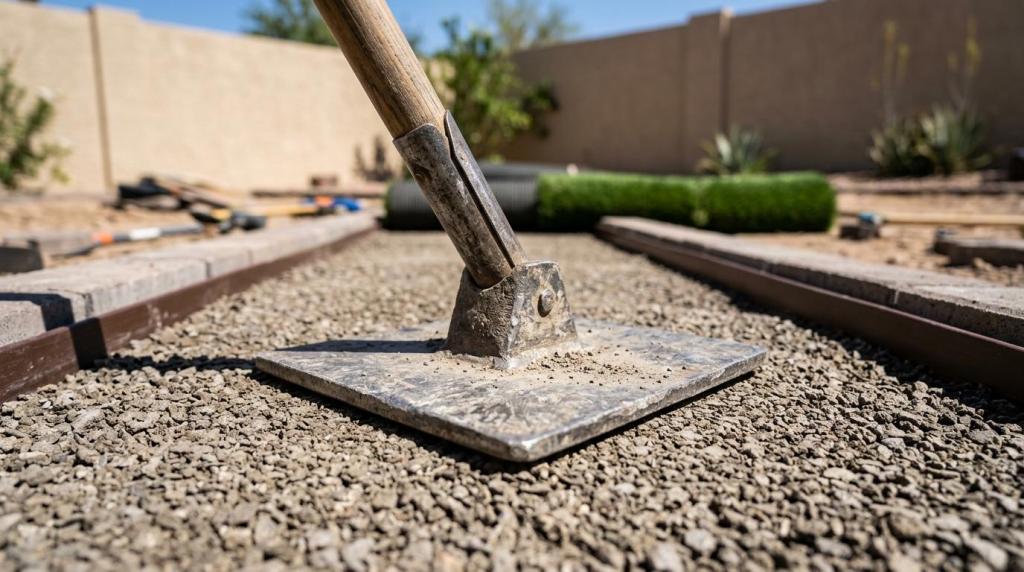
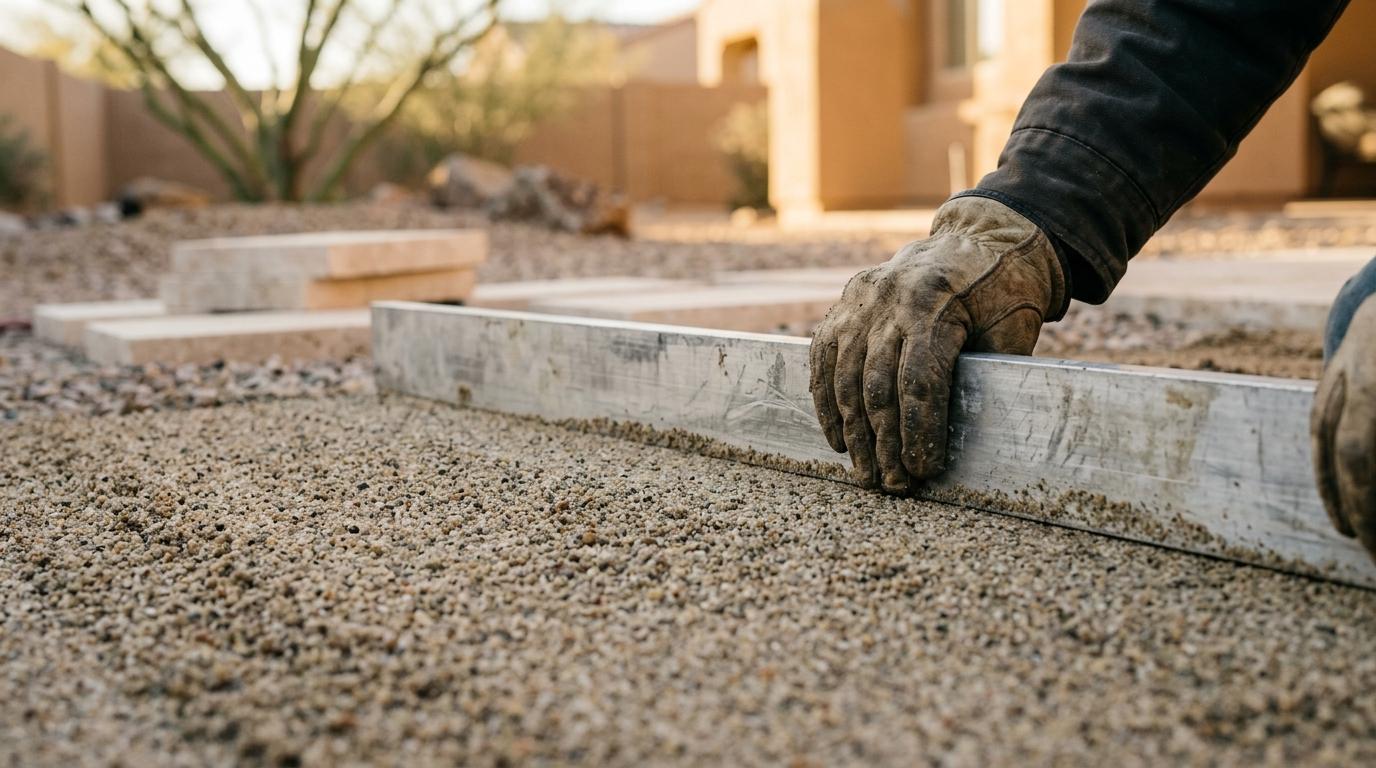
That means a desert-friendly design can be a smart value move. Gravel, pavers, artificial grass in the right setting, efficient drip or sprinkler systems, timers, shade trees placed with care, and practical grading often carry more real-world appeal than a thirsty lawn that struggles in summer.

A patio can be especially powerful in this market. Hardscape surfaces like pavers and travertine create outdoor living space that feels durable, attractive, and easy to maintain. They also photograph well, which matters when a listing is competing online.

Arizona landscaping features that support resale value

Many homeowners in this region get the best results from improvements that combine beauty with water awareness.

Projects commonly chosen for that purpose include paver installation, gravel refreshes, irrigation upgrades, artificial grass, landscape lighting, land grading, and tree care. When those features are tied together with a simple design plan, the property usually feels more intentional and more market-ready.

A strong Arizona yard often has a quiet confidence to it. The layout is clean. The materials are durable. The plants look healthy rather than overworked. The irrigation is efficient. Nothing feels excessive.

Hardscape projects that increase value through usability

Hardscape deserves special attention because it often does two jobs at once. It raises visual quality and improves how the yard works.

A front walkway is a good example. It guides visitors to the entry, frames the home, and gives the landscape structure. A backyard patio does something similar by turning open yard space into a usable destination. Buyers tend to respond well to these features because they can picture themselves using them right away.

This is one reason an overall landscape upgrade can recover so much value. It is rarely about one single element. It is about the combination of walkway, planters, shrubs, tree placement, and clean surfaces working together.

For homeowners who want the best balance of return and livability, hardscape often hits the sweet spot.

The outdoor projects buyers notice first

When outdoor improvements are visible from the street or easy to imagine using, they usually have stronger market impact.

  • Front entry improvements: paver walkways, defined borders, refreshed planters
  • Backyard gathering space: patios, seating areas, shade structures
  • Surface restoration: paver renovation, color sealing, joint repair
  • Perimeter structure: fences or block walls that add privacy and order

Those are not purely decorative upgrades. They shape movement, comfort, and privacy, which makes them easier for buyers to value.

Landscaping projects that can hurt ROI

Not every outdoor upgrade adds value at the same rate. Some projects are too taste-specific. Others create more maintenance than buyers want.

Water features are a common example. A fountain or pond may look upscale to one buyer and like future upkeep to another. Large specialty gardens can have the same issue if they feel labor-intensive or out of step with the neighborhood. In Arizona, an oversized lawn can also work against a value-focused strategy if it looks expensive to maintain.

Decks are a case-by-case project as well. Nationally, they perform well. In many Arizona settings, though, patios and pavers may feel more natural, more durable, and more comfortable in heat.

The safest path is usually simple: choose improvements that look attractive, work well in your climate, and feel easy to maintain.

How to prioritize landscaping by budget and timing

A value-focused plan does not require doing everything at once. The right sequence matters just as much as the project list.

If a sale is coming soon, the priority should be visible improvements with fast payoff. If the home will be kept for several years, it makes sense to invest in function and durability. That is where local expertise can save money because the design choices are tied to the region, the lot, and realistic maintenance habits.

A practical way to stage the work is:

  1. Sell soon: cleanup, pruning, weed control, gravel or mulch refresh, paver repair, irrigation tune-up
  2. Improve curb appeal: front walkway, planting refresh, tree care, lighting repair
  3. Build usable space: patio, seating area, privacy wall, shade-focused planting
  4. Protect the property: grading, drainage correction, timer installation, irrigation replacement

This kind of phased approach helps homeowners avoid overspending on low-impact features while still building a landscape that feels finished.

What to ask before starting a home-value landscaping project

Before approving a design, ask a few grounded questions. Will this improve the way the home looks from the street? Will it make the yard easier to use? Will it reduce maintenance stress or water waste? Will it still look good in the hottest month of the year?

Those questions quickly separate value-building upgrades from decorative extras.

Homeowners in Arizona also benefit from asking about irrigation efficiency, drainage patterns, long-term plant performance, and repair options for existing hardscape. A full-service landscaping company can often help with more than design alone, including pavers, artificial grass, lighting, gravel, grading, tree removal, stump grinding, and restoration work on worn surfaces.

The best projects are rarely the loudest ones. They are the ones that make a home feel cared for, comfortable, and ready for the next owner the moment the curb comes into view.

Paver Sealing Guide: When to Seal, Benefits, and What to Avoid

Pavers do a lot of visible work in an outdoor space. They shape driveways, patios, walkways, pool decks, and entry areas, all while handling constant exposure to sun, rain, traffic, spills, and daily wear. Over time, even a well-built surface can start to lose some of its visual sharpness if that exposure is left unchecked.

That is why sealing gets so much attention. On Pro Natural Landscape’s service pages, paver sealing is presented as a way to protect pavers from natural elements while also giving them a more attractive finished look. The same pages point out that sunlight, rain, oil spills, and tire marks can cause quality and appearance to deteriorate drastically. That combination of protection and visual preservation is the core value of sealing.

Why paver sealing matters for outdoor surfaces

A paver installation is not only about layout and material. It is also about how that surface holds up over time. A patio that looked crisp and uniform at installation can begin to look tired when surface staining, weather exposure, and fading start to show.

Pro Natural Landscape specifically notes that pavers are exposed every day to damaging conditions. That simple point matters. Outdoor hardscapes do not live in controlled conditions, and even attractive materials can lose ground when they are left unprotected.

The service descriptions highlight these common stressors:

  • Sunlight
  • Rain
  • Oil spills
  • Tire marks
  • Daily wear

Sealing is positioned as a practical response to that reality. It is not just a cosmetic extra. It is a way to help preserve the quality and appearance of the hardscape before deterioration becomes more obvious.

Paver sealing benefits for appearance and protection

The available source material gives a clear, focused list of benefits, even though it does not read like a full technical guide. Those benefits center on protection and appearance.

When pavers are sealed, the goal is to create a barrier that helps defend the surface from routine exposure. According to the company’s services page, sealing helps protect pavers from natural elements and everyday damaging contact. It also provides an aesthetically pleasing look.

That means the value of sealing can be viewed from two angles at once: how the surface performs and how the surface presents itself.

Benefit area What the source confirms
Weather exposure Sealing helps protect pavers from natural elements, including sun and rain
Surface wear Sealing helps protect against everyday exposure like oil spills and tire marks
Appearance Sealing provides an aesthetically pleasing look
Preservation Sealing helps reduce the visible deterioration of paver quality and appearance

This is especially relevant for driveways and front-entry hardscapes, where visual condition is always on display. A surface that looks blotchy, stained, or faded can change the feel of the whole property. A sealed surface is often part of keeping the hardscape looking intentional and cared for.

For property managers and homeowners alike, that visual consistency has practical value. Well-maintained paving supports the overall presentation of the property, which is often one of the first things guests, tenants, or customers notice.

When to seal pavers and what the source actually says

This is where clarity matters.

The Pro Natural Landscape website confirms that sealing is valuable, but it does not publish a specific best season, a preferred month, or an exact temperature range for application. It also does not provide a step-by-step timing guide on the accessible paver sealing service pages.

That does not make the topic vague. It simply means the timing decision should be based on the actual project, the paver material, and site conditions rather than a one-size-fits-all calendar rule taken from a brief service description.

A careful way to think about timing is to separate what is confirmed from what needs project-specific review:

  • Confirmed by the source: Sealing helps protect pavers from damaging exposure and supports appearance.
  • Not published on the source pages: Exact season, temperature window, drying requirements, or weather thresholds.
  • Practical implication: Timing should be matched to the hardscape material and the condition of the installed surface.
  • Best next step: Get a site-specific recommendation instead of relying on generic assumptions.

That last point becomes more important in Arizona communities, where sun exposure can be intense and hardscape performance matters year-round. Even then, it is better to avoid broad claims about an exact seasonal window when the published company content does not state one.

Why paver material affects sealing recommendations

One of the most useful details on the Pro Natural Landscape services page is the note that recommendations are tailored to paver material. The site specifically names concrete, travertine, slate, and clay.

That is an important distinction. Different materials can have different surface characteristics, porosity, and visual goals. A sealing approach that suits one type of paver may not be the right fit for another.

The source does not break down separate timing or product rules for each material, so there is no basis for claiming that concrete should always be treated one way and travertine another. Still, the company’s own wording supports the idea that material-specific guidance matters and that sealing decisions should not be made in a vacuum.

If a property has mixed hardscape surfaces, this matters even more. A driveway, courtyard, and pool surround may not all call for the same product or treatment schedule, even when they sit on the same property.

What to avoid with paver sealing

The accessible service pages do not offer a published checklist of sealing mistakes. There is no official list on the site warning against sealing wet pavers, applying too much product, or sealing before rain.

Still, one caution is clearly supported by the source: neglecting protection leaves pavers exposed to conditions that can damage their quality and appearance. That is directly consistent with the company’s own explanation of why sealing is offered.

There is also another source-grounded caution hiding in plain sight. Because the site says recommendations are tailored to material type, it suggests that a mismatched approach is not ideal. In simple terms, the wrong product or method for the paver material is not a smart move.

With that in mind, a few sensible avoidances stand out:

  • Ignoring material differences: Concrete, travertine, slate, and clay should not be treated as interchangeable.
  • Waiting for visible deterioration to worsen: Sun, rain, spills, and tire marks do cumulative damage.
  • Treating sealing as appearance only: The service is framed as both protective and aesthetic.
  • Assuming every hardscape needs the same plan: Site conditions and surface type matter.

That is a balanced way to discuss mistakes without inventing a technical checklist that the source does not provide.

Surface clues that suggest a paver sealing review may be worthwhile

While the website does not publish a formal inspection guide, its language about deterioration gives property owners a useful framework. If pavers are vulnerable to daily exposure and appearance loss, then visible wear is a reasonable cue to review the surface condition.

In many cases, the question is not just “Are the pavers old?” It is “How are they responding to the environment they live in?”

Look for signs like these:

  • Fading color
  • Visible staining
  • Tire mark buildup
  • Uneven appearance
  • A general loss of surface freshness

A property owner does not need to diagnose everything alone. The more practical move is to use these clues as a prompt for a professional assessment, especially when the hardscape is a major visual feature of the home or commercial property.

Paver sealing and curb appeal in Arizona properties

There is a strong aesthetic argument for sealing, and the source says that plainly. Sealing provides an aesthetically pleasing look. That may sound simple, yet it has major value for outdoor spaces where pavers are part of the first impression.

A faded driveway can pull attention in the wrong direction. A refreshed, protected surface can make the surrounding landscaping, gravel, artificial turf, lighting, irrigation, and planting areas look more cohesive. When the hardscape reads as clean and intentional, the whole property benefits.

In places like El Mirage and surrounding Arizona communities, outdoor living space is not an afterthought. Patios, walkways, and front entries are used and seen often. That gives paver appearance more weight than it might have in a property where outdoor features stay in the background.

This is one reason sealing often fits into a broader maintenance strategy rather than standing alone. Hardscape surfaces, gravel, artificial turf, lighting, irrigation, and planting areas all contribute to how a yard functions and how it feels. A neglected paver surface can interrupt an otherwise polished landscape plan.

What a professional paver sealing assessment should clarify

Because the company website does not publish exact weather rules or prep steps, the most useful next move is a direct assessment of the hardscape itself. A strong review should answer the questions the brief service descriptions do not spell out.

That means looking at the current surface condition, the paver material, the level of wear, and the desired finish. It also means identifying whether the hardscape is simply ready for sealing or whether it needs renovation work first.

A helpful assessment should sort out a few basics:

  • Material type: Concrete, travertine, slate, clay, or another surface
  • Current condition: Clean appearance, staining, fading, or visible deterioration
  • Use pattern: Patio foot traffic, driveway vehicle traffic, or mixed-use areas
  • Finish goals: Primarily protective, primarily visual, or both

That kind of project-specific review is more valuable than broad online advice because it responds to the actual surface in front of you.

Why paver renovation and color sealing often enter the conversation together

The source material references both “Paver Renovation Sealing Application” and “Reconstruction Of Pavers Color Sealing.” Even though the site descriptions are brief, those service labels point to an important idea: sealing is not always a stand-alone decision.

Sometimes the surface needs renewed visual consistency, not just a protective coat. In those cases, renovation and color sealing may be part of the discussion. That is especially relevant when pavers have already absorbed years of wear and no longer present the same character they had earlier in the life of the installation.

For homeowners and commercial property managers, this opens a useful path. A worn hardscape does not always need full replacement to look sharper and more protected. Reviewing renovation and sealing options together may create a more cost-conscious way to improve the space while preserving the existing layout.

A well-maintained paver surface supports the entire outdoor environment. It helps the landscape look finished, cared for, and ready for daily use. When the sealing plan is matched to the material and the condition of the surface, the result is usually more durable visually and more satisfying day to day.

For Arizona property owners who want their hardscape to keep pace with the rest of the landscape, that is a strong place to start.

Signs Your Irrigation System Needs Repair (Before Your Water Bill Spikes)

Most irrigation systems do not fail all at once. They drift out of balance.

A sprinkler head tilts a little. A valve stops closing cleanly. A buried line develops a small leak that keeps the soil wet long before anyone notices the monthly water bill. By the time the cost shows up on a statement, the landscape may already be telling the story.

That is the encouraging part. Early warning signs are usually there, and property owners who catch them quickly can save water, protect plant health, and avoid a much larger repair later.

Why irrigation repair signs matter in Arizona landscapes

In Arizona, irrigation mistakes tend to show up fast. Heat, sun exposure, dry air, and long watering seasons can turn a small system problem into wasted water and stressed plant material in a short window. A misdirected spray head is not just an equipment issue. It can lead to dry turf, runoff across hardscape, erosion around planting beds, and water that never reaches the root zone.

Small failures also stack up. One leaking fitting may not seem serious, yet it can change pressure across a zone, weaken nearby heads, and create both soggy and dry areas at the same time. That mix often confuses homeowners because it looks like a scheduling problem when the real cause is mechanical.

A rising bill is often the last sign, not the first.

Visible irrigation repair signs in your yard

Sprinkler head and spray pattern problems

Some of the clearest warning signs appear when the system is running. A quick walk through each zone can reveal damage, poor coverage, or pressure issues in minutes. If one sprinkler is throwing a fine mist while another barely pops up, the system is already asking for attention.

After you run a zone manually, watch for signs like these:

  • Broken heads: cracked bodies, missing nozzles, or damaged caps
  • Heads that stay low: poor pop-up height can point to debris, pressure loss, or worn components
  • Misaligned spray: water hitting sidewalks, walls, fences, or windows
  • Misting in the air
  • Weak rotor movement
  • Short spray distance

These problems waste water directly, though the larger issue is uneven coverage. One area gets too much. Another stays dry. The timer keeps running, but the results get worse.

Wet soil and runoff problems

Not every leak is dramatic. Many show up as soft ground, persistent dampness, or a strip of grass that stays greener than the rest of the yard. A common example is a hidden line leak below grade that never creates a visible spray, yet keeps one section of soil wet day after day.

Keep an eye out for wet-zone clues as well:

  • Soggy patches: possible underground leak or valve issue
  • Standing water: a zone may be running too long, draining poorly, or leaking
  • Bubbling soil: pressurized water can be escaping below the surface
  • Runoff into the street
  • Erosion near sprinkler heads
  • Algae or mushroom growth in one area

If one spot is always greener, faster-growing, or muddy compared with surrounding areas, treat that as a warning sign, not a bonus.

Lawn and plant health signs of irrigation problems

Plants often report irrigation trouble before the equipment does. Brown turf in a single arc, shrubs that wilt while nearby plants look fine, or a bed with patchy growth can all point to poor water distribution. That does not always mean the schedule is wrong. It may mean the system is no longer applying water where it should.

Uneven plant response usually traces back to one of a few causes: clogged nozzles, tilted heads, mismatched spray patterns, low pressure, excessive pressure, or broken drip components. In many cases, property owners respond by increasing run times, which only raises water use and hides the real problem for a while.

Watch for landscape symptoms that repeat in the same areas:

  • Brown corners
  • Yellowing in one section
  • Wilting despite regular watering
  • Fast-growing weeds along one line
  • Shrubs struggling in a single zone
  • Thin turf beside oversaturated soil

When dry spots and soggy spots exist in the same zone, a repair issue is very likely.

Controller and timer signs your irrigation system needs repair

Mechanical issues are only part of the picture. Controllers, timers, wiring, and valves can create problems that look like plumbing failures. A zone that does not start, does not stop, or runs at the wrong time may be dealing with a wiring fault, a failing solenoid, incorrect programming, or a controller that is losing its settings.

This matters because many owners assume the timer is fine if the display is on. That is not always true. The controller can have power and still fail to activate the valve correctly. Rain sensors can also stop doing their job, allowing watering during weather that should pause the system.

A few control-related warning signs deserve prompt attention:

  • Lost settings: the controller clock, date, or programs reset unexpectedly
  • A zone that will not shut off: stuck valve or electrical fault
  • Skipped zones: wiring issue, bad solenoid, or programming error
  • Watering at odd hours
  • Multiple start times you did not intend
  • Rain sensor not interrupting irrigation

If the schedule looks right but the landscape does not, the timer should still be checked.

Quick irrigation warning sign table

A simple way to separate urgency from routine maintenance is to match the symptom to its likely source.

Warning sign Likely cause Priority
One sprinkler not popping up fully Debris, low pressure, worn head Medium
Spray hitting pavement or walls Misaligned or damaged head Medium
Fine mist instead of defined spray Excess pressure, damaged nozzle Medium
Sudden soggy patch in one area Underground leak or stuck valve High
Zone keeps running after cycle ends Valve problem or controller issue High
Dry patch in same place every week Clogged nozzle, tilted head, poor coverage Medium
Water bill jumps with no indoor cause Hidden irrigation leak or runtime error High
Bubbling water near a head or valve box Cracked fitting, line break, seal failure High

When several of these appear together, delay gets expensive.

Simple checks before you call for irrigation repair

Property owners can catch many irrigation issues with a short manual inspection. The EPA WaterSense approach is straightforward: run each zone one at a time, walk the area, and look for waste, weak coverage, and obvious damage. This is one of the most useful habits for both homes and commercial properties.

A good monthly check does not need special tools. It needs attention.

Try this five-step review before the next billing cycle closes:

  1. Run one zone at a time from the controller and walk the full area.
  2. Look at every head for pop-up height, direction, rotation, and spray distance.
  3. Check the soil for puddles, bubbling, runoff, or unusually dry spots.
  4. Review the controller clock, start times, seasonal settings, and sensor status.
  5. Read the water meter when no water is being used inside or outside. If it moves, there may be a hidden leak.

That last step is especially valuable. A water meter can expose underground loss before the yard looks damaged.

A quick uniformity check

If you suspect uneven watering, place several identical cups or straight-sided containers across a single zone and run it for a set time. If the water levels are very different, the zone likely has a distribution problem. That may be caused by pressure imbalance, poor head spacing, clogging, or mixed nozzles.

It is a simple test, and it can prevent a season of guesswork.

Hidden problems that often cause high water bills

Some irrigation failures stay out of sight. Buried lateral leaks, cracked fittings, worn valve diaphragms, and small drip-line breaks may not produce a dramatic surface spray. Instead, they create slow, steady water loss that continues every time the zone runs. Those are the issues that often drive a surprising bill spike.

Pressure problems are another common culprit. Low pressure can keep heads from rising fully and shorten throw distance. High pressure can create fogging and mist, which means water is drifting away before it ever reaches the soil. Both conditions waste water, and both can be misread as a need for more runtime.

Electrical issues matter too. A damaged wire or failing solenoid can keep a zone from opening properly or can leave it running longer than intended. When a system behaves unpredictably, it is usually best to treat that as a repair issue rather than a programming inconvenience.

When professional irrigation repair makes sense

Some irrigation tasks are ideal for a quick homeowner check. Others call for trained diagnosis. If you see repeated soggy ground, multiple weak heads in one zone, valves that keep running, pressure swings, or unexplained water meter movement, professional service is the right next step. The same applies when the system needs schedule adjustments after landscape changes or seasonal shifts.

For homeowners, property managers, and businesses in El Mirage and nearby Arizona communities, Pro Natural Landscape LLC offers irrigation system repair, maintenance, installation, timer installation, and watering schedule optimization for residential and commercial properties. That kind of support can be valuable when the issue is bigger than a single broken head and the goal is long-term efficiency, not a short-term patch.

A strong repair visit should do more than replace the part that failed. It should also identify why it failed and whether anything else in the zone is contributing to the problem.

Professional irrigation service for El Mirage properties

An irrigation system works best when it is treated like active infrastructure, not background equipment. Regular inspections, seasonal adjustments, and fast response to small warning signs keep water use under control and protect the landscape investment around it.

If your sprinklers are misting, your soil is staying wet, a zone is acting unpredictably, or the lawn is showing uneven stress, now is a smart time to schedule a system check instead of waiting for the next water bill to make the decision for you.

Artificial Grass Installation in El Mirage, AZ

A green lawn in El Mirage can be beautiful, but keeping natural grass alive in desert heat often means high water use, constant maintenance, and uneven results. Artificial grass offers a different path: clean lines, year-round color, and a yard that stays ready for daily life without the weekly mowing cycle.

For homeowners, property managers, and businesses, professionally installed turf can turn an underused outdoor area into a polished, practical space. Pro Natural Landscape LLC provides artificial grass services for residential and commercial properties in El Mirage and nearby Arizona communities, with a focus on durable materials, thoughtful planning, and dependable project delivery.

Benefits of artificial grass for El Mirage properties

El Mirage weather puts real lawns under pressure for much of the year. Long dry stretches, intense sunlight, and summer temperatures above 100 degrees can leave natural grass thin, patchy, or dormant unless it receives frequent irrigation and regular upkeep. Artificial turf removes much of that demand while keeping the yard visually consistent.

That makes it a strong fit for front yards, backyards, pet areas, rental properties, office landscapes, and common-use spaces. Instead of managing irrigation schedules, fertilizer, reseeding, edging, and mowing, property owners get a surface that looks finished every day of the week.

Artificial grass also supports water-conscious landscaping goals. In the Phoenix area, a large share of household water use often goes toward outdoor irrigation. Replacing traditional lawn areas with turf can significantly cut water demand, which matters both for monthly utility costs and for long-term desert living.

Many clients choose artificial turf because it offers:

  • Lower water use
  • Year-round green color
  • Reduced yard work
  • Fewer mud patches
  • Cleaner pet and play areas

Artificial grass installation methods that support long-term performance

A good-looking turf surface starts below the grass fibers. Installation quality matters just as much as the turf product itself, especially in Arizona, where heat, dust, and monsoon runoff can expose weak preparation very quickly.

The installation process usually begins with site review and layout planning. That step helps determine how the turf will fit with walkways, pavers, gravel, irrigation components, planter beds, and drainage routes. In many yards, the best result comes from combining artificial grass with hardscape and low-water planting rather than treating it as a stand-alone feature.

Once the plan is set, the area is cleared, graded, and prepared with a compacted base that gives the turf a stable foundation. Weed barrier, edging, seaming, and infill all contribute to the final result. When these details are handled correctly, the lawn looks more natural, drains better, and holds up well under foot traffic.

A professional artificial grass installation often includes these key steps:

  • Site grading: Create proper slope so water moves away from structures and low spots do not collect runoff.
  • Base preparation: Install and compact crushed aggregate for a firm, even surface.
  • Weed control: Add a barrier layer to help limit future weed growth.
  • Turf placement: Cut, fit, and seam the material carefully around edges and curves.
  • Infill and grooming: Support blade structure, improve appearance, and help the turf wear more evenly.

Artificial turf options for homes, pets, and commercial spaces

Not every turf product is built for the same use. A family backyard may need a soft, natural-looking surface with enough resilience for children and pets. A commercial entry area may need a cleaner, tighter finish with strong traffic resistance. The right selection depends on pile height, density, blade shape, color blend, backing, and drainage performance.

For Arizona properties, UV-stable materials are especially important. Desert-grade turf is designed to resist fading and maintain structure in strong sun. Many products also include realistic thatch tones that help the finished lawn look more like natural grass instead of a flat green carpet.

Artificial grass for pet areas in El Mirage

Pet-friendly turf can be installed with drainage and base preparation that support quicker cleanup and better odor control, which is a major advantage for busy households and managed properties.

Artificial grass compared with natural lawns in El Mirage

The choice between turf and real grass often comes down to priorities. Natural lawns start with a lower installation cost, but they require ongoing watering, mowing, and seasonal care. Artificial grass costs more upfront, yet many property owners prefer the lower maintenance and more predictable appearance over time.

Feature Artificial Grass Natural Grass
Water use Very low, mainly occasional rinsing High in desert climate
Appearance Green year-round Can brown or thin in heat
Maintenance Minimal routine care Mowing, fertilizing, edging, irrigation
Upfront cost Higher Lower
Long-term upkeep cost Lower in many cases Higher over time
Surface temperature Can get hot in direct sun Usually cooler than turf
Durability Strong under regular use Can wear into bare spots

Artificial turf is not perfect for every goal. A living lawn offers natural cooling and supports soil life, while synthetic grass does not. That said, many El Mirage property owners decide that the water savings, cleaner appearance, and lower labor needs make turf the better match for their space.

Heat, drainage, and HOA rules for artificial grass in El Mirage

Heat is one of the most common questions about artificial turf in Arizona. That concern is valid. In full summer sun, turf can become much hotter than natural grass. Product choice and site design help address that issue. Shade planning, light-colored surrounding materials, cooling infill options, and a quick rinse before heavy use can make the space more comfortable.

Drainage is just as important. Even though El Mirage is dry for much of the year, monsoon storms can move a lot of water in a short time. Turf should be installed over a well-prepared base with proper grading so water drains away efficiently. This protects the lawn’s appearance and helps the surrounding landscape function as intended.

Homeowners associations may still have appearance guidelines, though Arizona law does not allow HOAs to ban artificial grass outright in places where natural grass is permitted. It is still wise to review community standards before installation so edging, color, placement, and drainage details meet local requirements.

Before installation, it helps to review a few project-specific factors:

  • Sun exposure: Full-sun areas may benefit from shade structures or nearby planting.
  • Traffic level: Play zones and commercial areas need stronger wear performance.
  • Pet use: Drainage and cleanup needs should shape product selection.
  • Border design: Pavers, bender board, or concrete edging help create a clean finish.
  • Yard layout: Turf often looks best when paired with gravel, planters, or hardscape accents.

Why local property owners choose Pro Natural Landscape LLC

Pro Natural Landscape LLC is a family-owned landscaping company serving El Mirage with more than a decade of experience in outdoor projects. Artificial grass installation is part of a full-service offering that also includes pavers, gravel, irrigation, landscape design, lighting, and other exterior improvements. That broader skill set is valuable because turf projects rarely exist in isolation. They usually connect to drainage, edging, walkways, planting areas, and overall yard flow.

Clients often look for a team that can provide clear communication, practical recommendations, and steady progress from estimate to completion. Pro Natural Landscape LLC offers free estimates and financing options through Hearth, giving property owners more flexibility when planning a lawn replacement or a larger yard renovation.

Artificial grass maintenance for Arizona conditions

Artificial turf is low maintenance, not no maintenance. Leaves, dust, and light debris should still be removed, and high-traffic areas may need occasional brushing to keep fibers upright. Pet areas benefit from routine rinsing, and a periodic inspection helps catch minor edge or infill issues before they become larger repairs.

That lighter maintenance schedule is exactly why many people make the switch. The yard stays usable, the appearance stays consistent, and the work required to keep it looking sharp is far more manageable than a traditional lawn in El Mirage’s climate.

If the goal is a greener, cleaner, lower-water landscape, artificial grass can be a strong investment when it is planned well and installed with care. Pro Natural Landscape LLC can help shape the space around how the property is actually used, whether that means a pet-friendly backyard, a polished front lawn, or a commercial landscape that stays neat through every season.

Desert-Friendly Landscaping: 15 Plants That Thrive With Less Water

A beautiful Arizona landscape does not need heavy irrigation to feel lush, colorful, or welcoming. In fact, some of the most striking yards in desert communities are built around plants that prefer heat, lean soil, bright sun, and long dry stretches.

That is the real strength of low-water desert landscaping plants. They fit the climate instead of fighting it.

For homeowners, property managers, and businesses in places like El Mirage, this approach can cut water waste, reduce routine upkeep, and create an outdoor space that still feels full of life through the hottest months of the year. The key is choosing plants with the right growth habits, then supporting them with smart irrigation, mulch, and thoughtful placement.

Why low-water desert landscaping plants work so well in Arizona

Desert-adapted plants are built for stress. Many store water in fleshy leaves, push roots deep into the soil, or slow growth during dry periods without losing their beauty. Native Southwest species do this especially well, though a few non-native arid plants also perform beautifully in Arizona landscapes.

A strong plant palette can do more than save water. It can also bring structure, wildlife activity, shade, seasonal bloom, and year-round texture to the yard.

After the design is in place, the biggest gains usually come from matching each plant to the right location and watering pattern.

  • seasonal color
  • sculptural form
  • lower pruning needs
  • pollinator value
  • better long-term resilience

One point matters more than any plant list: even drought-tolerant plants need regular care during establishment. Deep, targeted watering early on helps roots spread into the surrounding soil. Once established, many of these selections can do well with infrequent supplemental irrigation.

15 low-water desert landscaping plants for Arizona yards

The table below highlights fifteen reliable choices for desert-friendly planting plans. Sizes vary with soil, exposure, and irrigation, though these ranges are useful for planning.

Plant Type Mature Size Best Feature Water Need After Establishment
Frogfruit Groundcover 1 to 3 in. tall, spreading Living carpet, pollinator-friendly Low
Silver Carpet Groundcover 1 to 3 in. tall, slow spread Silvery foliage, tidy coverage Low
Blanket Flower Perennial 1 to 2 ft. x 1 to 2 ft. Long bloom season, bright color Low
Blackfoot Daisy Perennial 1 ft. x 1 to 2 ft. White flowers, compact habit Low
Desert Marigold Wildflower 1 to 2 ft. x 1 to 2 ft. Cheerful yellow bloom Low
Creosote Bush Shrub 4 to 8 ft. x 4 to 8 ft. Classic desert character, fragrance after rain Very low
Ocotillo Shrub 6 to 15 ft. tall Red flower spikes, dramatic form Very low
Texas Sage Shrub 4 to 6 ft. x 4 to 6 ft. Silvery leaves, purple bloom flushes Low
Red Yucca Succulent perennial 3 to 5 ft. x 4 to 6 ft. Coral flower stalks, hummingbird draw Very low
American Agave Succulent 3 to 6 ft. tall, 6 to 12 ft. wide Bold architectural shape Very low
Desert Willow Small tree 15 to 30 ft. tall Trumpet flowers, airy canopy Low
Foothill Palo Verde Tree 10 to 25 ft. tall Golden spring bloom, filtered shade Very low
Velvet Mesquite Tree 20 to 40 ft. tall Broad canopy, desert shade Low
Desert Ironwood Tree 20 to 40 ft. tall Dense wood, purple spring flowers Very low
Deer Grass Ornamental grass 3 to 4 ft. x 4 to 6 ft. Soft movement, strong texture Low

Best low-water groundcovers and flowering plants for desert color

Ground-level planting often makes the biggest visual difference. It softens gravel beds, cools the look of hardscape, and fills space between larger shrubs and trees. In low-water landscapes, this layer should be tough enough for heat but still lively enough to keep the yard from feeling bare.

Frogfruit is an excellent option for a looser, natural look. It creeps outward, forms a low mat, and offers tiny flowers that attract pollinators. Silver Carpet is a neater choice, with narrow silvery foliage that looks especially strong next to decomposed granite, pavers, or stone borders.

For bloom color, blanket flower, blackfoot daisy, and desert marigold are hard to beat. These plants bring bright red, yellow, and white tones into the landscape with far less water than traditional bedding flowers. They are also useful in places where you want a softer, more seasonal layer around boulders, paths, or specimen shrubs.

These flowering plants tend to look best when planted in groups rather than as isolated singles.

Best desert shrubs and succulents for structure and year-round interest

The backbone of a desert landscape usually comes from shrubs and succulents. This is where the design gains height, rhythm, privacy, and strong form.

Creosote bush is one of the most authentic choices for Sonoran-style planting. It has a natural shape, evergreen character, tiny yellow flowers, and that unmistakable scent after rainfall. Ocotillo offers a totally different look, upright canes with vivid red flower spikes that create motion and drama even when the plant is not in leaf.

Texas sage brings a softer silver-green mass to the palette, which helps balance the sharper lines of cacti and agaves. Red yucca is another standout. Its arching leaves and tall coral bloom stalks add color for months, and hummingbirds love it. American agave gives a landscape instant definition with broad rosettes that read almost like living sculpture.

When these plants are spaced correctly, the yard feels intentional and open rather than crowded.

A simple low-water shrub mix might include the following:

  • Creosote bush: natural screening and desert character
  • Red yucca: flower color with very little irrigation
  • Texas sage: silver foliage that brightens gravel beds
  • American agave: bold focal points near entries or corners
  • Ocotillo: vertical accent for large beds and open views

Best desert trees for shade with less water

Shade matters in Arizona, and low-water landscapes can still provide it. The difference is that desert-friendly trees usually create filtered shade rather than the dense, thirsty canopy associated with high-water lawns and traditional shade trees.

Foothill palo verde is one of the strongest choices for residential desert design. Its green bark, airy branching, and spring bloom fit Arizona beautifully. Desert willow gives a more floral look, with trumpet-shaped blooms and a graceful canopy that works well near patios. Velvet mesquite is larger and broader, often used where more overhead shade is needed. Desert ironwood grows more slowly, though it rewards patience with excellent durability and a rich desert presence.

These trees do more than cool the yard. They also create better conditions for understory plants, reduce reflected heat around patios and walkways, and help the whole landscape feel more layered.

Smart design practices that help low-water plants thrive

Plant choice is only half the equation. A water-wise landscape performs best when installation and maintenance are built around the same goal.

Soil preparation is a good place to start. In many Arizona properties, native soil drains quickly or becomes compacted after construction. Compost worked into planting areas can improve water holding capacity without turning the site into a high-input garden. Guidance from Klimaplanter notes that encouraging mycorrhiza around new plantings can further boost root efficiency and drought resilience in lean soils. Mulch also matters. Organic mulch works well in many planted beds, while gravel or decomposed granite often suits open desert-style layouts.

Irrigation should be precise. Drip systems and well-placed emitters deliver water to the root zone with far less waste than overhead spray. Timers and weather-aware scheduling can cut unnecessary watering, especially in monsoon season or during cooler months.

A strong low-water plan usually includes these steps:

  • Hydrozoning: group plants by similar water needs
  • Mulch depth: keep enough cover to slow evaporation and reduce weeds
  • Deep watering: soak the root zone, then allow soil to dry between cycles
  • Mature spacing: give shrubs and succulents room to reach full size
  • Permeable hardscape: use surfaces that let water soak into the ground

One common mistake is treating desert plants like tropical plants. Too much water, frequent shallow watering, or crowded placement can create weak growth and disease issues even in species known for toughness.

How to combine plants for a balanced desert landscaping plan

A successful low-water yard is not just a collection of tough plants. It is a composition. The best ones use contrast, repetition, and scale to keep the space attractive all year.

Start with one or two trees for canopy, then anchor the planting beds with structural shrubs or succulents. Fill open areas with flowering perennials and low groundcovers. Repeat key shapes or colors across the property so the design feels unified. Silver foliage, green bark, coral flowers, yellow bloom, and dark gravel can work together beautifully when each element is given room.

This kind of plant layering helps a yard feel cooler and more settled, even before the trees reach full size.

A few pairings work especially well in Arizona landscapes:

  • Palo verde with red yucca and silver carpet
  • Mesquite with creosote and desert marigold
  • Desert willow with blanket flower and blackfoot daisy
  • Ocotillo with agave and decomposed granite accents

Planning low-water desert landscaping plants for El Mirage properties

In El Mirage and surrounding Arizona communities, heat intensity, reflected sun, alkaline soil, and limited rainfall should shape every planting decision. That is why locally appropriate design matters so much. The same plant can thrive in one part of a yard and struggle in another depending on drainage, wall heat, irrigation pattern, and sun exposure.

A practical plan often includes native plants, efficient drip irrigation, mulch or gravel coverage, and hardscape features that reduce unnecessary turf. For some properties, artificial grass also has a place in the design when a green play area or clean visual contrast is important but water savings remains a priority.

Professional installation can make a big difference here, especially when it includes grading, irrigation zoning, pavers, lighting, and plant placement as part of one coordinated plan. A family-owned landscaping team that works regularly in desert conditions can help match plant choices to the site, set realistic watering schedules, and build a landscape that looks strong from day one and keeps getting better as it settles in.

How Much Does Artificial Grass Cost? A Homeowner’s Pricing Guide

Artificial grass can be one of the smartest outdoor upgrades for Arizona properties, but the price is not one-size-fits-all. A small pet run, a clean front yard refresh, and a full backyard transformation can all have very different costs, even when the square footage looks similar on paper.

For most homeowners, the real question is not just “What is the price per square foot?” It is “What am I actually getting for that price?” The answer depends on turf quality, site preparation, drainage, access, edging, and the skill of the installation crew.

Average artificial grass installation cost per square foot

Across the U.S., professionally installed artificial grass often falls between $5 and $20 per square foot. Many residential projects land somewhere in the middle of that range, while premium installations, difficult sites, or custom layouts can push pricing higher.

In Arizona, artificial turf projects often make financial sense because water savings and reduced maintenance can be substantial over time. At the same time, desert conditions can affect the type of turf selected, the base preparation required, and the overall installation method. That means local pricing may sit closer to the mid-range or upper-range depending on the yard.

Material-only pricing is lower than full installation pricing. Turf itself may cost roughly $2 to $6 per square foot for many products, while the rest of the project budget goes toward excavation, base materials, compaction, seaming, infill, edging, labor, hauling, and cleanup.

Artificial grass cost by yard size and turf grade

A quick table helps show how project totals can shift depending on the size of the area and the level of turf selected.

Project Size Budget Range at $6 to $9/sq ft Mid-Range at $10 to $14/sq ft Premium Range at $15 to $20/sq ft
200 sq ft $1,200 to $1,800 $2,000 to $2,800 $3,000 to $4,000
500 sq ft $3,000 to $4,500 $5,000 to $7,000 $7,500 to $10,000
800 sq ft $4,800 to $7,200 $8,000 to $11,200 $12,000 to $16,000
1,000 sq ft $6,000 to $9,000 $10,000 to $14,000 $15,000 to $20,000
1,500 sq ft $9,000 to $13,500 $15,000 to $21,000 $22,500 to $30,000

These numbers are planning ranges, not fixed prices. A simple flat yard with easy access can come in lower than expected. A property with demolition, grading, drainage issues, or lots of curved edges can rise quickly.

Main factors that change artificial grass pricing

Square footage matters, but it is only part of the story. Two 600 square foot projects can have very different totals if one needs major prep work and the other is ready for installation.

The biggest pricing factors usually include the turf product itself, how much base work the site needs, and how much labor is required to make the finished lawn look clean and natural.

  • Turf quality: Higher-end turf with better color variation, denser stitching, stronger backing, and better heat and UV performance costs more.
  • Pile height: Taller, fuller grass usually raises the material price.
  • Site preparation: Sod removal, grading, compaction, weed barrier, and base installation can add a meaningful amount to the total.
  • Drainage needs: Poor drainage, clay-heavy soil, or low spots may require extra rock, grading, or drainage corrections.
  • Access to the yard: Narrow side yards, gates, or limited equipment access increase labor time.
  • Edges and layout: Curves, tree rings, stepping stones, and tight corners create more cuts, seams, and labor.

That is why the lowest quote is not always the best value. If important prep steps are skipped, the turf may shift, wrinkle, drain poorly, or wear unevenly much sooner than expected.

Turf material quality and pile height pricing

Not all artificial grass products are built the same. Some are designed for basic visual appeal. Others are designed for heavy foot traffic, pets, play areas, or a softer, more realistic look.

Budget turf often has a shorter pile and simpler color blend. Mid-range turf usually looks more natural and offers better durability for everyday residential use. Premium turf can include multi-tone fibers, added thatch, higher face weight, and stronger backing systems that help the lawn hold up under Arizona sun and regular use.

A few product details tend to influence price more than homeowners expect.

  • Short pile turf
  • Multi-tone blade color
  • Higher face weight
  • UV-resistant fibers
  • Pet-friendly drainage backing
  • Softer texture underfoot

If appearance matters most, many homeowners choose a turf that balances realism and budget instead of buying the most expensive option available. If pets or active kids will use the area daily, performance may matter more than looks alone.

Site preparation, drainage, and extras that add to cost

Base preparation is where a large share of the budget often goes, and for good reason. Strong prep work helps artificial grass stay level, drain well, and keep its shape over the years.

A professional installation commonly includes removing existing grass or debris, excavating to the proper depth, adding and compacting a crushed stone base, and setting the finished grade. On a site with uneven ground or drainage problems, prep can add several dollars per square foot to the final price.

Extras can also shift the total. These add-ons are not always optional, especially if you want a polished result that lasts.

  • Edging: Bender board, metal edging, or concrete borders help define the perimeter and hold the install together.
  • Infill: Silica sand or other infill materials help support the blades and improve performance.
  • Seam work: Large areas or custom shapes may require extra seam tape and adhesive.
  • Pet features: Deodorizing infill or improved drainage layers can raise the cost.
  • Removal and hauling: Old sod, gravel, roots, junk, or hardscape debris can increase disposal fees.

One detail homeowners often miss is waste factor. Turf comes in rolls, and complicated layouts create offcuts. A simple rectangle usually uses material more efficiently than a yard with many islands, curves, and small connecting spaces.

Artificial grass cost versus natural grass over time

Natural grass is much cheaper to install at the start. That is the main reason many homeowners hesitate when they first see a turf quote.

But the long-term math tells a different story, especially in dry climates where irrigation is expensive and lawn care never really stops. Water, mowing, fertilizer, weed control, reseeding, patch repair, sprinkler maintenance, and seasonal stress can add up year after year.

Here is a simple side-by-side look at common costs for roughly 1,000 square feet:

Cost Category Natural Grass Artificial Grass
Upfront installation Lower Higher
Water use High Minimal
Mowing Ongoing None
Fertilizer and weed control Ongoing Minimal
Irrigation repairs Common over time Rare or none for lawn watering
Appearance in hot weather Can decline Consistent
10-year maintenance spending Often significant Usually much lower

For many Arizona properties, artificial grass is less about getting the cheapest installation and more about buying predictability. The lawn looks finished year-round, maintenance drops sharply, and water demand can fall dramatically.

That shift is valuable.

Artificial grass cost for Arizona homeowners and property managers

Arizona projects come with a few local realities. Heat, intense sun, dust, hard soil, and water-conscious landscaping all shape how turf is selected and installed.

A high-quality artificial grass system often works best when it is part of a broader landscape plan. Gravel, pavers, irrigation adjustments, lighting, and clean transitions around patios or walkways can help the yard look intentional rather than patched together. When those elements are added to the same project, the per-square-foot turf price may no longer tell the whole budget story.

For homeowners and property managers in El Mirage and nearby communities, custom quoting is especially important. A local, family-owned landscaping company with experience in both landscaping and hardscaping can evaluate the property as a whole, not just the turf section. That helps create a more accurate budget and a better final result.

How to get an accurate artificial grass estimate

The fastest way to narrow your price range is to get a site-specific quote instead of relying on a national average. A good estimate should account for the actual condition of the yard, access points, drainage, and the turf product being proposed.

Before choosing an installer, it helps to know what separates a solid quote from a vague one.

  • Scope of prep work: Ask whether excavation, base compaction, weed barrier, and cleanup are included.
  • Turf specifications: Ask for pile height, face weight, backing type, and warranty details.
  • Drainage plan: Ask how the installation will handle runoff, pet use, or low spots.
  • Edge treatment: Ask what will secure the perimeter.
  • Labor and materials: Ask whether the proposal includes infill, seaming materials, hauling, and disposal.
  • Project timeline: Ask when work starts and how long the install should take.

If a quote looks unusually low, compare the prep details first. That is often where corners get cut.

Ways to keep artificial grass installation on budget

A beautiful turf installation does not always require a premium package. Smart decisions during planning can control costs without giving up quality where it matters.

Many homeowners save money by reducing unnecessary shapes, combining turf with gravel or pavers, or focusing on the highest-visibility areas first. A smaller, well-designed turf area often looks better than trying to cover every inch of the yard.

A few budget-friendly ideas can make a real difference.

  • Choose a mid-range turf for most residential yards
  • Keep the layout simple
  • Limit tight curves and isolated cutouts
  • Address drainage early
  • Combine turf with hardscape or decorative rock
  • Install in phases if needed

In some cases, financing can also help turn a large outdoor project into a more manageable monthly investment. For homeowners who want a complete yard upgrade, that can open the door to tackling turf, pavers, lighting, and cleanup in one coordinated plan instead of stretching the project over several seasons.

For property owners in El Mirage and surrounding Arizona communities, Pro Natural Landscape LLC offers free estimates and financing options through Hearth, which can make it easier to map out a realistic budget before work begins.

Landscape Lighting Ideas That Improve Safety and Curb Appeal

A well-lit yard changes how a property feels after sunset. It looks more polished, more inviting, and much easier to use. The best outdoor landscape lighting ideas do not treat safety and style as separate goals. They build both at the same time.

That matters for homeowners, property managers, and businesses alike. A dark front walk can lead to trips. A dim side yard can feel uneasy. A flat, overly bright lighting setup can wash out the architecture you want people to notice. Thoughtful lighting fixes all three problems by guiding movement, showing off textures, and reducing the dark pockets that make a property feel unfinished.

In Arizona neighborhoods, where outdoor living is part of daily life for much of the year, lighting also extends the usefulness of patios, courtyards, entryways, and garden spaces. A yard that disappears at dusk is leaving value on the table.

Outdoor landscape lighting ideas for safer walkways, steps, and entryways

Safety should start with the routes people use most often. That means the front walk, driveway, porch, gate, side yard access, steps, and any change in elevation. Even a modest lighting plan can make these areas much easier to use by showing edges clearly and removing dark gaps between fixtures.

Path lights are one of the most effective tools here. Set low to the ground, they cast a soft spread of light that defines the walking surface without creating glare. Step lights take that a step further by highlighting risers and tread edges, which helps guests see depth more clearly. This is especially useful around raised patios, retaining walls, and sloped walkways.

Good safety lighting is not about flooding every inch of the yard with brightness. It is about placing light where people need visual cues most.

After identifying the main walking routes, focus on the areas that tend to create nighttime risk:

  • Front walkway
  • Porch and entry threshold
  • Steps and grade changes
  • Driveway edges
  • Side-yard gates
  • Pool, patio, and deck transitions

Security benefits come from the same disciplined approach. Research on public lighting has shown meaningful reductions in nighttime crime after lighting upgrades, and the principle carries over to residential design. When entry points, side yards, and rear access areas are visible, an intruder has fewer places to stay hidden. Motion-activated fixtures near gates, garages, and back corners add another layer without keeping a harsh light on all night.

A couple of porch lights rarely cover everything that matters. A better plan creates clear sightlines from the street to the front door, from the driveway to the garage, and from the patio to the yard perimeter.

Outdoor landscape lighting ideas that boost curb appeal after dark

Once the essential safety zones are covered, curb appeal becomes the fun part. This is where lighting brings dimension to the property and gives the landscape a finished look long after the sun goes down. Trees look taller. Stone textures stand out. Garden beds gain depth. The home itself feels more welcoming from the curb.

Uplighting is one of the most reliable ways to create that effect. A fixture placed at ground level and aimed upward can draw attention to a specimen tree, a textured wall, a column, or a large cactus grouping. The goal is not to light everything equally. It is to guide the eye toward the strongest elements in the landscape.

Shadowing and silhouetting can add even more interest. A finely branched tree placed near a wall can cast soft patterns that move with the breeze. A sculptural plant or garden feature lit from behind can produce a crisp outline that feels dramatic without looking flashy. These techniques work especially well when the architecture has clean surfaces that can catch light and shadow.

Layering is what gives a property a high-end nighttime look.

The table below shows how common lighting ideas work in practice.

Lighting technique Best use Visual effect Safety value
Path lighting Walkways, drive borders, garden paths Clean definition and soft glow Helps prevent trips and missteps
Step lighting Stairs, retaining wall steps, raised patios Crisp edge visibility Improves footing and depth perception
Uplighting Trees, columns, facades, tall plants Height, texture, and drama Keeps key areas visible
Downlighting Patios, seating areas, lawn zones Natural moonlight effect Adds broad ambient coverage
Accent lighting Fountains, sculptures, specimen plants Focus and contrast Keeps focal areas readable at night
Motion lighting Side yards, garage areas, gates Sudden illumination on activity Deters unwanted movement

The strongest curb appeal usually comes from combining three layers: functional light for movement, accent light for focal points, and ambient light for atmosphere. A property that uses only one of those layers often feels either too dim or too flat.

Landscape lighting color temperature and brightness tips

Fixture placement gets most of the attention, yet color temperature has a major impact on the final look. Warm white light, usually in the 2700K to 3000K range, is popular for residential landscapes because it feels natural and welcoming. It flatters stone, wood, desert plantings, and most home exteriors.

Neutral white light, closer to 3000K to 4000K, can work well on busy walkways or mixed-use commercial spaces where clarity matters a bit more. Cooler light, often 4000K to 5000K, is best used selectively for security zones, service areas, or motion-triggered fixtures where visibility is the top priority.

Here is a simple guide:

Color temperature Best fit Typical result
2700K to 3000K Front yards, planting beds, patios, facade accents Warm, inviting, residential feel
3000K to 4000K Walkways, common areas, commercial entries Balanced visibility with less harshness
4000K to 5000K Security zones, side yards, service access Bright, crisp visibility

Brightness matters just as much. A path light that is too weak leaves dark gaps. One that is too strong creates glare and harsh contrast. The right level gives enough illumination to read the surface underfoot while keeping the yard comfortable to look at. In many projects, low-voltage LED fixtures spaced with care will do the job better than a smaller number of very bright fixtures.

This is one place where restraint usually wins. More light does not always mean better lighting.

LED and smart outdoor landscape lighting ideas for Arizona properties

LED systems have become the standard for good reason. They use less energy, last longer, and offer better control over beam spread and color temperature than older lamp types. For a property owner, that means lower maintenance, steadier performance, and a cleaner nighttime appearance.

Low-voltage LED lighting is especially useful in residential landscapes because it is efficient and flexible. Fixtures can be placed along paver walks, around planting beds, near water features, and under walls or seating elements without making the system overly complex. For commercial properties, the same approach supports cleaner layouts and more predictable coverage.

Smart controls make the system work harder without adding effort to the owner’s routine. Timers, photocells, and motion sensors let lights turn on at the right time and shut off when they are no longer needed. This is good for energy use, yet it also keeps the property consistently lit when people are arriving home, leaving for work early, or using the patio in the evening.

A practical smart-lighting setup often includes:

  • Photocells: Turn lights on automatically at dusk
  • Timers: Set shutoff times for decorative zones
  • Motion sensors: Add extra security near gates and garages
  • Zoned lighting
  • Seasonal programming
  • App-based control where needed

For Arizona landscapes, durability matters too. Heat, dust, irrigation overspray, and sun exposure all put pressure on outdoor materials. Quality fixtures with solid seals, strong finishes, and well-planned wiring hold up better and keep the lighting scheme looking consistent over time.

Outdoor landscape lighting ideas for patios, walls, and focal features

The front yard usually gets the most attention, but backyard and side-yard lighting often has the biggest effect on how often the space is used. A patio with the right lighting becomes a place people want to stay in, not just pass through. The same is true for courtyards, ramadas, outdoor kitchens, and poolside seating areas.

Downlighting mounted on structures or in tree canopies can create a soft wash over dining and lounge areas. Wall lights can bring texture out of masonry and block walls while giving the yard a calmer background glow. Recessed lights tucked into low walls or benches keep the light source hidden and the effect refined.

If the property has a fountain, specimen tree, sculpture, or architectural column, give it a dedicated accent light. One well-lit focal point can organize the entire nighttime view. That is often more effective than scattering fixtures evenly across every bed and border.

Patio lighting works best when the fixtures match the purpose of the space:

  • Dining areas: Soft overhead or downlighting with good color quality
  • Conversation areas: Lower ambient light with subtle wall or planter accents
  • Water features: Focused beam control to avoid glare and highlight movement
  • Outdoor kitchens: Brighter task lighting on prep and cooking surfaces

Custom landscape lighting planning for homes and commercial properties

A strong lighting plan starts with how people use the property. Where do guests enter? Which route do residents take from the driveway to the front door? Where are the level changes? What deserves attention from the street? Those answers shape the layout far better than buying a boxed kit and placing fixtures at random.

That is one reason many property owners choose a professional design and installation team. Pro Natural Landscape LLC, a family-owned company serving El Mirage and nearby Arizona communities, provides outdoor lighting as part of broader landscape and hardscape work. Their service mix includes Low-voltage LED lighting, timer installation, design support, and exterior improvements that let the lighting feel integrated with the rest of the property rather than added on as an afterthought.

Their practical approach fits what most owners actually need:

  • Path and step lighting: Safer movement from curb to entry and through outdoor living areas
  • Uplights and accent fixtures: Better curb appeal for trees, facades, and focal features
  • Timers and controls: Reliable scheduling with less wasted energy
  • Free estimates
  • Financing options through Hearth

For commercial properties, the same design principles apply with a slightly different priority order. Safety and clarity often come first, especially near entries, parking edges, and pedestrian routes. Curb appeal still matters, though. A well-lit storefront, office frontage, or common area signals care, quality, and attention to detail before anyone steps inside.

The best outdoor landscape lighting ideas are rarely the loudest ones. They are the ones that make a property easier to use, easier to appreciate, and more memorable at night.

Travertine Paver Installation in El Mirage, AZ

A well-built travertine pavers surface can change the way an outdoor space looks, feels, and functions. In El Mirage, where heat, sun, and sudden monsoon runoff all shape exterior materials, travertine pavers offer a strong mix of natural beauty, comfort, and durability when they are installed the right way.

For homeowners, property managers, and business owners, the key is not only choosing attractive stone. It is choosing an installation method that fits Arizona soil conditions, daily temperature swings, and long-term drainage needs.

El Mirage travertine paver installation for patios, walkways, and pool areas

Travertine is a natural stone that fits desert properties especially well. Its lighter tones complement Southwestern architecture, modern backyard layouts, and clean commercial entries. It also stays more comfortable underfoot than many darker hardscape materials, which matters during long El Mirage summers.

When used in patios, pool decks, walkways, courtyards, and outdoor living areas, travertine creates a finished look that feels refined without looking overly formal. It works equally well with gravel landscapes, artificial turf, low-water planting plans, and custom hardscape features like benches, fire pits, and seat walls.

Many properties benefit from travertine in areas like these:

  • Backyard patios
  • Pool decks
  • Garden paths
  • Front entry walkways
  • Outdoor dining areas
  • Courtyard gathering spaces

Why travertine performs well in the El Mirage climate

El Mirage brings a demanding set of conditions. Summer temperatures are intense, UV exposure is constant, and the ground can shift if drainage and base preparation are ignored. Travertine is a smart material for this setting, but performance depends heavily on product selection and proper installation.

Dense, outdoor-rated travertine pavers are a strong fit because they provide a naturally elegant surface while handling heat better than many manufactured alternatives. Lighter finishes help reduce surface temperature, and textured finishes improve traction around pools or after rain.

A good installation also accounts for movement. Desert hardscapes expand and contract with daily temperature changes, so joint spacing, edge restraint, and joint sand selection all matter.

The travertine paver installation process in El Mirage, AZ

A lasting result starts below the stone. In this region, many failures happen because the visible pavers look great on day one, but the hidden base was rushed. Caliche, clay, and variable alluvial soils require serious preparation.

The process usually begins with excavation, removal of loose top material, and grading for positive drainage away from the home or structure. The subgrade should be shaped carefully, often with a gentle slope, so water does not collect under the finished surface or run back toward the building.

Next comes the compacted aggregate base. In desert conditions, this layer is critical. The base should be installed in controlled lifts and compacted thoroughly to create a stable platform. In areas where soil movement or fines migration is a concern, separation fabric may be used between native soil and base materials.

Over that prepared base, a bedding layer of coarse washed sand is screeded smooth. The travertine pavers are then laid in the chosen pattern, checked for spacing and alignment, and secured with durable edge restraints. Once the field is set, joint sand is worked into the gaps and the surface is compacted and finished according to the product requirements.

Installation Stage Why It Matters in El Mirage
Excavation and grading Helps prevent drainage issues and standing water
Base compaction Reduces settling, shifting, and uneven surfaces
Bedding sand placement Creates a level setting bed for the stone
Travertine layout Keeps joints consistent and the pattern clean
Edge restraint installation Helps hold the paver field in place during heat cycles
Joint sand finishing Supports flexibility and surface stability

What sets quality travertine paver installation apart

Not all travertine projects are built to the same standard. The stone itself matters, but the real difference is often in the preparation, layout discipline, and finishing details.

A quality-focused crew will pay close attention to grades, cuts, joint spacing, transitions, and edge stability. They will also consider how the finished surface connects to surrounding landscaping, irrigation, walls, turf, gravel, or concrete features.

Strong installation practices usually include the following:

  • Subgrade preparation: Removal of unstable material and correction of low spots before base work starts
  • Drainage planning: Surface slope that directs water away from structures and use areas
  • Base construction: Compacted aggregate installed in lifts for strength and long-term support
  • Material selection: Outdoor-rated travertine with the right thickness for the application
  • Edge restraint: Secure borders that limit movement over time
  • Joint finishing: Sand selected for desert conditions and seasonal movement

These details may not be obvious from a distance, yet they are what protect the finished surface year after year.

Travertine design options for Arizona outdoor spaces

Travertine can support a wide range of design styles. Some properties need a clean, understated layout with rectangular pavers and straight borders. Others call for a more decorative arrangement with mixed sizes, pattern shifts, accent bands, or integration with planters and seating features.

In El Mirage, lighter shades are often preferred because they pair well with the desert palette and help reduce heat absorption. Tumbled or honed finishes are also popular because they offer a softer appearance and practical traction.

Design choices often include pattern, color, border treatment, and how the pavers connect with the rest of the property. A thoughtful plan can make a compact yard feel larger or help a commercial frontage feel more polished and inviting.

Residential and commercial travertine paver services in El Mirage

Travertine is not limited to backyards. It can also be an excellent option for commercial courtyards, office entries, hospitality spaces, and multi-family properties where appearance and durability both matter.

For residential clients, common priorities include comfort, curb appeal, entertainment space, and poolside safety. For commercial and managed properties, the focus often shifts toward traffic flow, easier upkeep, and a polished first impression.

Projects may be built around features like these:

  • Patio expansions: More usable space for outdoor seating and gatherings
  • Pool deck upgrades: Cooler, attractive surfaces with better traction
  • Entry walkways: Natural stone paths that strengthen curb appeal
  • Shared outdoor areas: Hardscape surfaces for apartments, offices, or community spaces

Maintenance for travertine pavers in El Mirage weather

Travertine is durable, though it does best with routine care. Dust, windblown debris, intense sun, and seasonal rain all affect the surface over time. Regular sweeping and occasional rinsing help keep the pavers clean and reduce buildup.

Sealing is another important part of maintenance in Arizona. A breathable penetrating sealer can help protect the stone from staining, moisture intrusion, and weathering while still allowing the material to breathe. Resealing intervals depend on sun exposure and use, though exterior travertine in this climate often needs more frequent attention than stone in milder regions.

After monsoon season, it is smart to inspect the area for joint sand loss, minor settling, or isolated movement along edges. Addressing small issues early helps preserve the appearance and structural integrity of the whole surface.

Working with a local El Mirage travertine paver contractor

Local experience matters with stone installation in Arizona. Soil conditions, drainage behavior, and heat exposure all influence how a paver system should be built. A contractor familiar with El Mirage projects can better plan for grading, edge restraint, material choice, and long-term performance.

Pro Natural Landscape LLC provides travertine paver installation as part of its full-service outdoor work for residential and commercial properties. As a family-owned company with more than a decade of experience in the area, the focus is on quality craftsmanship, clear communication, and practical solutions suited to local conditions.

Clients often look for more than installation alone. They may want help tying travertine into landscape design, lighting, irrigation updates, gravel, turf, walls, or paver renovation work nearby. A full-service approach can make the finished project feel more cohesive and save time during planning.

Free estimates are available, and financing options through Hearth can help make larger outdoor upgrades more manageable for property owners who want to move forward with a strong plan and realistic budget.

Planning your travertine paver project in El Mirage

Before installation begins, it is wise to consider how the space will be used across the year. A patio for quiet evenings may call for a different layout than a pool deck built for weekend gatherings. The same goes for commercial spaces, where traffic patterns and maintenance expectations shape the design.

Permits or approvals may also apply in some cases, especially when drainage patterns, walls, or larger site changes are involved. A careful review of layout, grading, and local requirements helps keep the project moving in the right direction from the start.

A well-executed travertine surface does more than improve appearance. It gives outdoor space structure, comfort, and lasting value in a climate that demands real durability.

Tree Removal & Stump Grinding in El Mirage, AZ

Old stumps do more than take up space. In El Mirage yards, they can interfere with irrigation, attract pests, limit new planting, and leave a landscape looking unfinished long after a tree has been cut down. Professional stump grinding clears that obstacle safely and gives the area a clean reset for whatever comes next.

For homeowners, property managers, and businesses, this service is often the fastest way to reclaim usable ground without turning the yard into a major excavation project.

Stump grinding services in El Mirage, AZ for safer, cleaner landscapes

Stump grinding is the process of mechanically reducing a stump below ground level so the visible base is gone and the area can be restored. It is a practical solution when a stump is creating a tripping hazard, blocking a future landscape feature, or simply making the property harder to maintain.

In El Mirage, stump work should be approached with care. Desert landscapes often include gravel, irrigation lines, hardscape edges, block walls, and nearby plantings that need protection during the job. A professional crew can assess access, identify nearby utilities or irrigation components, and select the right equipment for the size and position of the stump.

Pro Natural Landscape LLC provides stump grinding and stump removal as part of a full outdoor service offering. That matters when the work does not stop at the stump. After grinding, the area may need grading, gravel replacement, irrigation repair, fresh planting, or a more complete yard update.

Common reasons to schedule stump grinding in El Mirage

A leftover stump may seem harmless at first, but it often becomes a problem over time. Once the tree is gone, the stump stays in the way of mowing, edging, foot traffic, and future improvements.

Property owners often call for stump grinding when they notice issues like these:

  • Trip hazards
  • Pest activity
  • Sprouting around the base
  • Blocked planting space
  • Difficult mowing and maintenance

Some situations call for faster action than others:

  • After tree removal: finish the job so the area is usable again
  • Before new landscaping: clear room for gravel, turf, shrubs, or pavers
  • Near walkways or driveways: reduce obstacles and awkward edges
  • On commercial sites: keep outdoor areas neat, accessible, and easier to maintain

Tree removal and stump grinding as one coordinated service

When a tree is dead, diseased, storm-damaged, or growing too close to structures, removal and stump grinding are often best handled together. Coordinating both services saves time and prevents the property from being left with a rough, incomplete look.

A careful process starts with an on-site assessment. The crew reviews the tree’s condition, the surrounding space, access for equipment, and any nearby structures or landscape features. Large or hazardous trees may need to be removed in sections to protect the property and reduce disruption.

Once the tree is down, the stump can be ground below grade so the remaining area can be restored. Debris removal is part of the value here as well. Branches, logs, and grindings should not be left scattered across the yard unless the property owner wants chips retained for another use.

That coordinated approach is especially useful in El Mirage properties where outdoor areas often combine decorative rock, desert-adapted planting, lighting, irrigation, walls, and paved surfaces in a compact layout.

What the stump grinding process usually includes

A professional stump grinding visit should feel organized from the start. The work is not just about running a machine over wood. It includes planning, protection, cleanup, and site restoration.

A typical service flow includes:

  • Site review: identify stump size, root flare, access, and nearby obstacles
  • Safety setup: protect the work zone and control debris during grinding
  • Grinding below grade: reduce the stump to a depth suitable for restoration
  • Cleanup: remove debris or leave grindings based on the project plan
  • Finish options: backfill, regrade, add gravel, or prepare for planting

In many cases, grinding is the most efficient option because it removes the visible stump without the larger disruption that can come with full extraction. That can be a smart fit for residential yards, HOA-managed areas, and commercial properties where preserving the surrounding surface matters.

Stump grinding vs. full stump removal

Both services have value, and the right choice depends on your plans for the space.

Service Best For Main Benefit Considerations
Stump Grinding Most residential and commercial landscapes Faster, less invasive, clears the visible stump Some root material remains below ground
Full Stump Removal Areas needing deeper excavation or major reconstruction Removes stump and root mass more completely More digging, more site disruption, often higher cost

If the goal is to plant new shrubs, refresh gravel, install artificial turf, or restore a general landscape bed, stump grinding is often enough. If the area is being rebuilt for structural work or deeper excavation, full removal may make more sense.

An on-site estimate helps determine the best fit.

Why local experience matters for stump grinding in El Mirage

El Mirage landscapes are shaped by heat, drought, compacted soil, and practical water use. Stump grinding in this setting is not the same as working in a yard with thick turf and deep organic soil. The property may have decomposed granite, desert shrubs, timer-controlled irrigation, paver borders, or narrow side-yard access that changes how the job should be done.

Local experience helps with details that are easy to miss:

  • Protecting nearby irrigation and valve boxes
  • Limiting damage around gravel and decorative stone
  • Working around block walls, patios, and driveways
  • Recommending drought-tolerant replacements after tree removal

This is where a full-service landscape company can offer real efficiency. If stump grinding is just one step in a bigger outdoor project, it helps to work with a team that can also handle grading, gravel installation, irrigation adjustments, planting, hardscape improvements, and site cleanup.

Residential and commercial stump grinding solutions

Residential clients often want to reclaim yard space quickly. A front yard stump may be ruining curb appeal. A backyard stump may sit right where a future seating area, turf section, or shade planting is planned. Grinding the stump opens those options back up.

Commercial properties have a different set of priorities. Appearance, pedestrian safety, and maintenance efficiency are often at the top of the list. A stump near an entry, parking area, or walkway can create an obvious hazard and leave a poor impression. Prompt service helps keep the property looking managed and professional.

Pro Natural Landscape LLC serves both residential and commercial clients in El Mirage and nearby Arizona communities, with free estimates and financing options available through Hearth for qualifying projects.

What to expect from a professional stump grinding company

Property owners should expect clear communication, careful work, and a clean site once the job is done. Those basics matter just as much as the grinding itself.

Look for service features like these:

  • Straightforward estimates
  • Trained crews with proper equipment
  • Attention to safety and local requirements
  • Thorough debris cleanup
  • Options for landscape restoration after the stump is gone

Experience also matters when the stump is tied to a larger tree issue. If the tree still needs to be removed, the work should be planned with safety first, especially around structures, fencing, utilities, and neighboring landscape features.

Landscape restoration after stump grinding in El Mirage

Once the stump is gone, the area can become something useful again. That is often the most satisfying part of the process.

The cleared space can be finished with fresh gravel, new desert-friendly shrubs, irrigation updates, pavers, or artificial grass, depending on the layout of the property. Some owners choose a simple backfill and rake-out. Others use the opening as the starting point for a broader landscape upgrade.

Because Pro Natural Landscape LLC offers tree work, grading, irrigation, gravel installation, pavers, lighting, fencing, and general landscape improvements, stump grinding can fit into a larger plan without the need to coordinate multiple contractors.

If a stump is taking up space, creating risk, or keeping your yard from moving forward, a local on-site estimate is the right next step. A well-planned stump grinding service can clear the problem, protect the surrounding landscape, and make room for a cleaner, more functional outdoor space.

How to Build a Low-Maintenance Front Yard (Step-by-Step)

A low-maintenance front yard is not a bare yard. Done well, it looks clean, welcoming, and purposeful while asking for far less watering, mowing, trimming, and seasonal replacement.

That balance matters even more in hot, dry parts of Arizona, where traditional lawns can consume time, water, and money at a pace many homeowners would rather avoid. The good news is that a front yard can look polished and still be practical. With the right layout, plant choices, and materials, the work drops sharply after installation.

Step 1: Assess Front Yard Conditions Before You Build

Start with the site you already have, not the picture in your head. A front yard that gets full afternoon sun behaves very differently from one shaded by a mature tree or neighboring wall. Soil texture, drainage, slope, and foot traffic all shape which low-maintenance front yard ideas will actually hold up.

Spend a few days observing the yard at different times. Watch where water pools after irrigation or rain. Notice where the sun is harshest. Check whether people naturally cut across the lawn from the driveway to the door. Those clues help you place plants, walkways, and gravel where they will work with the property instead of fighting it.

Before sketching anything, make notes on a few basics:

  • full sun areas
  • afternoon shade pockets
  • compacted or rocky soil
  • drainage trouble spots
  • high-traffic paths
  • areas visible from the street

This first step keeps costly mistakes off the project list. It is much easier to move a line on paper than a tree, paver border, or irrigation zone later.

Step 2: Reduce Lawn and Create Low-Maintenance Yard Zones

The fastest way to lower front yard maintenance is to reduce turf. Grass usually demands the most mowing, edging, fertilizing, and watering. A smaller lawn, or no lawn at all, opens the door to a much more efficient design.

Break the front yard into zones. One zone might be a walkway and entry. Another could be drought-tolerant planting beds. Another might be decorative gravel with boulders or accent plants. This structure makes the yard easier to install, easier to irrigate, and easier to maintain throughout the year.

For homeowners who still want some green, keep it intentional. A small patch of turf near the entrance or along the driveway can deliver the look without dominating the whole yard. In many Arizona neighborhoods, artificial grass is also used sparingly as a visual feature rather than as wall-to-wall coverage.

Here is a practical way to compare common front yard zones:

Yard Element Best Use Water Demand Maintenance Level
Drought-tolerant planting beds Color, texture, curb appeal Low Low
Decorative gravel Open areas, weed suppression, clean finish Very low Very low
Pavers or stone paths Walkways, entry routes, patios None Very low
Artificial grass Small visual lawn areas None Low
Natural lawn Play space or traditional look High High

A strong front yard usually combines two or three of these, not all five. Simpler is usually better.

Step 3: Improve Soil for a Front Yard That Needs Less Water

Healthy soil makes every other step more effective. Poor soil dries out too fast, sheds water, or holds moisture in the wrong places. Either way, plants struggle, and struggling plants create more work.

If the soil is compacted, loosen it before planting. If it is very sandy, add compost to help it hold moisture a little longer. If it is dense clay, compost helps with structure and root growth there as well. This is not about creating perfect garden soil everywhere. It is about giving roots a better start so plants can establish faster and depend less on constant care.

Mulch belongs in this step too, even though many people think of it as a finishing touch. Organic mulch around shrubs and perennials helps the soil stay cooler, reduces evaporation, and slows weed growth. In desert-style landscapes, gravel mulch can also work well in the right areas, especially around cacti, agaves, and pathways. The key is choosing the right material for the right zone.

Step 4: Choose Drought-Tolerant Plants for a Low-Maintenance Front Yard

Plant selection is where the yard either becomes easy or stays demanding. Low-maintenance front yard ideas work best when plants fit the climate, the sun pattern, and the soil. In El Mirage and similar Arizona communities, that usually means drought-tolerant, heat-tolerant, and often native or desert-adapted plants.

A common mistake is buying plants based only on flower color or a nursery tag that says “full sun.” Full sun in a mild climate is not the same as full sun in the West Valley. The most reliable front yard plants are the ones that can take reflected heat, dry spells, and lean soil without needing constant correction.

A solid plant palette usually includes a few categories:

  • Foundation shrubs: Texas sage, dwarf oleander alternatives suited to local codes, chuparosa, desert ruellia
  • Accent plants: agave, red yucca, hesperaloe, sotol
  • Soft texture plants: deer grass, muhly grass, damianita
  • Ground-level color: lantana, blackfoot daisy, desert marigold, trailing rosemary

Use repetition. Three or five of the same shrub usually look better, and stay easier to maintain, than a collection of one-off plants with different pruning and watering needs. Repetition also gives the front yard a calm, designed look from the street.

Native plants deserve special attention here. They are often better adapted to local heat swings and rainfall patterns, and many support birds and pollinators while still staying low effort. That means your front yard can be resilient without feeling sparse.

Step 5: Group Plants by Water Needs and Mature Size

A low-maintenance plant list can still become a high-maintenance yard if the layout is wrong. Plants with similar water needs should share the same area. That lets irrigation deliver the right amount to each section instead of overwatering some plants to keep others alive.

Keep larger shrubs and small trees away from entries, windows, and walkways unless their mature size clearly fits. Many front yard problems start when a plant looked small in a nursery pot and later grew into constant shearing. Frequent shearing is one of the biggest hidden maintenance costs in residential landscaping.

Think in layers. A small tree or tall accent shrub can anchor the yard. Mid-height shrubs fill most of the visual field. Lower flowering plants or groundcovers soften the front edge. When these layers are spaced correctly, the yard looks full without becoming crowded.

Step 6: Install Drip Irrigation for Efficient Front Yard Watering

Smart irrigation is one of the best low-maintenance front yard ideas because it removes inconsistency. Drip irrigation sends water to the root zone instead of spraying large areas into the air. In hot weather, that difference matters.

A basic system should include separate zones for different plant types, pressure regulation, proper emitters, and a timer. If trees, shrubs, and accent plants all share one watering schedule, waste goes up and plant health usually goes down. A timer keeps things regular, and seasonal adjustments keep things efficient.

A few irrigation priorities make a big difference:

  • Separate zones: trees, shrubs, and turf alternatives should not all run together
  • Deep watering: less often, but long enough to encourage stronger roots
  • Seasonal timer changes: summer and winter schedules should never be identical
  • Routine checks: look for clogged emitters, broken lines, and runoff

For homeowners who want even less daily involvement, a professionally planned irrigation layout with smart controls can save time year-round.

Step 7: Add Gravel, Pavers, and Hardscape to Cut Ongoing Work

Hardscape is not just decorative. It is a practical tool for reducing upkeep. Gravel, pavers, edging, and stone pathways reduce the amount of space that needs trimming, watering, and weed control. They also make the yard feel finished.

Gravel is especially useful in Arizona front yards because it handles heat well, drains well when installed properly, and pairs naturally with desert plants. Pavers create clear walking routes and help stop foot traffic from compacting planting beds. Edging keeps gravel out of beds and mulch out of walkways, which saves cleanup later.

This is where restraint matters. Too much hardscape can make a front yard feel harsh. Too little can leave the design looking unfinished and harder to maintain. The best results usually come from a balanced mix of planted space and durable surface materials.

Step 8: Use Mulch and Weed Prevention to Keep Maintenance Light

Weeds love open soil. Leave bare gaps in the yard, and you create ongoing work. Covering the soil is one of the simplest ways to keep the maintenance load low.

In shrub and perennial beds, a generous layer of mulch helps suppress weed growth and slows moisture loss. In more desert-style sections, decorative gravel can fill that role. The point is not just appearance. It is protection. Covered soil is easier to manage, and planted beds stay stable longer.

Dense planting helps too. When plants are spaced to fill in over time, fewer weed seeds get the sunlight they need. That turns the design itself into a maintenance strategy.

Step 9: Follow a Simple First-Year Front Yard Maintenance Plan

Even the best low-maintenance front yard needs some attention during the first year. That is normal. Plants are getting established, irrigation is being adjusted, and the yard is settling into its long-term rhythm.

What you do in the first few months often determines how easy the yard will be later. Water deeply enough for roots to spread. Replace failing plants early instead of trying to nurse poor performers along for a full season. Remove weeds early before they seed. Pull weeds while they are small. Refresh mulch or rake gravel back into place as needed.

A simple first-year plan usually looks like this:

  1. Check irrigation monthly and adjust with the weather.
  2. Remove weeds early before they seed.
  3. Lightly prune only for shape, safety, or dead growth.
  4. Watch plant size so crowding does not begin.

After establishment, many front yards settle into a very manageable routine. That may mean occasional pruning, seasonal timer changes, and a few cleanup visits each year rather than weekly chores.

Step 10: Keep the Design Simple, Cohesive, and Easy to Maintain

Some of the best low-maintenance front yard ideas are really design decisions. Too many materials, too many plant varieties, and too many small beds create visual clutter and more maintenance points. Simplicity lowers labor.

Choose a limited palette. Repeat the same gravel in multiple sections. Use one or two paver styles. Stick with a focused plant selection rather than collecting every attractive specimen at the nursery. A restrained design usually looks more refined, especially from the curb.

For homeowners in El Mirage and surrounding Arizona communities, this kind of planning often leads to the strongest results: drought-tolerant plants, efficient irrigation, practical hardscape, and a layout that fits the home instead of competing with it. A family-owned landscaping team with local experience can help bring all of those pieces together, from grading and gravel installation to pavers, artificial grass, and irrigation, so the finished front yard looks sharp and stays manageable long after the project is done.