A new landscape rarely succeeds on design alone. The ground, water flow, access, and hidden conditions under the surface all shape how well that investment performs once plants, pavers, irrigation, and lighting go in.
That is why the smartest part of a landscape project often happens before installation day. Good preparation reduces change orders, protects new materials, and gives plants and hardscape features a much better start. If you are planning a yard makeover in El Mirage or nearby Arizona communities, a clear prep plan can save time and keep the work moving.
Why yard preparation matters for landscape installation
Site preparation is where practical planning meets long-term performance. A beautiful layout can still struggle if the soil is compacted, drainage is poor, weeds are left in place, or crews run into unmarked utilities. When those issues are handled early, installation becomes faster, cleaner, and far more predictable.
Extension guidance consistently points to the same starting points before planting begins: test the soil, check drainage, and remove competing vegetation. Those steps are not glamorous, yet they set the stage for healthy roots, efficient irrigation, and fewer surprises during construction.
Successful yards are often won before the first plant goes into the ground.
After the initial review, most projects move through a short set of prep priorities:
- Soil testing
- Drainage and grading review
- Weed and turf removal
- Debris cleanup
- Utility marking through 811
- Access planning for crews and materials
Yard preparation checklist before new landscaping
A checklist helps separate true site-prep work from nice-to-have tasks. It also keeps homeowners, property managers, and contractors on the same page.
| Prep task | What to verify | Why it matters |
|---|---|---|
| Soil test | pH, texture, organic matter, nutrient levels | Helps match plants and soil amendments to actual site conditions |
| Drainage check | Areas where water stands, runoff paths, low spots | Prevents root stress, erosion, and water damage |
| Weed and turf removal | Existing grass, invasive weeds, volunteer growth | Cuts down competition for new plants |
| Debris removal | Old edging, trash, rock piles, dead roots, broken concrete | Creates a clean installation surface |
| Utility marking | Call 811 before digging | Reduces safety risks and service disruptions |
| Grading review | Slope away from structures, finished elevations | Supports drainage and hardscape stability |
| Irrigation planning | Water source, zones, controller location | Keeps trenching and layout organized |
| Site access | Gate widths, parking, staging area, pet control | Helps crews work efficiently and safely |
A checklist is also useful when comparing bids. If one proposal includes site prep and another assumes the yard is already ready, the price gap may not mean the same scope of work.
Soil testing and soil improvement before landscaping
Soil testing should happen early, ideally in spring before planting or in fall if the schedule allows. A basic test is usually enough for most lawns and gardens, and the report can show pH, texture, organic matter, nutrient levels, and whether compost or fertilizer is warranted. That information is far better than guessing.
In practical terms, soil testing answers a few big questions. Will selected plants tolerate the existing soil pH? Does the ground drain quickly or hold water too long? Is the soil structure loose enough for roots to establish, or is it compacted and short on organic matter? Those answers shape plant selection, amendment plans, and irrigation settings.
For new landscape installations, it is wise to test before buying large quantities of plants or soil products. That keeps spending focused and reduces the chance of correcting avoidable problems after installation.
A good soil report usually helps you evaluate these points:
- Soil pH: shows whether plant choices are likely to thrive or struggle
- Soil texture: indicates how fast water moves through the root zone
- Organic matter: points to how well the soil can hold moisture and nutrients
- Nutrient levels: helps avoid over-fertilizing or feeding the wrong way
- Contaminants: useful when the yard has an uncertain site history
Once the results are back, the prep work may include loosening compacted ground, incorporating compost, removing construction residue, or adjusting the planting plan. If an area is being converted from bare ground or turf to a garden bed, some projects benefit from deeper cultivation before installation begins.
Drainage and grading checks before landscape installation
Before any planting, drainage should be checked. That guidance is simple, but it prevents many expensive setbacks. If water collects in a planting bed or around a foundation, the issue tends to show up after the yard is finished, when repairs are harder and more disruptive.
A quick field check often starts with observation. Where does water go after irrigation or rain? Do low spots stay wet longer than the rest of the yard? Does runoff move toward the house, patio, or block wall? These patterns tell you whether regrading, drainage piping, swales, or changes to hardscape elevations are needed.
This step matters just as much for pavers and artificial grass as it does for shrubs and trees. Hardscape needs a stable base and proper slope. Planting areas need oxygen in the root zone. When grade and drainage are corrected first, the rest of the installation has a stronger foundation.
If a yard has repeated puddling or erosion, that is usually a sign to pause and solve the water path before moving ahead with finishing materials.
Weed removal and debris cleanup before landscaping
New plants rarely compete well against established weeds or existing turf. Extension recommendations on planting areas are clear: competing vegetation should be removed before new material goes in. That applies to flower beds, low-water gardens, turf replacement projects, and larger renovations.
There are several ways to handle this. Mechanical removal works for smaller areas. For larger sections of unwanted grass or weeds, solarization or occultation can be useful. Solarization uses heat under clear plastic, while occultation blocks light with dark plastic, tarps, or similar coverings. Both methods help knock back existing growth and reduce the first flush of weed seeds before planting.
The cleanup stage should also remove anything that interferes with layout or root growth. Old edging, broken irrigation parts, buried trash, leftover construction materials, and dead root masses all add friction to the job. Crews work faster on a clean site, and finished results look sharper.
Common items to clear before installation include:
- Old sod and turfgrass
- Volunteer weeds
- Dead shrubs
- Loose rubble
- Broken pavers
- Scrap wood and metal
- Abandoned drip line
- Tree stumps or large roots
If a tarp or dark sheet is being used to suppress grass before planting, give it enough time to work. In some situations, that means several weeks, not a weekend.
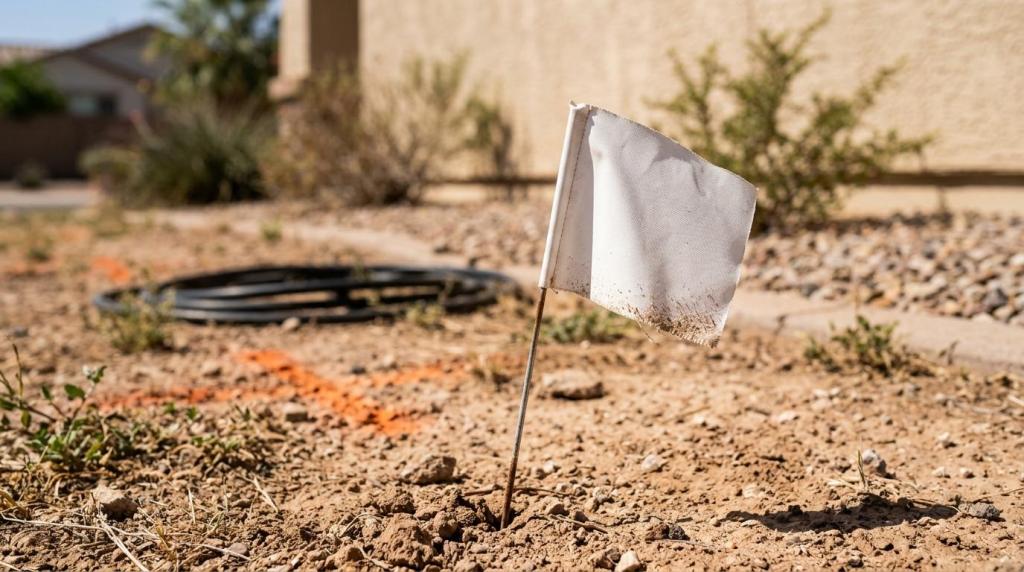
Underground utility marking before any yard digging
Utility marking is a separate safety step from soil prep and planting prep. Even if the yard looks simple, underground lines may be present for electric, gas, water, cable, or other services. Calling 811 starts the one-call system process so utilities can be marked before digging begins.
That call should happen before trenching for irrigation, lighting, drainage, trees, or footings. It is not a substitute to call a different agency or assume old plans are accurate. The marked lines protect workers, residents, and the project schedule.
A short delay for utility marking is far better than a damaged line, an outage, or an emergency repair.
Site decisions to finalize before landscape crews arrive
Some of the most useful prep has nothing to do with soil. It has to do with decisions. If the install team arrives and basic layout questions are still open, time gets lost quickly.
Finalize the location of planting beds, turf areas, paver borders, lighting runs, drainage features, and irrigation control boxes before the start date. Confirm which items stay and which are being removed. That includes mature trees, decorative rock, existing concrete pads, play equipment, and fences or gates that affect access.
It also helps to identify site boundaries and staging areas. Where will pallets of pavers sit? Where should crews place removed debris? Which gate should remain unlocked? Can heavy materials cross the driveway without blocking daily access for residents or tenants?
Before installation begins, confirm these points with your contractor:
- Scope: what is being removed, installed, repaired, or left in place
- Access: gate width, parking limits, pet safety, and locked areas
- Utilities: whether 811 markings are complete and visible
- Water: hose bib access or irrigation shutoff locations
- Materials: where rock, plants, pavers, and soil will be staged
Preparing an Arizona yard for efficient installation
Arizona yards often reward careful planning. Dry conditions can make the surface look simple, yet the real work may involve compacted soil, hard digging, fast runoff, or older irrigation that needs updating before new planting begins. A prep-first approach reduces rework and protects the investment.
This is where local experience has real value. A family-owned landscape company serving El Mirage for more than a decade will usually have a strong read on common site conditions, scheduling needs, and the order in which work should happen. That kind of field experience supports clear communication and more realistic timelines.
When the contractor offers full-service work, the prep phase can be coordinated more efficiently. Grading, cleanup, irrigation, lighting, pavers, gravel, trees, and planting all affect one another. Managing those pieces in the right order keeps the project moving and avoids tearing up finished work later.
Installation day yard access and homeowner preparation
Once the yard is prepped, installation day becomes much smoother. Crews can unload, mark layout lines, trench where needed, and move directly into base prep, irrigation work, planting, or hardscape installation without losing time to preventable site issues.
Homeowners can help by securing pets, moving vehicles away from access points, unlocking gates, and clearing fragile items from work zones. If the project includes backyard access through a side yard, that path should be open and wide enough for wheelbarrows, compact equipment, or material carts.
A ready site sends the whole project in the right direction. Clean ground, marked utilities, tested soil, and a clear plan give the installation team what it needs to produce a yard that looks finished on day one and performs well long after that.