×

Landscape Lighting Ideas That Improve Safety and Curb Appeal

A well-lit yard changes how a property feels after sunset. It looks more polished, more inviting, and much easier to use. The best outdoor landscape lighting ideas do not treat safety and style as separate goals. They build both at the same time.

That matters for homeowners, property managers, and businesses alike. A dark front walk can lead to trips. A dim side yard can feel uneasy. A flat, overly bright lighting setup can wash out the architecture you want people to notice. Thoughtful lighting fixes all three problems by guiding movement, showing off textures, and reducing the dark pockets that make a property feel unfinished.

In Arizona neighborhoods, where outdoor living is part of daily life for much of the year, lighting also extends the usefulness of patios, courtyards, entryways, and garden spaces. A yard that disappears at dusk is leaving value on the table.

Outdoor landscape lighting ideas for safer walkways, steps, and entryways

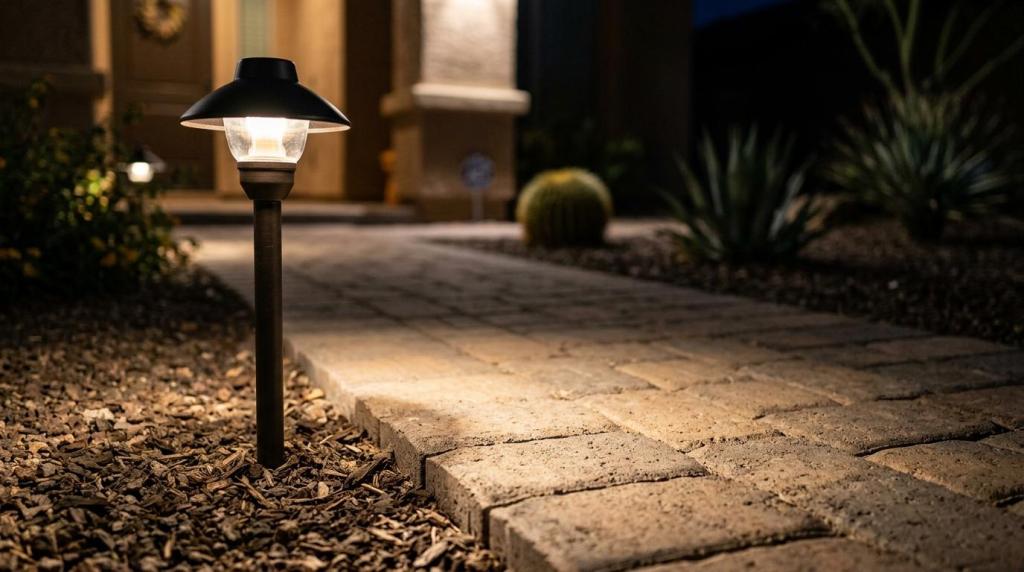
Safety should start with the routes people use most often. That means the front walk, driveway, porch, gate, side yard access, steps, and any change in elevation. Even a modest lighting plan can make these areas much easier to use by showing edges clearly and removing dark gaps between fixtures.

Path lights are one of the most effective tools here. Set low to the ground, they cast a soft spread of light that defines the walking surface without creating glare. Step lights take that a step further by highlighting risers and tread edges, which helps guests see depth more clearly. This is especially useful around raised patios, retaining walls, and sloped walkways.

Good safety lighting is not about flooding every inch of the yard with brightness. It is about placing light where people need visual cues most.

After identifying the main walking routes, focus on the areas that tend to create nighttime risk:

  • Front walkway
  • Porch and entry threshold
  • Steps and grade changes
  • Driveway edges
  • Side-yard gates
  • Pool, patio, and deck transitions

Security benefits come from the same disciplined approach. Research on public lighting has shown meaningful reductions in nighttime crime after lighting upgrades, and the principle carries over to residential design. When entry points, side yards, and rear access areas are visible, an intruder has fewer places to stay hidden. Motion-activated fixtures near gates, garages, and back corners add another layer without keeping a harsh light on all night.

A couple of porch lights rarely cover everything that matters. A better plan creates clear sightlines from the street to the front door, from the driveway to the garage, and from the patio to the yard perimeter.

Outdoor landscape lighting ideas that boost curb appeal after dark

Once the essential safety zones are covered, curb appeal becomes the fun part. This is where lighting brings dimension to the property and gives the landscape a finished look long after the sun goes down. Trees look taller. Stone textures stand out. Garden beds gain depth. The home itself feels more welcoming from the curb.

Uplighting is one of the most reliable ways to create that effect. A fixture placed at ground level and aimed upward can draw attention to a specimen tree, a textured wall, a column, or a large cactus grouping. The goal is not to light everything equally. It is to guide the eye toward the strongest elements in the landscape.

Shadowing and silhouetting can add even more interest. A finely branched tree placed near a wall can cast soft patterns that move with the breeze. A sculptural plant or garden feature lit from behind can produce a crisp outline that feels dramatic without looking flashy. These techniques work especially well when the architecture has clean surfaces that can catch light and shadow.

Layering is what gives a property a high-end nighttime look.

The table below shows how common lighting ideas work in practice.

Lighting technique Best use Visual effect Safety value
Path lighting Walkways, drive borders, garden paths Clean definition and soft glow Helps prevent trips and missteps
Step lighting Stairs, retaining wall steps, raised patios Crisp edge visibility Improves footing and depth perception
Uplighting Trees, columns, facades, tall plants Height, texture, and drama Keeps key areas visible
Downlighting Patios, seating areas, lawn zones Natural moonlight effect Adds broad ambient coverage
Accent lighting Fountains, sculptures, specimen plants Focus and contrast Keeps focal areas readable at night
Motion lighting Side yards, garage areas, gates Sudden illumination on activity Deters unwanted movement

The strongest curb appeal usually comes from combining three layers: functional light for movement, accent light for focal points, and ambient light for atmosphere. A property that uses only one of those layers often feels either too dim or too flat.

Landscape lighting color temperature and brightness tips

Fixture placement gets most of the attention, yet color temperature has a major impact on the final look. Warm white light, usually in the 2700K to 3000K range, is popular for residential landscapes because it feels natural and welcoming. It flatters stone, wood, desert plantings, and most home exteriors.

Neutral white light, closer to 3000K to 4000K, can work well on busy walkways or mixed-use commercial spaces where clarity matters a bit more. Cooler light, often 4000K to 5000K, is best used selectively for security zones, service areas, or motion-triggered fixtures where visibility is the top priority.

Here is a simple guide:

Color temperature Best fit Typical result
2700K to 3000K Front yards, planting beds, patios, facade accents Warm, inviting, residential feel
3000K to 4000K Walkways, common areas, commercial entries Balanced visibility with less harshness
4000K to 5000K Security zones, side yards, service access Bright, crisp visibility

Brightness matters just as much. A path light that is too weak leaves dark gaps. One that is too strong creates glare and harsh contrast. The right level gives enough illumination to read the surface underfoot while keeping the yard comfortable to look at. In many projects, low-voltage LED fixtures spaced with care will do the job better than a smaller number of very bright fixtures.

This is one place where restraint usually wins. More light does not always mean better lighting.

LED and smart outdoor landscape lighting ideas for Arizona properties

LED systems have become the standard for good reason. They use less energy, last longer, and offer better control over beam spread and color temperature than older lamp types. For a property owner, that means lower maintenance, steadier performance, and a cleaner nighttime appearance.

Low-voltage LED lighting is especially useful in residential landscapes because it is efficient and flexible. Fixtures can be placed along paver walks, around planting beds, near water features, and under walls or seating elements without making the system overly complex. For commercial properties, the same approach supports cleaner layouts and more predictable coverage.

Smart controls make the system work harder without adding effort to the owner’s routine. Timers, photocells, and motion sensors let lights turn on at the right time and shut off when they are no longer needed. This is good for energy use, yet it also keeps the property consistently lit when people are arriving home, leaving for work early, or using the patio in the evening.

A practical smart-lighting setup often includes:

  • Photocells: Turn lights on automatically at dusk
  • Timers: Set shutoff times for decorative zones
  • Motion sensors: Add extra security near gates and garages
  • Zoned lighting
  • Seasonal programming
  • App-based control where needed

For Arizona landscapes, durability matters too. Heat, dust, irrigation overspray, and sun exposure all put pressure on outdoor materials. Quality fixtures with solid seals, strong finishes, and well-planned wiring hold up better and keep the lighting scheme looking consistent over time.

Outdoor landscape lighting ideas for patios, walls, and focal features

The front yard usually gets the most attention, but backyard and side-yard lighting often has the biggest effect on how often the space is used. A patio with the right lighting becomes a place people want to stay in, not just pass through. The same is true for courtyards, ramadas, outdoor kitchens, and poolside seating areas.

Downlighting mounted on structures or in tree canopies can create a soft wash over dining and lounge areas. Wall lights can bring texture out of masonry and block walls while giving the yard a calmer background glow. Recessed lights tucked into low walls or benches keep the light source hidden and the effect refined.

If the property has a fountain, specimen tree, sculpture, or architectural column, give it a dedicated accent light. One well-lit focal point can organize the entire nighttime view. That is often more effective than scattering fixtures evenly across every bed and border.

Patio lighting works best when the fixtures match the purpose of the space:

  • Dining areas: Soft overhead or downlighting with good color quality
  • Conversation areas: Lower ambient light with subtle wall or planter accents
  • Water features: Focused beam control to avoid glare and highlight movement
  • Outdoor kitchens: Brighter task lighting on prep and cooking surfaces

Custom landscape lighting planning for homes and commercial properties

A strong lighting plan starts with how people use the property. Where do guests enter? Which route do residents take from the driveway to the front door? Where are the level changes? What deserves attention from the street? Those answers shape the layout far better than buying a boxed kit and placing fixtures at random.

That is one reason many property owners choose a professional design and installation team. Pro Natural Landscape LLC, a family-owned company serving El Mirage and nearby Arizona communities, provides outdoor lighting as part of broader landscape and hardscape work. Their service mix includes Low-voltage LED lighting, timer installation, design support, and exterior improvements that let the lighting feel integrated with the rest of the property rather than added on as an afterthought.

Their practical approach fits what most owners actually need:

  • Path and step lighting: Safer movement from curb to entry and through outdoor living areas
  • Uplights and accent fixtures: Better curb appeal for trees, facades, and focal features
  • Timers and controls: Reliable scheduling with less wasted energy
  • Free estimates
  • Financing options through Hearth

For commercial properties, the same design principles apply with a slightly different priority order. Safety and clarity often come first, especially near entries, parking edges, and pedestrian routes. Curb appeal still matters, though. A well-lit storefront, office frontage, or common area signals care, quality, and attention to detail before anyone steps inside.

The best outdoor landscape lighting ideas are rarely the loudest ones. They are the ones that make a property easier to use, easier to appreciate, and more memorable at night.
Travertine Paver Installation in El Mirage, AZ

A well-built travertine pavers surface can change the way an outdoor space looks, feels, and functions. In El Mirage, where heat, sun, and sudden monsoon runoff all shape exterior materials, travertine pavers offer a strong mix of natural beauty, comfort, and durability when they are installed the right way.

For homeowners, property managers, and business owners, the key is not only choosing attractive stone. It is choosing an installation method that fits Arizona soil conditions, daily temperature swings, and long-term drainage needs.

El Mirage travertine paver installation for patios, walkways, and pool areas

Travertine is a natural stone that fits desert properties especially well. Its lighter tones complement Southwestern architecture, modern backyard layouts, and clean commercial entries. It also stays more comfortable underfoot than many darker hardscape materials, which matters during long El Mirage summers.

When used in patios, pool decks, walkways, courtyards, and outdoor living areas, travertine creates a finished look that feels refined without looking overly formal. It works equally well with gravel landscapes, artificial turf, low-water planting plans, and custom hardscape features like benches, fire pits, and seat walls.

Many properties benefit from travertine in areas like these:

  • Backyard patios
  • Pool decks
  • Garden paths
  • Front entry walkways
  • Outdoor dining areas
  • Courtyard gathering spaces

Why travertine performs well in the El Mirage climate

El Mirage brings a demanding set of conditions. Summer temperatures are intense, UV exposure is constant, and the ground can shift if drainage and base preparation are ignored. Travertine is a smart material for this setting, but performance depends heavily on product selection and proper installation.

Dense, outdoor-rated travertine pavers are a strong fit because they provide a naturally elegant surface while handling heat better than many manufactured alternatives. Lighter finishes help reduce surface temperature, and textured finishes improve traction around pools or after rain.

A good installation also accounts for movement. Desert hardscapes expand and contract with daily temperature changes, so joint spacing, edge restraint, and joint sand selection all matter.

The travertine paver installation process in El Mirage, AZ

A lasting result starts below the stone. In this region, many failures happen because the visible pavers look great on day one, but the hidden base was rushed. Caliche, clay, and variable alluvial soils require serious preparation.

The process usually begins with excavation, removal of loose top material, and grading for positive drainage away from the home or structure. The subgrade should be shaped carefully, often with a gentle slope, so water does not collect under the finished surface or run back toward the building.

Next comes the compacted aggregate base. In desert conditions, this layer is critical. The base should be installed in controlled lifts and compacted thoroughly to create a stable platform. In areas where soil movement or fines migration is a concern, separation fabric may be used between native soil and base materials.

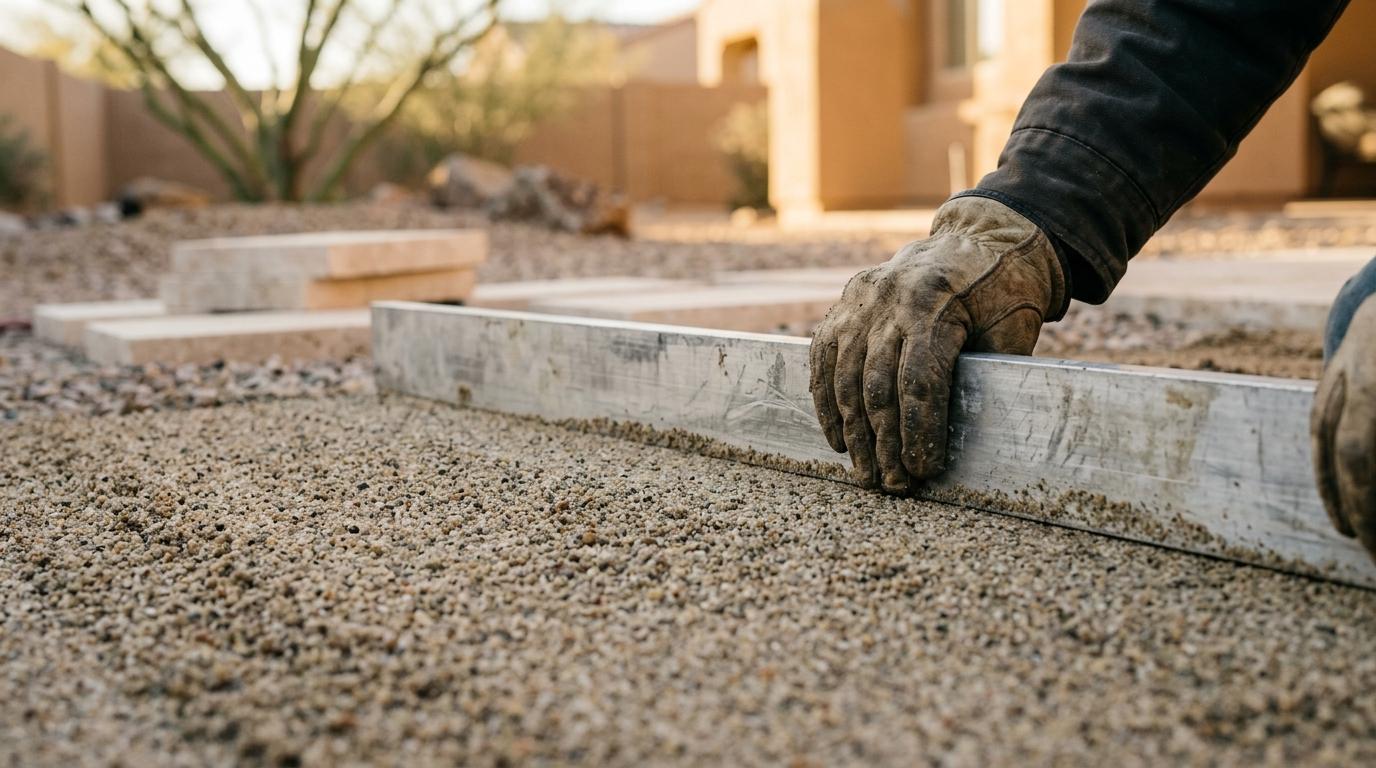
Over that prepared base, a bedding layer of coarse washed sand is screeded smooth. The travertine pavers are then laid in the chosen pattern, checked for spacing and alignment, and secured with durable edge restraints. Once the field is set, joint sand is worked into the gaps and the surface is compacted and finished according to the product requirements.

Installation Stage Why It Matters in El Mirage
Excavation and grading Helps prevent drainage issues and standing water
Base compaction Reduces settling, shifting, and uneven surfaces
Bedding sand placement Creates a level setting bed for the stone
Travertine layout Keeps joints consistent and the pattern clean
Edge restraint installation Helps hold the paver field in place during heat cycles
Joint sand finishing Supports flexibility and surface stability

What sets quality travertine paver installation apart

Not all travertine projects are built to the same standard. The stone itself matters, but the real difference is often in the preparation, layout discipline, and finishing details.

A quality-focused crew will pay close attention to grades, cuts, joint spacing, transitions, and edge stability. They will also consider how the finished surface connects to surrounding landscaping, irrigation, walls, turf, gravel, or concrete features.

Strong installation practices usually include the following:

  • Subgrade preparation: Removal of unstable material and correction of low spots before base work starts
  • Drainage planning: Surface slope that directs water away from structures and use areas
  • Base construction: Compacted aggregate installed in lifts for strength and long-term support
  • Material selection: Outdoor-rated travertine with the right thickness for the application
  • Edge restraint: Secure borders that limit movement over time
  • Joint finishing: Sand selected for desert conditions and seasonal movement

These details may not be obvious from a distance, yet they are what protect the finished surface year after year.

Travertine design options for Arizona outdoor spaces

Travertine can support a wide range of design styles. Some properties need a clean, understated layout with rectangular pavers and straight borders. Others call for a more decorative arrangement with mixed sizes, pattern shifts, accent bands, or integration with planters and seating features.

In El Mirage, lighter shades are often preferred because they pair well with the desert palette and help reduce heat absorption. Tumbled or honed finishes are also popular because they offer a softer appearance and practical traction.

Design choices often include pattern, color, border treatment, and how the pavers connect with the rest of the property. A thoughtful plan can make a compact yard feel larger or help a commercial frontage feel more polished and inviting.

Residential and commercial travertine paver services in El Mirage

Travertine is not limited to backyards. It can also be an excellent option for commercial courtyards, office entries, hospitality spaces, and multi-family properties where appearance and durability both matter.

For residential clients, common priorities include comfort, curb appeal, entertainment space, and poolside safety. For commercial and managed properties, the focus often shifts toward traffic flow, easier upkeep, and a polished first impression.

Projects may be built around features like these:

  • Patio expansions: More usable space for outdoor seating and gatherings
  • Pool deck upgrades: Cooler, attractive surfaces with better traction
  • Entry walkways: Natural stone paths that strengthen curb appeal
  • Shared outdoor areas: Hardscape surfaces for apartments, offices, or community spaces

Maintenance for travertine pavers in El Mirage weather

Travertine is durable, though it does best with routine care. Dust, windblown debris, intense sun, and seasonal rain all affect the surface over time. Regular sweeping and occasional rinsing help keep the pavers clean and reduce buildup.

Sealing is another important part of maintenance in Arizona. A breathable penetrating sealer can help protect the stone from staining, moisture intrusion, and weathering while still allowing the material to breathe. Resealing intervals depend on sun exposure and use, though exterior travertine in this climate often needs more frequent attention than stone in milder regions.

After monsoon season, it is smart to inspect the area for joint sand loss, minor settling, or isolated movement along edges. Addressing small issues early helps preserve the appearance and structural integrity of the whole surface.

Working with a local El Mirage travertine paver contractor

Local experience matters with stone installation in Arizona. Soil conditions, drainage behavior, and heat exposure all influence how a paver system should be built. A contractor familiar with El Mirage projects can better plan for grading, edge restraint, material choice, and long-term performance.

Pro Natural Landscape LLC provides travertine paver installation as part of its full-service outdoor work for residential and commercial properties. As a family-owned company with more than a decade of experience in the area, the focus is on quality craftsmanship, clear communication, and practical solutions suited to local conditions.

Clients often look for more than installation alone. They may want help tying travertine into landscape design, lighting, irrigation updates, gravel, turf, walls, or paver renovation work nearby. A full-service approach can make the finished project feel more cohesive and save time during planning.

Free estimates are available, and financing options through Hearth can help make larger outdoor upgrades more manageable for property owners who want to move forward with a strong plan and realistic budget.

Planning your travertine paver project in El Mirage

Before installation begins, it is wise to consider how the space will be used across the year. A patio for quiet evenings may call for a different layout than a pool deck built for weekend gatherings. The same goes for commercial spaces, where traffic patterns and maintenance expectations shape the design.

Permits or approvals may also apply in some cases, especially when drainage patterns, walls, or larger site changes are involved. A careful review of layout, grading, and local requirements helps keep the project moving in the right direction from the start.

A well-executed travertine surface does more than improve appearance. It gives outdoor space structure, comfort, and lasting value in a climate that demands real durability.

Tree Removal & Stump Grinding in El Mirage, AZ

Old stumps do more than take up space. In El Mirage yards, they can interfere with irrigation, attract pests, limit new planting, and leave a landscape looking unfinished long after a tree has been cut down. Professional stump grinding clears that obstacle safely and gives the area a clean reset for whatever comes next.

For homeowners, property managers, and businesses, this service is often the fastest way to reclaim usable ground without turning the yard into a major excavation project.

Stump grinding services in El Mirage, AZ for safer, cleaner landscapes

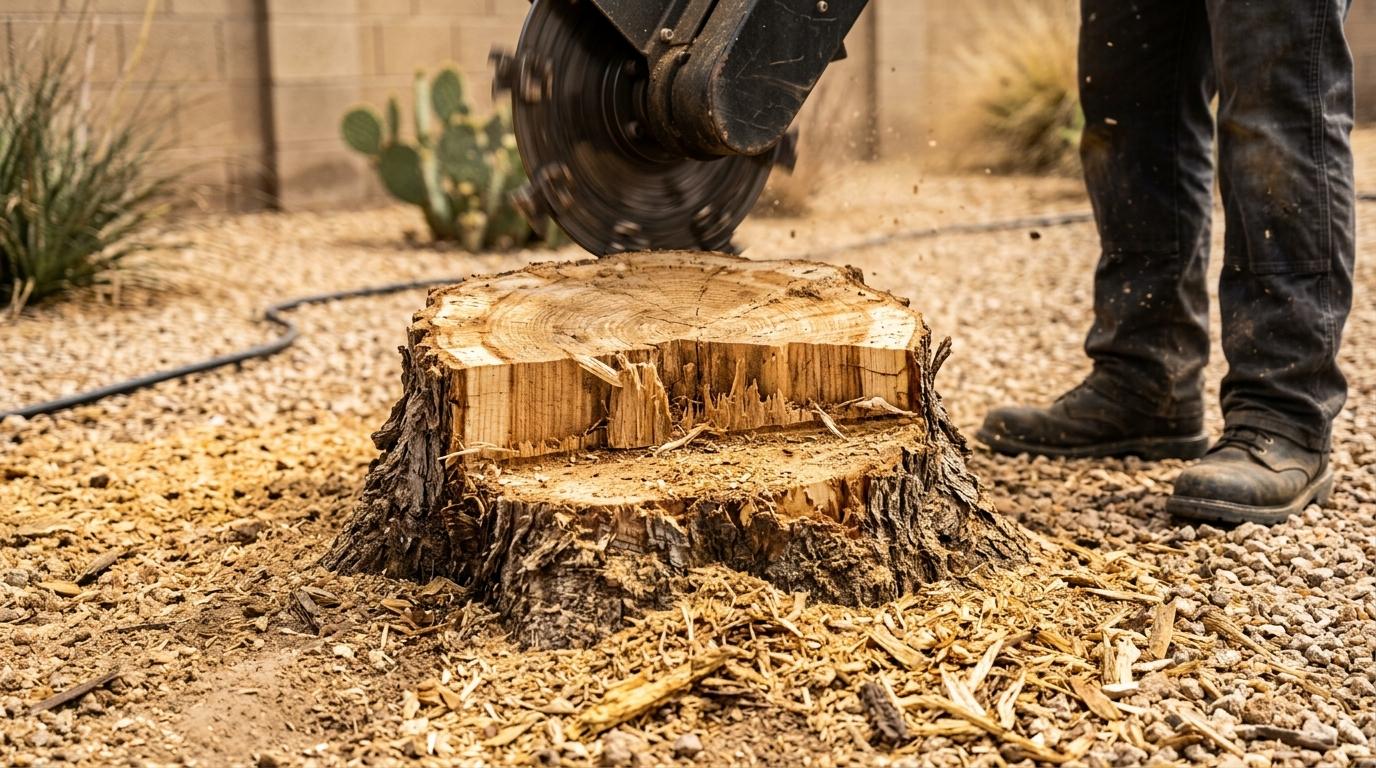
Stump grinding is the process of mechanically reducing a stump below ground level so the visible base is gone and the area can be restored. It is a practical solution when a stump is creating a tripping hazard, blocking a future landscape feature, or simply making the property harder to maintain.

In El Mirage, stump work should be approached with care. Desert landscapes often include gravel, irrigation lines, hardscape edges, block walls, and nearby plantings that need protection during the job. A professional crew can assess access, identify nearby utilities or irrigation components, and select the right equipment for the size and position of the stump.

Pro Natural Landscape LLC provides stump grinding and stump removal as part of a full outdoor service offering. That matters when the work does not stop at the stump. After grinding, the area may need grading, gravel replacement, irrigation repair, fresh planting, or a more complete yard update.

Common reasons to schedule stump grinding in El Mirage

A leftover stump may seem harmless at first, but it often becomes a problem over time. Once the tree is gone, the stump stays in the way of mowing, edging, foot traffic, and future improvements.

Property owners often call for stump grinding when they notice issues like these:

  • Trip hazards
  • Pest activity
  • Sprouting around the base
  • Blocked planting space
  • Difficult mowing and maintenance

Some situations call for faster action than others:

  • After tree removal: finish the job so the area is usable again
  • Before new landscaping: clear room for gravel, turf, shrubs, or pavers
  • Near walkways or driveways: reduce obstacles and awkward edges
  • On commercial sites: keep outdoor areas neat, accessible, and easier to maintain

Tree removal and stump grinding as one coordinated service

When a tree is dead, diseased, storm-damaged, or growing too close to structures, removal and stump grinding are often best handled together. Coordinating both services saves time and prevents the property from being left with a rough, incomplete look.

A careful process starts with an on-site assessment. The crew reviews the tree’s condition, the surrounding space, access for equipment, and any nearby structures or landscape features. Large or hazardous trees may need to be removed in sections to protect the property and reduce disruption.

Once the tree is down, the stump can be ground below grade so the remaining area can be restored. Debris removal is part of the value here as well. Branches, logs, and grindings should not be left scattered across the yard unless the property owner wants chips retained for another use.

That coordinated approach is especially useful in El Mirage properties where outdoor areas often combine decorative rock, desert-adapted planting, lighting, irrigation, walls, and paved surfaces in a compact layout.

What the stump grinding process usually includes

A professional stump grinding visit should feel organized from the start. The work is not just about running a machine over wood. It includes planning, protection, cleanup, and site restoration.

A typical service flow includes:

  • Site review: identify stump size, root flare, access, and nearby obstacles
  • Safety setup: protect the work zone and control debris during grinding
  • Grinding below grade: reduce the stump to a depth suitable for restoration
  • Cleanup: remove debris or leave grindings based on the project plan
  • Finish options: backfill, regrade, add gravel, or prepare for planting

In many cases, grinding is the most efficient option because it removes the visible stump without the larger disruption that can come with full extraction. That can be a smart fit for residential yards, HOA-managed areas, and commercial properties where preserving the surrounding surface matters.

Stump grinding vs. full stump removal

Both services have value, and the right choice depends on your plans for the space.

Service Best For Main Benefit Considerations
Stump Grinding Most residential and commercial landscapes Faster, less invasive, clears the visible stump Some root material remains below ground
Full Stump Removal Areas needing deeper excavation or major reconstruction Removes stump and root mass more completely More digging, more site disruption, often higher cost

If the goal is to plant new shrubs, refresh gravel, install artificial turf, or restore a general landscape bed, stump grinding is often enough. If the area is being rebuilt for structural work or deeper excavation, full removal may make more sense.

An on-site estimate helps determine the best fit.

Why local experience matters for stump grinding in El Mirage

El Mirage landscapes are shaped by heat, drought, compacted soil, and practical water use. Stump grinding in this setting is not the same as working in a yard with thick turf and deep organic soil. The property may have decomposed granite, desert shrubs, timer-controlled irrigation, paver borders, or narrow side-yard access that changes how the job should be done.

Local experience helps with details that are easy to miss:

  • Protecting nearby irrigation and valve boxes
  • Limiting damage around gravel and decorative stone
  • Working around block walls, patios, and driveways
  • Recommending drought-tolerant replacements after tree removal

This is where a full-service landscape company can offer real efficiency. If stump grinding is just one step in a bigger outdoor project, it helps to work with a team that can also handle grading, gravel installation, irrigation adjustments, planting, hardscape improvements, and site cleanup.

Residential and commercial stump grinding solutions

Residential clients often want to reclaim yard space quickly. A front yard stump may be ruining curb appeal. A backyard stump may sit right where a future seating area, turf section, or shade planting is planned. Grinding the stump opens those options back up.

Commercial properties have a different set of priorities. Appearance, pedestrian safety, and maintenance efficiency are often at the top of the list. A stump near an entry, parking area, or walkway can create an obvious hazard and leave a poor impression. Prompt service helps keep the property looking managed and professional.

Pro Natural Landscape LLC serves both residential and commercial clients in El Mirage and nearby Arizona communities, with free estimates and financing options available through Hearth for qualifying projects.

What to expect from a professional stump grinding company

Property owners should expect clear communication, careful work, and a clean site once the job is done. Those basics matter just as much as the grinding itself.

Look for service features like these:

  • Straightforward estimates
  • Trained crews with proper equipment
  • Attention to safety and local requirements
  • Thorough debris cleanup
  • Options for landscape restoration after the stump is gone

Experience also matters when the stump is tied to a larger tree issue. If the tree still needs to be removed, the work should be planned with safety first, especially around structures, fencing, utilities, and neighboring landscape features.

Landscape restoration after stump grinding in El Mirage

Once the stump is gone, the area can become something useful again. That is often the most satisfying part of the process.

The cleared space can be finished with fresh gravel, new desert-friendly shrubs, irrigation updates, pavers, or artificial grass, depending on the layout of the property. Some owners choose a simple backfill and rake-out. Others use the opening as the starting point for a broader landscape upgrade.

Because Pro Natural Landscape LLC offers tree work, grading, irrigation, gravel installation, pavers, lighting, fencing, and general landscape improvements, stump grinding can fit into a larger plan without the need to coordinate multiple contractors.

If a stump is taking up space, creating risk, or keeping your yard from moving forward, a local on-site estimate is the right next step. A well-planned stump grinding service can clear the problem, protect the surrounding landscape, and make room for a cleaner, more functional outdoor space.

How to Build a Low-Maintenance Front Yard (Step-by-Step)

A low-maintenance front yard is not a bare yard. Done well, it looks clean, welcoming, and purposeful while asking for far less watering, mowing, trimming, and seasonal replacement.

That balance matters even more in hot, dry parts of Arizona, where traditional lawns can consume time, water, and money at a pace many homeowners would rather avoid. The good news is that a front yard can look polished and still be practical. With the right layout, plant choices, and materials, the work drops sharply after installation.

Step 1: Assess Front Yard Conditions Before You Build

Start with the site you already have, not the picture in your head. A front yard that gets full afternoon sun behaves very differently from one shaded by a mature tree or neighboring wall. Soil texture, drainage, slope, and foot traffic all shape which low-maintenance front yard ideas will actually hold up.

Spend a few days observing the yard at different times. Watch where water pools after irrigation or rain. Notice where the sun is harshest. Check whether people naturally cut across the lawn from the driveway to the door. Those clues help you place plants, walkways, and gravel where they will work with the property instead of fighting it.

Before sketching anything, make notes on a few basics:

  • full sun areas
  • afternoon shade pockets
  • compacted or rocky soil
  • drainage trouble spots
  • high-traffic paths
  • areas visible from the street

This first step keeps costly mistakes off the project list. It is much easier to move a line on paper than a tree, paver border, or irrigation zone later.

Step 2: Reduce Lawn and Create Low-Maintenance Yard Zones

The fastest way to lower front yard maintenance is to reduce turf. Grass usually demands the most mowing, edging, fertilizing, and watering. A smaller lawn, or no lawn at all, opens the door to a much more efficient design.

Break the front yard into zones. One zone might be a walkway and entry. Another could be drought-tolerant planting beds. Another might be decorative gravel with boulders or accent plants. This structure makes the yard easier to install, easier to irrigate, and easier to maintain throughout the year.

For homeowners who still want some green, keep it intentional. A small patch of turf near the entrance or along the driveway can deliver the look without dominating the whole yard. In many Arizona neighborhoods, artificial grass is also used sparingly as a visual feature rather than as wall-to-wall coverage.

Here is a practical way to compare common front yard zones:

Yard Element Best Use Water Demand Maintenance Level
Drought-tolerant planting beds Color, texture, curb appeal Low Low
Decorative gravel Open areas, weed suppression, clean finish Very low Very low
Pavers or stone paths Walkways, entry routes, patios None Very low
Artificial grass Small visual lawn areas None Low
Natural lawn Play space or traditional look High High

A strong front yard usually combines two or three of these, not all five. Simpler is usually better.

Step 3: Improve Soil for a Front Yard That Needs Less Water

Healthy soil makes every other step more effective. Poor soil dries out too fast, sheds water, or holds moisture in the wrong places. Either way, plants struggle, and struggling plants create more work.

If the soil is compacted, loosen it before planting. If it is very sandy, add compost to help it hold moisture a little longer. If it is dense clay, compost helps with structure and root growth there as well. This is not about creating perfect garden soil everywhere. It is about giving roots a better start so plants can establish faster and depend less on constant care.

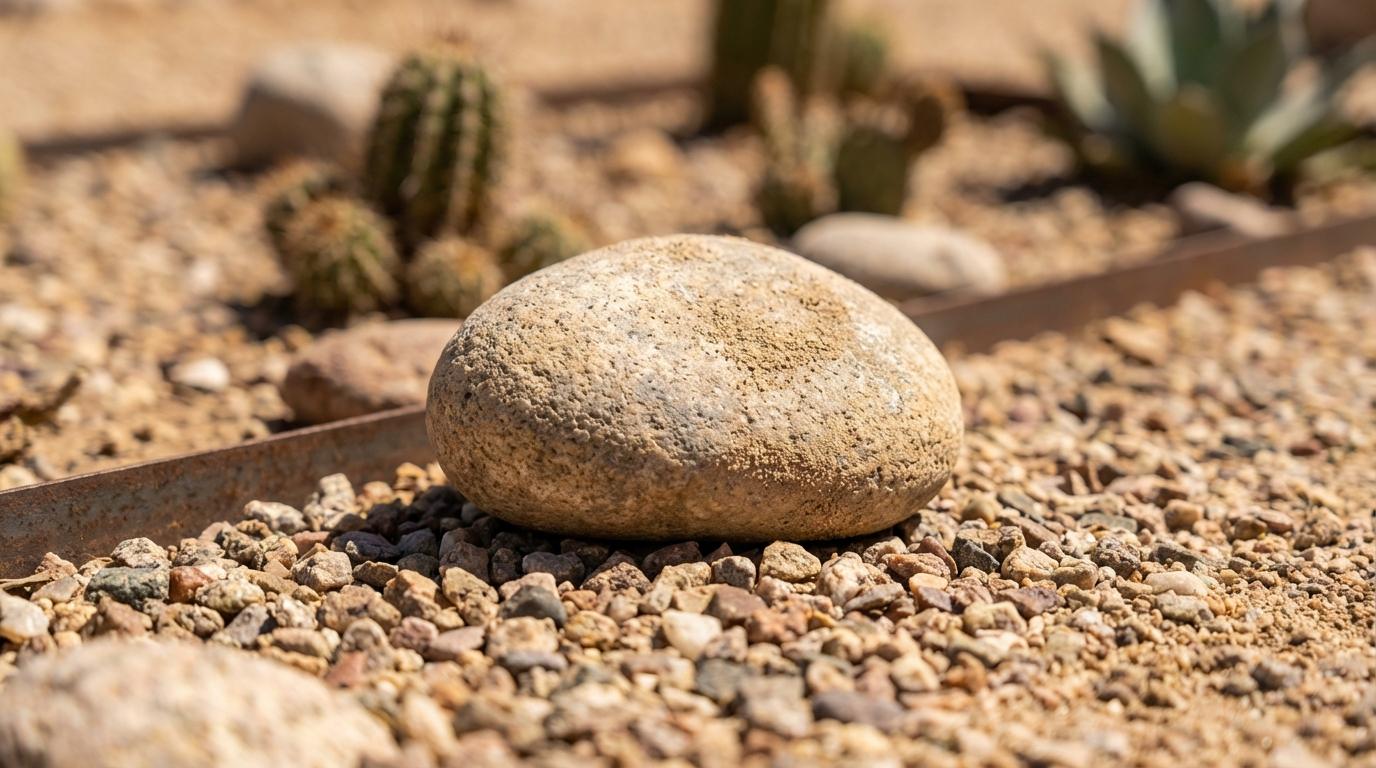
Mulch belongs in this step too, even though many people think of it as a finishing touch. Organic mulch around shrubs and perennials helps the soil stay cooler, reduces evaporation, and slows weed growth. In desert-style landscapes, gravel mulch can also work well in the right areas, especially around cacti, agaves, and pathways. The key is choosing the right material for the right zone.

Step 4: Choose Drought-Tolerant Plants for a Low-Maintenance Front Yard

Plant selection is where the yard either becomes easy or stays demanding. Low-maintenance front yard ideas work best when plants fit the climate, the sun pattern, and the soil. In El Mirage and similar Arizona communities, that usually means drought-tolerant, heat-tolerant, and often native or desert-adapted plants.

A common mistake is buying plants based only on flower color or a nursery tag that says “full sun.” Full sun in a mild climate is not the same as full sun in the West Valley. The most reliable front yard plants are the ones that can take reflected heat, dry spells, and lean soil without needing constant correction.

A solid plant palette usually includes a few categories:

  • Foundation shrubs: Texas sage, dwarf oleander alternatives suited to local codes, chuparosa, desert ruellia
  • Accent plants: agave, red yucca, hesperaloe, sotol
  • Soft texture plants: deer grass, muhly grass, damianita
  • Ground-level color: lantana, blackfoot daisy, desert marigold, trailing rosemary

Use repetition. Three or five of the same shrub usually look better, and stay easier to maintain, than a collection of one-off plants with different pruning and watering needs. Repetition also gives the front yard a calm, designed look from the street.

Native plants deserve special attention here. They are often better adapted to local heat swings and rainfall patterns, and many support birds and pollinators while still staying low effort. That means your front yard can be resilient without feeling sparse.

Step 5: Group Plants by Water Needs and Mature Size

A low-maintenance plant list can still become a high-maintenance yard if the layout is wrong. Plants with similar water needs should share the same area. That lets irrigation deliver the right amount to each section instead of overwatering some plants to keep others alive.

Keep larger shrubs and small trees away from entries, windows, and walkways unless their mature size clearly fits. Many front yard problems start when a plant looked small in a nursery pot and later grew into constant shearing. Frequent shearing is one of the biggest hidden maintenance costs in residential landscaping.

Think in layers. A small tree or tall accent shrub can anchor the yard. Mid-height shrubs fill most of the visual field. Lower flowering plants or groundcovers soften the front edge. When these layers are spaced correctly, the yard looks full without becoming crowded.

Step 6: Install Drip Irrigation for Efficient Front Yard Watering

Smart irrigation is one of the best low-maintenance front yard ideas because it removes inconsistency. Drip irrigation sends water to the root zone instead of spraying large areas into the air. In hot weather, that difference matters.

A basic system should include separate zones for different plant types, pressure regulation, proper emitters, and a timer. If trees, shrubs, and accent plants all share one watering schedule, waste goes up and plant health usually goes down. A timer keeps things regular, and seasonal adjustments keep things efficient.

A few irrigation priorities make a big difference:

  • Separate zones: trees, shrubs, and turf alternatives should not all run together
  • Deep watering: less often, but long enough to encourage stronger roots
  • Seasonal timer changes: summer and winter schedules should never be identical
  • Routine checks: look for clogged emitters, broken lines, and runoff

For homeowners who want even less daily involvement, a professionally planned irrigation layout with smart controls can save time year-round.

Step 7: Add Gravel, Pavers, and Hardscape to Cut Ongoing Work

Hardscape is not just decorative. It is a practical tool for reducing upkeep. Gravel, pavers, edging, and stone pathways reduce the amount of space that needs trimming, watering, and weed control. They also make the yard feel finished.

Gravel is especially useful in Arizona front yards because it handles heat well, drains well when installed properly, and pairs naturally with desert plants. Pavers create clear walking routes and help stop foot traffic from compacting planting beds. Edging keeps gravel out of beds and mulch out of walkways, which saves cleanup later.

This is where restraint matters. Too much hardscape can make a front yard feel harsh. Too little can leave the design looking unfinished and harder to maintain. The best results usually come from a balanced mix of planted space and durable surface materials.

Step 8: Use Mulch and Weed Prevention to Keep Maintenance Light

Weeds love open soil. Leave bare gaps in the yard, and you create ongoing work. Covering the soil is one of the simplest ways to keep the maintenance load low.

In shrub and perennial beds, a generous layer of mulch helps suppress weed growth and slows moisture loss. In more desert-style sections, decorative gravel can fill that role. The point is not just appearance. It is protection. Covered soil is easier to manage, and planted beds stay stable longer.

Dense planting helps too. When plants are spaced to fill in over time, fewer weed seeds get the sunlight they need. That turns the design itself into a maintenance strategy.

Step 9: Follow a Simple First-Year Front Yard Maintenance Plan

Even the best low-maintenance front yard needs some attention during the first year. That is normal. Plants are getting established, irrigation is being adjusted, and the yard is settling into its long-term rhythm.

What you do in the first few months often determines how easy the yard will be later. Water deeply enough for roots to spread. Replace failing plants early instead of trying to nurse poor performers along for a full season. Remove weeds early before they seed. Pull weeds while they are small. Refresh mulch or rake gravel back into place as needed.

A simple first-year plan usually looks like this:

  1. Check irrigation monthly and adjust with the weather.
  2. Remove weeds early before they seed.
  3. Lightly prune only for shape, safety, or dead growth.
  4. Watch plant size so crowding does not begin.

After establishment, many front yards settle into a very manageable routine. That may mean occasional pruning, seasonal timer changes, and a few cleanup visits each year rather than weekly chores.

Step 10: Keep the Design Simple, Cohesive, and Easy to Maintain

Some of the best low-maintenance front yard ideas are really design decisions. Too many materials, too many plant varieties, and too many small beds create visual clutter and more maintenance points. Simplicity lowers labor.

Choose a limited palette. Repeat the same gravel in multiple sections. Use one or two paver styles. Stick with a focused plant selection rather than collecting every attractive specimen at the nursery. A restrained design usually looks more refined, especially from the curb.

For homeowners in El Mirage and surrounding Arizona communities, this kind of planning often leads to the strongest results: drought-tolerant plants, efficient irrigation, practical hardscape, and a layout that fits the home instead of competing with it. A family-owned landscaping team with local experience can help bring all of those pieces together, from grading and gravel installation to pavers, artificial grass, and irrigation, so the finished front yard looks sharp and stays manageable long after the project is done.

Irrigation Repair & Valve Replacement in El Mirage, AZ

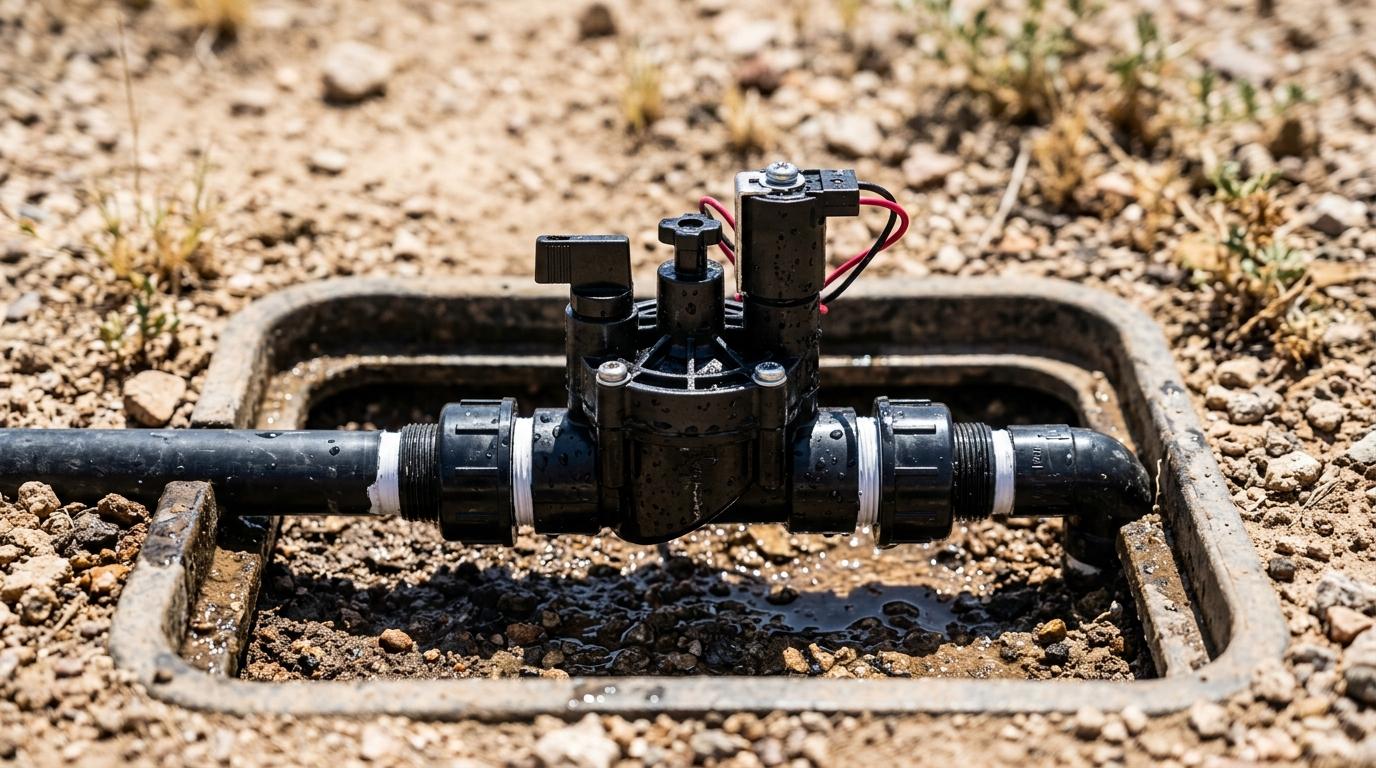
A dependable irrigation system is not a luxury in El Mirage. It is what keeps lawns, trees, shrubs, and commercial landscapes alive through long stretches of heat, dry wind, and mineral-heavy water. When a valve sticks, a pipe leaks, or a zone stops turning on, the damage can move quickly from wasted water to stressed plants and rising utility costs.

Pro Natural Landscape LLC provides irrigation repair in El Mirage, AZ for residential and commercial properties, with service focused on practical diagnosis, durable repairs, and water-smart performance. From leaking lines and clogged emitters to full irrigation valve replacement, the goal is simple: restore consistent coverage, protect the landscape, and help the system run the way it should.

Irrigation Repair Services in El Mirage, AZ

Irrigation systems in the West Valley deal with conditions that wear components down faster than many property owners expect. High summer temperatures, coarse soils, and very hard water can shorten the life of valves, heads, fittings, and timers. A problem that starts small can spread across the yard if it is left alone.

That is why irrigation repair needs more than a quick patch. A useful repair starts with finding the actual source of the issue. Sometimes the symptom is obvious, like water bubbling up near a valve box. Sometimes it shows up as a weak zone, a dry corner, or a sprinkler that never shuts off.

Service commonly includes repair or replacement for drip and sprinkler components across the system, including lines, fittings, heads, emitters, valves, solenoids, wiring, and controllers.

Irrigation problem What you may notice Typical service
Leaking pipe or fitting Soggy soil, pooling water, low pressure Pipe repair, fitting replacement, pressure check
Failed irrigation valve Zone stays on, zone stays off, inconsistent flow Valve rebuild or full valve replacement
Clogged drip emitters or nozzles Dry plants, uneven watering Cleaning, flushing, emitter or nozzle replacement
Broken sprinkler head Geysering, misting, poor spray pattern Head replacement and alignment
Controller or wiring fault Zone will not start or schedule fails Electrical diagnosis, wire repair, timer adjustment

Common Signs You Need Irrigation Valve Replacement in El Mirage

Valve problems are some of the most common irrigation issues in desert landscapes. A failing valve can keep one zone from running at all, or it can keep water flowing long after the cycle should have ended. In either case, the yard pays the price.

Small irrigation issues rarely stay small in the desert.

If your system has been acting inconsistently, there is a good chance a valve, solenoid, or related electrical connection needs attention. Common warning signs include:

  • Dry patches in one zone
  • Zone stays on: water continues to run after the controller shuts off
  • Zone will not start: the valve may be stuck, the solenoid may have failed, or wiring may be damaged
  • Sputtering or weak sprinkler heads
  • Valve box fills with water: a cracked body, bad diaphragm, or leaking connection may be present
  • Higher water bills

When a valve is badly worn, repeated patch repairs may not be the best use of time or money. Replacement is often the smarter move, especially on older systems affected by hard water buildup and long-term heat exposure.

Irrigation Valve Diagnosis and Repair Process in El Mirage

A proper repair starts with testing the system zone by zone. That can include running the controller manually, checking which stations activate, watching spray and drip output, and inspecting for leaks, pressure loss, or poor coverage. If a zone fails completely, the issue may be the valve itself, the solenoid, the wiring, or the timer.

Once the source is narrowed down, the repair can move forward with a clear plan. If a valve can be rebuilt reliably, that may be an option. If the body is cracked, the diaphragm is worn out, or mineral deposits have caused repeated sticking, full replacement is often the better long-term answer.

The replacement process usually includes exposing the valve, shutting off the water supply, removing the damaged component, and installing a properly matched new valve with secure fittings and waterproof electrical connections. After that, the zone is tested under normal pressure to confirm the valve opens and closes correctly and that no leaks remain in the box or nearby line.

Controller settings matter too. Once the mechanical repair is complete, run times and zone schedules can be adjusted to fit seasonal conditions in El Mirage so the system is not overwatering or leaving parts of the landscape behind.

Why Desert Conditions in El Mirage Cause More Irrigation Problems

El Mirage landscapes face a demanding mix of heat, alkaline soil, and very hard water. Those conditions affect almost every part of an irrigation system. Plastic components can become brittle over time. Mineral scale can collect inside valves and emitters. Soil movement and erosion can stress buried lines or expose shallow piping after storms.

These local conditions are a big reason irrigation systems benefit from a repair approach built for Arizona, not a generic one.

A few of the most common local stress factors include:

  • Hard water scale: mineral deposits can restrict flow and interfere with valve movement
  • Coarse, fast-draining soils
  • Summer heat: seals, diaphragms, and plastic fittings age faster
  • Monsoon washouts
  • Frequent run cycles: heavy seasonal demand puts extra wear on valves and controllers

This is also why irrigation scheduling should change through the year. A system that is left on the same settings month after month usually wastes water or underwaters plants. Smart adjustments after storms, during peak heat, and in cooler months help protect both the yard and the equipment.

Preventive Irrigation Maintenance for Homes and Commercial Properties

Repair work solves the immediate issue, but routine maintenance is what helps reduce repeat failures. Periodic irrigation checks can catch clogged emitters, misaligned heads, slow leaks, worn valves, and timer problems before they grow into larger repairs.

That matters for homeowners who want a healthy yard, and it matters just as much for HOAs, retail properties, office sites, and rental homes where appearance and water efficiency both affect value. A neglected irrigation system can lead to bare spots, dying plant material, slippery overspray, and avoidable water waste.

Preventive service may include system testing, head adjustment, drip line inspection, valve checks, timer programming, and seasonal changes to watering schedules. In a climate like El Mirage, that kind of attention keeps the system working with the environment instead of fighting against it.

Residential and Commercial Irrigation Repair Backed by Local Experience

With more than a decade of experience serving El Mirage and surrounding Arizona communities, Pro Natural Landscape LLC brings local knowledge to irrigation repair and valve service. As a family-owned company, the focus stays on communication, dependable scheduling, and results that make sense for the property.

Services are available for both residential and commercial landscapes, whether the job involves a single stuck valve, multiple leaking zones, drip irrigation repair, or broader outdoor improvements tied to the irrigation system. Because irrigation is closely connected to plant health, grading, drainage, and landscape performance, repairs can be handled with the yard as a whole in mind.

Free estimates are available, and financing options through Hearth can help make larger outdoor projects more manageable when repairs connect to wider landscape updates.

Schedule Irrigation Repair in El Mirage, AZ

If your sprinkler or drip system is leaking, skipping zones, flooding an area, or failing to keep plants healthy, now is a good time to get it checked. Fast action can save water, prevent plant loss, and stop a minor valve issue from turning into a much larger repair.

Pro Natural Landscape LLC provides irrigation repair in El Mirage, AZ with a practical, quality-driven approach built for local conditions. From valve replacement and line repair to system checks and seasonal adjustments, the work is aimed at keeping landscapes efficient, reliable, and ready for Arizona weather.

Yard Grading & Leveling Services in El Mirage, AZ

A yard that looks mostly flat can still hold water in the wrong places, wash soil away from plant beds, or leave a patio base uneven. In El Mirage, those small grade problems often become much more noticeable during monsoon season, when fast, heavy rainfall tests every slope on the property.

Professional yard grading creates order in the landscape. It reshapes the surface so water moves where it should, supports new landscaping and hardscaping, and gives the entire yard a cleaner, more usable layout. For homeowners, property managers, and commercial properties, it is one of the smartest ways to protect outdoor space before larger problems take hold.

Why grading matters in El Mirage

Desert landscapes have their own challenges. El Mirage properties deal with compacted soils, hardpan or caliche in some areas, intense heat, and sudden storm runoff. A yard that is slightly off-grade may stay unnoticed for months, then show clear trouble after one strong rain.

Good grading helps direct water away from foundations, walls, walkways, and outdoor living areas. It can also reduce standing water, limit erosion, and create a better base for gravel, turf, pavers, or planting beds. When the ground is shaped correctly, the rest of the landscape has a much better chance of performing well.

It also makes day-to-day use of the yard more enjoyable. A level surface feels safer, looks more polished, and supports everything from play areas to patios.

After a site review, common warning signs usually stand out quickly:

  • Water pooling near the house
  • Low spots in gravel or dirt areas
  • Soil erosion along walls or fence lines
  • Uneven ground under artificial turf
  • Paver movement caused by poor base conditions
  • Runoff collecting near gates, walkways, or patios

What yard grading can fix

Some grading projects are focused on drainage. Others are about creating a level, stable surface for a future installation. Many do both at the same time.

If a yard slopes toward the home, grading can create positive flow away from the structure. If the property has dips and ridges, leveling can smooth those transitions so the space works better visually and functionally. If there is a plan for pavers, artificial grass, irrigation, or a new planting layout, grading often comes first because every later step depends on the ground being prepared correctly.

On larger properties, land grading may involve more substantial reshaping with heavy equipment. On smaller residential lots, the work may center on correcting a few trouble areas, adjusting slope, compacting soil, and fine-tuning the finish grade around existing features.

What the process typically looks like

A strong grading result starts with the layout, not just the equipment. The grade has to make sense for the structures already on site, the way water enters and exits the property, and the planned use of the yard. That is why measurements, elevations, and drainage paths matter from the beginning.

Heavy machinery is often used for the main earthwork. Depending on the site, that may include skid steers, loaders, excavators, or other equipment capable of cutting down high areas and filling low ones. Precision tools like laser levels and grade stakes help shape the final slope with greater accuracy.

Once the grade is set, soil compaction becomes a key step. Loose fill can settle later and undo the work. Proper compaction creates a firmer base for traffic, irrigation, hardscaping, and surface materials.

A typical project may include:

  • Site review: checking slope, runoff patterns, soil condition, and access
  • Cut and fill: removing high areas and building up low spots
  • Drainage shaping: forming swales, gentle slopes, or collection paths
  • Compaction: stabilizing the soil to reduce settling
  • Finish grading: preparing the surface for gravel, turf, pavers, or planting

Built to support the rest of the landscape

A grading project rarely stands alone. In many cases, it is the foundation for the next phase of the yard.

Pro Natural Landscape LLC provides land grading and land leveling as part of a wider range of outdoor services in El Mirage and nearby communities. That matters because drainage, surfacing, irrigation, and hardscape work often need to be coordinated instead of handled as separate pieces. A properly graded yard can then support artificial grass installation, paver patios, gravel layouts, drip irrigation, retaining walls, and planting beds with fewer future issues.

Tree removal, stump grinding, and junk or debris removal can also be part of site preparation when the area needs to be cleared before reshaping begins. If a slope needs structural support, block wall construction may be added to help hold grade changes in place.

Grading plus related improvements

When several outdoor goals are tied together, the work tends to move more efficiently and with better long-term results.

Related service How it supports grading
Irrigation installation Helps water reach the right zones after the surface is reshaped
Paver installation Needs a stable, correctly sloped base to stay level
Artificial grass Performs best on a smooth, compacted sub-base
Block or retaining walls Helps manage soil where elevation changes are more significant
Gravel installation Finishes the yard cleanly and can support low-water landscape design
Landscape design Connects drainage, circulation, planting, and visual balance

Budget and schedule expectations

Pricing for yard grading in the El Mirage area depends on the size of the yard, how much cut and fill is needed, soil conditions, site access, and whether related work is included. Regional averages around Phoenix often fall near $1 to $2 per square foot for straightforward grading, though more complex projects can run higher.

Projects with hard caliche, steep corrections, drainage additions, hauling, or limited access tend to cost more. A basic leveling job in a smaller yard may be completed quickly, while a larger regrade with compaction, drainage shaping, and site cleanup can take several days or longer.

These broad ranges can help frame expectations, though they are not fixed quotes:

Project scope General regional range Typical timeframe
Small yard correction $1,000 to $1,500 1 to 2 days
Medium residential regrade $2,000 to $5,000 2 to 5 days
Large lot or major reshaping $8,000+ Several days to 1+ week

The most accurate way to price a grading project is an on-site estimate. Pro Natural Landscape LLC offers free estimates, which is especially useful when drainage concerns, base preparation, and future landscape work all need to be reviewed together. Financing options through Hearth may also be available for qualifying projects.

Why local experience matters

Grading in Arizona is not only about making the yard look level. It is about reading how water will behave on a hot, dry property that still gets intense seasonal storms. Local knowledge helps with slope planning, soil behavior, and material choices that fit El Mirage conditions.

A family-owned, full-service landscaping company with more than a decade of experience can bring practical value here: clear communication, coordinated outdoor services, and work that stays focused on both performance and appearance. Residential and commercial properties benefit from that kind of planning because grading affects nearly every other surface in the yard.

Start with a site visit

If the yard has puddling, washouts, uneven ground, or a planned hardscape project, the next step is simple: have the property evaluated before the problem spreads. A site visit can identify drainage patterns, measure grade issues, and outline the right approach for leveling, reshaping, and preparing the space for what comes next.

Paver Repair & Re-Leveling in El Mirage, AZ

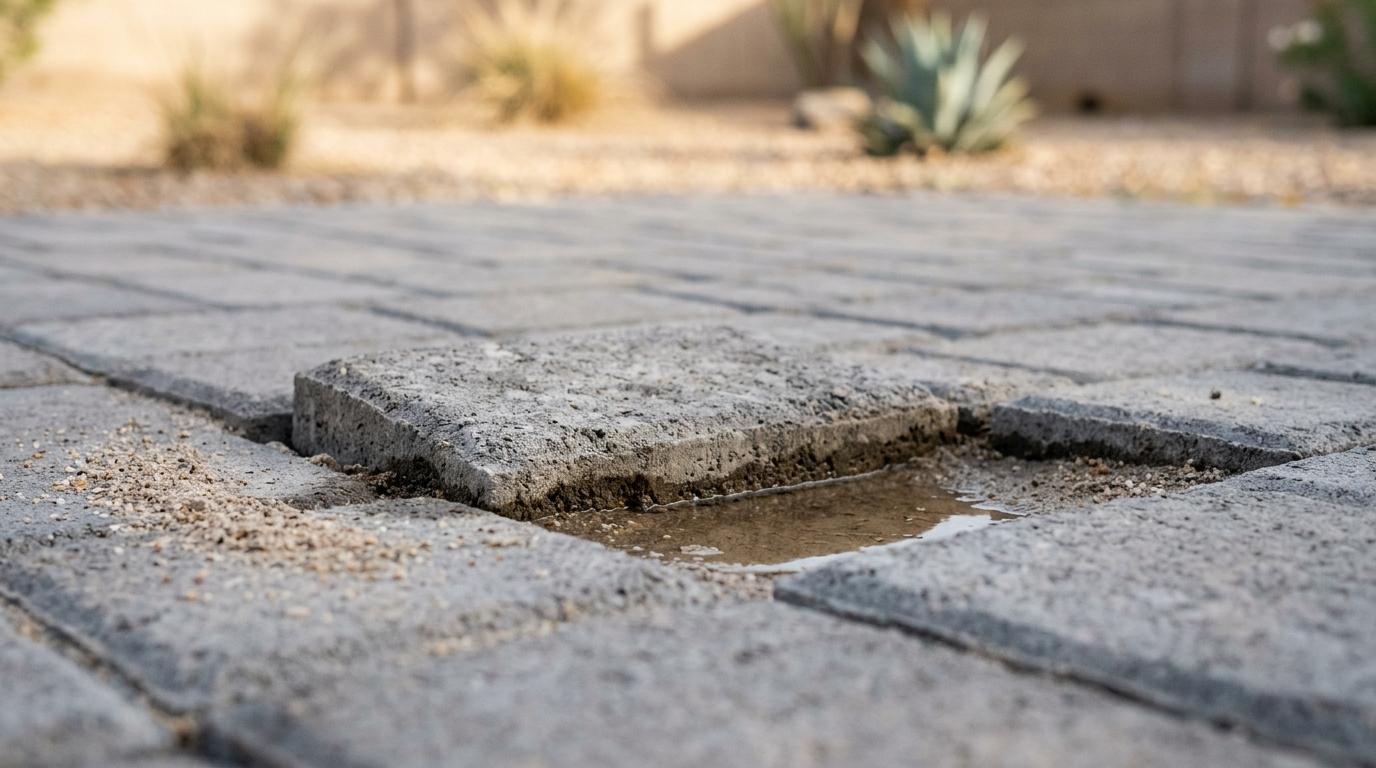
Uneven pavers can change the feel of an entire outdoor space. A driveway that once looked sharp starts to dip, a patio develops low spots that hold water, or a walkway becomes a tripping risk. In El Mirage, those problems often build slowly, then show up all at once after a monsoon storm, irrigation leak, or another long stretch of extreme heat.

Pro Natural Landscape LLC provides paver repair and re-leveling for homeowners, property managers, and commercial properties that need a durable fix rather than a temporary patch.

Why pavers shift in El Mirage

Desert landscapes put hardscapes under constant stress. El Mirage sees intense sun, wide temperature swings, dry periods, and sudden heavy rain. That combination can affect base materials, joint sand, edge restraints, and the soil below the surface.

Even a well-built paver surface can develop trouble over time if runoff is not directed properly or if the original installation did not include enough base preparation. In many cases, the visible problem is only the top layer of a larger issue below.

Common causes include:

  • Soil movement
  • Monsoon washout
  • Irrigation overspray
  • Poor drainage
  • Inadequate base depth
  • Weak edge restraints
  • Heavy vehicle traffic
  • Loss of joint sand

Signs your paver surface needs repair

Some damage is obvious. Some starts small and keeps spreading until the affected section becomes harder and more expensive to fix. Early repair usually protects more of the original installation and keeps the project focused on the problem areas.

You may need re-leveling or repair if you notice:

  • Sunken areas: Low spots that collect water or create a soft, uneven walking surface
  • Raised edges: Pavers that sit higher than surrounding pieces and create a trip hazard
  • Wobbling units: Individual pavers that rock underfoot instead of staying firmly locked in place
  • Joint loss: Sand washing out of the joints after wind, rain, or pressure washing
  • Spreading pattern: Gaps widening at the perimeter or curves losing their shape
  • Surface damage: Cracked, stained, or chipped pavers that affect appearance and function

A single loose paver can point to a much larger base problem.

What proper re-leveling involves

Quality paver repair is a methodical process. The affected section is typically lifted, the bedding and base are inspected, unstable material is removed, and the area is rebuilt to the right grade before the pavers are relaid and compacted.

That matters because resetting pavers over the same failed base usually leads to the same failure returning.

A repair approach built for desert conditions

In Arizona, re-leveling often calls for more than surface adjustment. The goal is to create a stable foundation that can handle heat, runoff, and daily use. Depending on the location and the type of paver area, repair work may include:

  • Careful lift and reset: Existing pavers are removed with attention to pattern, fit, and reusability
  • Base correction: Settled or washed-out aggregate is replaced and compacted in lifts
  • Bedding layer adjustment: The screeded sand layer is brought back to a consistent grade
  • Drainage improvement: Slopes, swales, or runoff paths are corrected to reduce future washout
  • Edge restraint repair: Border sections are secured so the field of pavers stays locked together
  • Joint stabilization: Fresh polymeric sand is installed to help resist erosion and weed growth

For patios and walkways, the finished surface should look clean and level. For driveways, it also needs to handle load.

Common problems and how they are addressed

Not every paver issue requires full replacement. Many surfaces can be restored by repairing the affected area and correcting the conditions that caused the movement.

Problem Likely Repair Strategy
Sunken patio section Lift pavers, rebuild base, re-screed bedding sand, relay and compact
Pooling water near house Regrade slope away from structure, reset pavers, improve drainage path
Loose or rocking pavers Remove affected units, correct bedding level, refill joints with polymeric sand
Washed-out joints after storms Clean surface, refill joints, compact, inspect for base erosion
Shifted driveway pavers Re-level area, strengthen base for traffic load, secure edges
Cracked individual units Replace damaged pavers and inspect surrounding field for movement
Spreading border Rebuild or reinforce edge restraint and tighten paver pattern

A strong repair preserves the look of the original design while correcting the weak point underneath.

Materials and methods that matter

In this climate, the details make a real difference. Angular crushed aggregate performs better than rounded material because it locks together during compaction. Proper bedding sand helps keep the surface even. Polymeric sand can help resist washout and limit weed intrusion in the joints.

Slope is another major factor. Paver surfaces should guide water away from structures and toward safe drainage areas. Without that, even a great-looking patio can start to fail after repeated storms or irrigation saturation.

For many projects, durable results depend on a few essentials:

  • solid excavation
  • stable compacted base
  • consistent bedding layer
  • correct pitch for drainage
  • reliable edge restraint
  • full joint sand installation

Repair or replacement?

Many property owners assume damaged pavers need to be torn out and rebuilt from scratch. Sometimes that is true, especially when the original installation has widespread base failure. In many other cases, targeted repair is the smarter move.

If the pavers themselves are still in good condition, lifting and relaying them can restore appearance and performance without changing the overall design. This is often ideal for patios, entry paths, courtyards, and portions of driveways where the problem is limited to certain sections.

A site visit helps determine whether the project calls for spot repair, partial reconstruction, or a broader reset of the paved area.

Residential and commercial applications

Paver repair is valuable anywhere safety, drainage, and appearance matter. The service is commonly used for:

  • driveways
  • front walkways
  • backyard patios
  • pool decks
  • courtyards
  • HOA common areas
  • commercial entrances

For commercial sites and multi-property portfolios, prompt repair can also reduce liability tied to uneven walking surfaces.

Local experience that supports better results

Pro Natural Landscape LLC is a family-owned company serving El Mirage and surrounding Arizona communities with over a decade of experience in outdoor construction and landscape improvement. That local background matters when dealing with desert soils, harsh UV exposure, and monsoon runoff patterns.

Paver repair often connects with other site conditions, not just the paved surface itself. A sinking area may point to runoff concentration, irrigation issues, grading trouble, or failing borders. Because the company also handles drainage, gravel, grading, sealing, and related exterior improvements, repairs can be planned with the full outdoor space in mind.

Clear communication and on-time project delivery are a priority, and free estimates help property owners understand the scope before work begins.

What to expect from the service process

A good repair process should feel straightforward. The first step is an on-site evaluation of the affected area, including slope, drainage behavior, base failure signs, edge condition, and the amount of paver movement.

From there, the scope can be defined with practical recommendations that fit the site. That may involve re-leveling a small section, replacing broken units, rebuilding a border, restoring joint sand, or combining repair with sealing once the surface is stabilized.

In many cases, the process includes:

  1. Site assessment and estimate
  2. Removal of affected pavers
  3. Base and bedding correction
  4. Reinstallation and compaction
  5. Joint sand application and cleanup

If needed, financing options are available through Hearth, which can make larger repairs more manageable.

When timing matters

Waiting too long can turn a minor repair into a broader reconstruction. Low spots tend to collect more water. Loose pavers allow more movement. Lost joint sand weakens interlock. One damaged edge can let an entire field start to spread.

That is why early service often saves money and protects the original investment.

For property owners in El Mirage looking to restore a patio, walkway, or driveway, paver repair and re-leveling can bring back both function and curb appeal with a solution designed for Arizona conditions.

Epoxy Garage Floor Coatings in El Mirage, AZ

A garage floor takes more abuse than almost any other surface around a home. Hot tires, dust, oil drips, lawn tools, storage bins, and constant foot traffic can turn plain concrete into a stained, rough, and hard-to-clean slab. In El Mirage, that wear happens even faster because of desert heat, windblown grit, and strong sunlight.

A professionally installed epoxy garage floor coating changes that experience. Instead of a porous concrete surface that traps dust and marks easily, the floor becomes sealed, durable, and visually sharp. For homeowners who want a garage that feels cleaner, brighter, and more finished, epoxy is one of the strongest upgrades available.

A cleaner, tougher garage floor

Epoxy coatings create a hard, protective layer over concrete. When the slab is prepared correctly and the coating is applied in a proper system, the result is a floor that stands up to daily use while staying much easier to maintain than bare concrete.

That matters in garages that do more than hold cars. Many properties use this space as a workshop, home gym, storage area, or entry point into the house. A coated floor helps the whole area feel more usable and far less neglected.

The difference is practical as much as visual.

  • Oil and fluid resistance
  • Reduced concrete dust
  • Easier sweeping and mopping
  • Better light reflection
  • Improved surface protection
  • Cleaner finished appearance

Why epoxy makes sense in El Mirage

Arizona garages deal with conditions that can punish lower-grade coatings. Heat can stress weak products. Fine dust and sand can grind into untreated concrete. Hot tires can damage poorly installed paint systems. A quality epoxy floor is chosen for this kind of environment, giving the slab a more resilient surface that is built for real use.

In El Mirage, that local climate factor matters. Surface preparation, product choice, and cure timing should all account for temperature swings and dry desert conditions. A garage floor coating is not just about adding gloss. It is about building a system that performs well in the place where it is installed.

Comparing common garage floor options

Many homeowners start by looking at paint kits or leaving the slab alone. Those options may seem cheaper at first, though they rarely deliver the same lifespan or finish quality.

Flooring Option Appearance Durability Maintenance Performance in Arizona Heat
Bare concrete Plain, dusty, stains easily Moderate High Can crack, discolor, and collect dust
Garage floor paint Better than bare concrete at first Low to moderate Moderate More likely to peel under hot tires
Epoxy coating system Clean, polished, customizable High Low Strong choice when installed correctly

A garage floor should not need constant touch-ups to stay presentable.

What the installation process should include

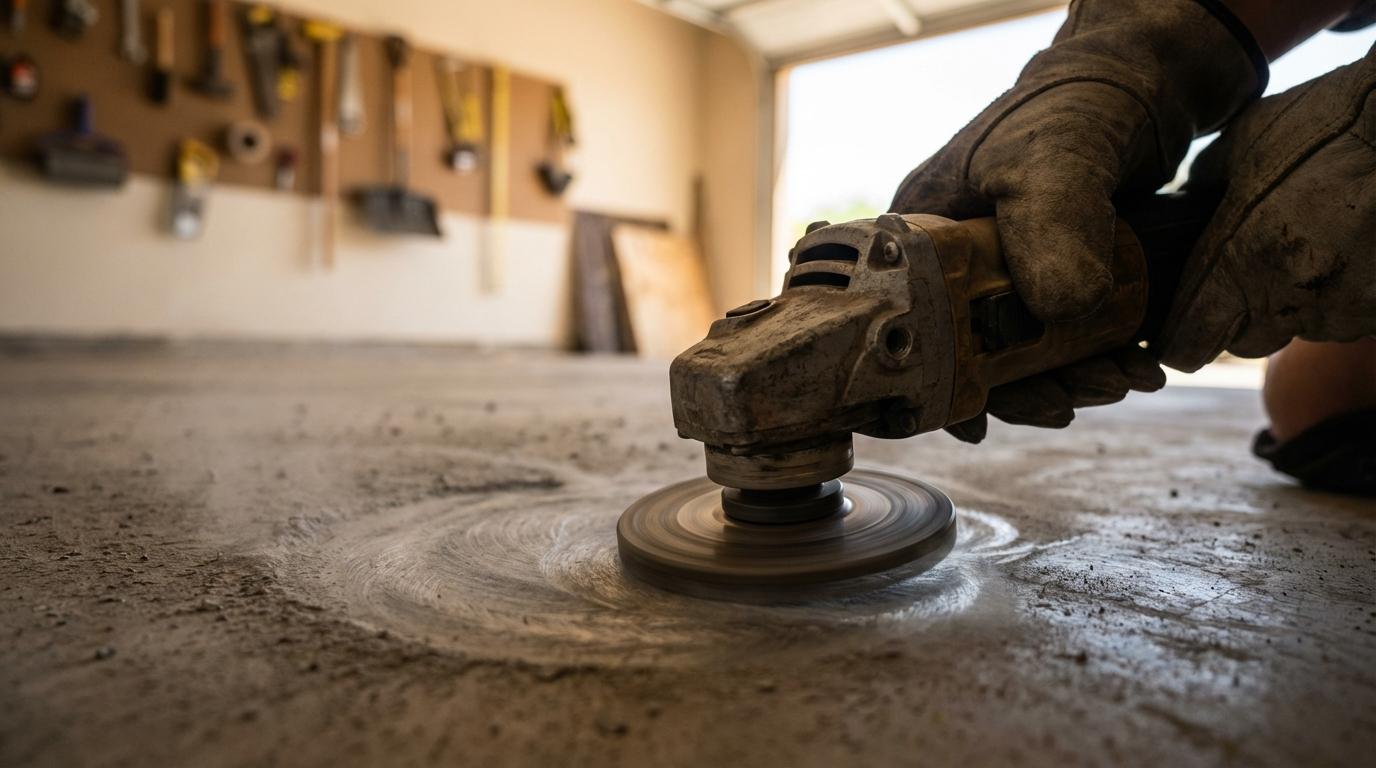
A long-lasting result starts before any coating is mixed. The concrete has to be checked, cleaned, and mechanically prepared so the new material bonds properly. If the slab has cracks, pitting, old residue, or surface weakness, those issues should be addressed before the coating goes down.

This is one reason professional installation matters. Good epoxy work is not just about the top layer people see. It depends on the prep, the repair work, the right coating build, and controlled application.

A typical process may include:

  • Surface prep: grinding the concrete to open the pores and remove contaminants
  • Repairs: filling cracks, patching chips, and leveling problem areas
  • Base coat application: creating the primary bond and color layer
  • Decorative broadcast: adding flakes or texture when that finish is selected
  • Protective topcoat: sealing the floor for wear resistance, easier cleaning, and a finished look

In many cases, a standard two-car garage takes a few days from preparation to final cure. Foot traffic may be possible earlier, while vehicle traffic usually needs more time. Exact timing depends on the coating system, slab condition, and weather conditions during installation.

Design options that go beyond gray concrete

Epoxy garage floors are popular because they work hard, though the design flexibility is a major advantage too. Homeowners are no longer limited to a plain industrial look. Color choices, flake blends, and finish textures make it possible to match the garage to the rest of the property.

A flake finish is often a favorite because it hides small bits of dust and minor marks better than a solid color. It also gives the floor more visual depth. Solid-tone coatings create a clean, sleek appearance, while textured additives can add traction where slip resistance is a priority.

For homes with a polished exterior, the garage should feel like part of the property, not an afterthought.

Day-to-day benefits after the floor cures

The best part of epoxy for many property owners is what happens after installation. The garage becomes easier to care for. Dust does not seem to cling to the surface in the same way. Spills are easier to wipe up. The floor looks more intentional, and the space feels brighter because coated surfaces reflect light more effectively than dull concrete.

That improved look can support the value of the property too. A finished garage sends a message that the home has been cared for. For homeowners preparing for resale, or simply investing in the condition of their space, that upgrade has real appeal.

Some of the most appreciated long-term benefits include:

  • Easy cleaning: sweep regularly and mop with a gentle cleaner when needed
  • Stain resistance: oil, dirt, and common garage spills are easier to remove
  • Reduced wear: the coating helps protect the slab from surface damage
  • Low upkeep: no frequent repainting or ongoing sealing schedule
  • Brighter space: reflective finishes can make the garage feel more open

Maintenance is refreshingly simple

Once the coating has fully cured, routine care is straightforward. A soft broom, dust mop, or blower can handle loose dirt and sand. Occasional mopping with mild soap and water is usually enough for general cleaning.

Harsh chemicals and abrasive scrubbing are rarely necessary. That is part of the appeal. A garage floor should support the pace of daily life, not create more work.

If the floor sees years of heavy use, a professional refresh coat may be an option depending on the system and wear pattern. Small repairs can often be addressed before they become larger issues.

A good fit for homes and commercial properties

Epoxy garage floor coatings are not only for single-family homes. Property managers, workshops, service spaces, and small commercial garages can also benefit from a sealed, durable concrete surface. A cleaner floor supports a better impression, and it can make routine cleanup much faster in active spaces.

That flexibility fits well with a company that already works across residential and commercial outdoor improvement projects. When one team can handle hardscape, exterior upgrades, and garage floor coatings, the process can feel more organized from start to finish.

Working with a local team matters

Local knowledge makes a difference with concrete surfaces in Arizona. Installers need to pay attention to heat, cure windows, slab conditions, and scheduling around weather patterns. A coating system that looks good on day one should still perform after repeated exposure to hot tires, dust, and regular use.

Pro Natural Landscape LLC brings that local perspective to projects in El Mirage and nearby communities, with a focus on quality workmanship, strong communication, and durable results. Homeowners and property managers looking for a cost-conscious upgrade with lasting value can benefit from clear guidance on surface condition, finish choices, and project timing.

Free estimates help make planning easier, and financing options through Hearth may be available for those who want to move forward with improvements on a schedule that fits their budget. A garage floor can become one of the most finished-looking spaces on the property with the right coating system and the right preparation behind it.

Tree Removal vs Trimming: When Each Option Makes Sense

A mature tree can be one of the most valuable features on a property. It gives shade, softens hard edges, frames the house, and adds a sense of permanence that new landscaping cannot match overnight.

Still, keeping every tree is not always the right call.

Property owners often face a practical question: should the tree be trimmed and preserved, or is full removal the safer, smarter option? The right answer depends on health, structure, location, risk, and long-term plans for the space. In many cases, trimming protects both the tree and the property. In others, removal is the responsible move because no amount of pruning can fix a serious structural problem.

Why trimming is usually the first option

When a tree is basically healthy, trimming is often the better place to start. Good pruning can remove deadwood, reduce excess weight on major limbs, improve air flow through the canopy, and create clearance over roofs, walkways, driveways, and fences. It can also help a tree direct energy toward stronger growth.

That matters because removal is permanent. Once a mature tree is gone, so are the shade, screening, habitat, and visual balance it brought to the landscape. If a tree can be kept safely with skilled pruning, that often gives the property the best mix of beauty, function, and value.

Trimming also works well when the issue is local rather than total. A few storm-damaged branches, low limbs over a sidewalk, canopy crowding, or minor interference with a roofline do not usually justify taking down the entire tree.

Common reasons trimming makes sense include:

  • Dead branch removal
  • Clearance over structures
  • Crown thinning
  • Weight reduction on extended limbs
  • Shape correction
  • Better light penetration for turf and planting beds

A healthy tree can often stay in place for many more years with the right maintenance cycle.

When removal is the safer decision

There is a point where pruning stops being a fix and starts being wishful thinking. If a tree has severe decay, major trunk failure, extensive root loss, or advanced disease, trimming may reduce symptoms without solving the real risk.

A useful way to think about it is this: pruning can manage parts of a tree, but it cannot rebuild structural strength that has already been lost. If too much of the canopy is dead, if the trunk is badly compromised, or if the roots can no longer anchor the tree, removal is often the only reliable answer.

This becomes even more urgent when the tree stands near a home, parked vehicles, a public sidewalk, a play area, or utility lines. A weak tree in an open field is one thing. A weak tree hanging over a roof is something else entirely.

Signs that often point toward removal include:

  • Extensive decline: Large portions of the canopy are dead, diseased, or no longer producing healthy growth.
  • Structural failure: Major cracks, cavities, splitting stems, or a hollow trunk indicate serious weakness.
  • Root instability: Root heaving, severed roots, or major soil disturbance can make the tree unsafe even if the canopy still looks decent.
  • Severe lean: A sudden lean, especially with disturbed soil around the base, can signal active failure.
  • Irreversible pest or disease damage: Some infestations and diseases leave too little sound material to preserve.
  • Repeated utility conflict: Trees growing into critical overhead lines may need removal when aggressive recurring pruning is the only alternative.

Dead trees belong in this category too. Even if they still appear solid from a distance, dead trees dry out, become brittle, and can fail without much warning.

It is not just about tree health

Two trees with the same defect can lead to different recommendations because their settings are different. A partly decayed tree in a low-traffic corner of a large property may be monitored and pruned. The same tree next to a bedroom, parking lot, or entry gate may need to come down.

Landscape goals matter as well. If roots are lifting paving, branches are scraping the roof, and the tree no longer fits the scale of the yard, the decision may go beyond arboriculture and into overall site planning. That is especially true when patios, irrigation updates, wall work, outdoor lighting, or grading changes are already part of the property plan.

The comparison below shows how the decision often plays out.

Factor Trimming often fits best Removal often fits best
Tree health Mostly healthy tree with isolated dead, damaged, or crowded branches Advanced decay, major dieback, widespread disease, or severe infestation
Structure Correctable branch issues or canopy imbalance Cracked trunk, unstable codominant stems, large cavities, major root failure
Safety Limited risk that can be reduced with pruning High risk to people, buildings, vehicles, or utilities
Cost pattern Lower immediate cost, repeated over time Higher one-time cost, fewer future pruning needs
Landscape value Important shade, screening, curb appeal, habitat Tree no longer suits the space or prevents needed site changes
Legal or utility issues Routine maintenance is allowed Removal may be required for serious line conflict or approved site work

This is why a quick glance from the street rarely tells the full story.

The Arizona climate changes the equation

In places like El Mirage and nearby Arizona communities, tree decisions often come with added pressure from heat, drought, and storm patterns. Trees under water stress may thin out, drop limbs, or decline faster after root disturbance. Monsoon winds can turn an existing weakness into a sudden failure.

Desert conditions also reveal the difference between a tree that is stressed and a tree that is structurally unsound. Some trees respond well to corrective pruning, irrigation review, and better maintenance. Others are too far gone, especially after prolonged neglect, poor planting choices, or damage from construction.

Location matters here too. A tree planted too close to block walls, driveways, pool decks, or foundations may create recurring conflict as it matures. In those cases, trimming may buy time, though it may not be a lasting answer if the species simply outgrew the space.

A local evaluation helps because regional experience matters. A crew familiar with area soils, irrigation patterns, common planting mistakes, and seasonal storm risk can judge whether a tree is likely to recover or continue declining.

What a professional assessment should look at

A good recommendation should be based on more than canopy appearance. Trees can look green and still be unsafe, especially when decay is hidden in the trunk or root zone. A proper site visit usually includes the tree itself, the surrounding grade, nearby structures, and the way the property is used day to day.

That broader view is valuable because the tree is part of a system. Irrigation, drainage, hardscape, lighting, walls, and traffic patterns can all affect the decision.

During an assessment, a property owner should expect attention to items like:

  1. Overall canopy condition
  2. Deadwood and branch attachment quality
  3. Trunk cracks, cavities, or fungal growth
  4. Root flare visibility and soil movement
  5. Lean, balance, and weight distribution
  6. Distance from roofs, fences, walks, and utilities
  7. Signs of pest activity or disease progression
  8. Whether pruning can reduce risk to an acceptable level

If the recommendation is removal, it should be clear why trimming will not solve the problem. If the recommendation is pruning, it should also be clear what kind of pruning is planned and what result to expect.

Trimming has benefits beyond appearance

A lot of people think of trimming as cosmetic work, though the real value is often structural and preventive. Well-timed pruning can reduce the chance of storm breakage, keep limbs from overextending, and lower the weight load on vulnerable branch unions.

It can also extend the useful life of a tree.

That is a meaningful benefit for mature shade trees, ornamental specimens, and established landscape trees that anchor the design of the yard. In many cases, targeted pruning preserves the best parts of the tree while removing the parts most likely to cause trouble.

Trimming is especially worthwhile when the goal is to keep:

  • Shade where it matters most
  • Privacy screening
  • Established curb appeal
  • Habitat value
  • Seasonal bloom or fruit production

Poor pruning, of course, can do the opposite. Topping, over-thinning, or removing too much live canopy at once can stress the tree and trigger weak regrowth. That is why technique matters as much as the decision itself.

Removal also creates opportunities

Taking a tree down is not only about eliminating risk. It can also reset a space that has stopped working. Once an unsafe or poorly placed tree is removed, the property owner can address stump grinding, grading, irrigation corrections, replacement planting, or hardscape improvements without planning around a failing tree.

For some sites, that opens the door to a much better long-term layout.

A fresh plan after removal may include:

  • Replanting: Choose a species better suited to the space, climate, and water use goals.
  • Hardscape repair: Fix paving, walls, edging, or drainage affected by roots.
  • Outdoor function: Create room for patios, turf alternatives, lighting, or cleaner sightlines.
  • Maintenance savings: Reduce repeated cleanup and recurring pruning on a tree that never performed well.

This is where a full-service outdoor contractor can be especially helpful. When tree work connects to irrigation, pavers, gravel, fences, grading, lighting, or general landscape updates, the solution can be planned as one coordinated project instead of a series of disconnected fixes.

Practical questions to ask before choosing

The best decisions are usually made with a mix of safety judgment and site planning. A few direct questions can help narrow the choice quickly.

Ask:

  • Can the risk be reduced enough with pruning: Or will the tree remain a hazard even after work is done?
  • Is the tree likely to recover: Or is it already in long-term decline?
  • What is the target beneath it: Open yard, roof, driveway, play space, utility area?
  • How often will it need work after this: Every few years, or only occasional maintenance?
  • What happens to the space if the tree is removed: Shade loss, privacy loss, room for improvements, replanting options?

For homeowners and property managers, those questions often turn a vague concern into a clear plan.

In El Mirage, many outdoor projects are interconnected, and tree decisions rarely stay limited to the tree alone. A family-owned company like Pro Natural Landscape LLC, with experience across landscaping, irrigation, hardscaping, removals, and exterior improvements, can evaluate the tree in the context of the whole property. That matters when the goal is not only to solve one issue today, but to shape an outdoor space that stays safe, attractive, and easier to manage over time. Free estimates can make that first step easier, and for larger projects, financing options may help move needed work forward without delay.

Gravel & Rock Installation for Desert Landscaping in El Mirage, AZ

A well-built gravel landscape fits El Mirage better than a thirsty lawn ever could. It handles heat, looks clean year-round, and gives homeowners and property managers a practical way to cut water use without settling for a plain yard. When the ground is prepared correctly and the right rock is selected, gravel becomes more than a surface material. It becomes part of a durable desert landscape that is easier to maintain and better suited to local weather.

In El Mirage, that preparation matters. Summer monsoons can dump water fast, desert soils can harden like concrete, and sloped yards can wash out if drainage is ignored. A gravel installation that looks fine on day one but lacks grading, compaction, or containment can shift, thin out, and create drainage issues around the home. A professional approach prevents those problems before the first load of rock is spread.

Built for El Mirage conditions

Gravel installation in the West Valley is not just about dumping stone and raking it smooth. The soil profile, existing grade, roof runoff, irrigation layout, and traffic pattern all need to be evaluated first. That is especially true in El Mirage, where many properties deal with hardpan soil, heat exposure, and fast-moving stormwater.

A desert-ready plan usually starts with clearing old turf, weeds, debris, or worn rock, then shaping the ground so water moves away from structures and toward the right collection points. In some yards, that means gentle grading. In others, it may call for swales, dry creek features, or a stronger base layer under the decorative rock.

Pro Natural Landscape LLC takes that practical view of installation. With more than a decade of experience serving residential and commercial properties, the team focuses on site-specific work rather than one-size-fits-all layouts. That includes grading for drainage, selecting gravel that fits the property’s look and function, and pairing rock areas with drought-tolerant planting where it makes sense.

What proper installation includes

Good gravel work starts below the surface. A stable base helps prevent ruts, sinking, and uneven coverage, while edging keeps stone from spilling into sidewalks, driveways, and planting beds. For paths, patios, and drive areas, material depth also matters. Decorative rock that is too shallow will scatter and wear thin. Material that is too deep can feel loose underfoot and look unfinished.

The process often includes these core steps:

  • Site review: slope, drainage flow, utilities, and access points
  • Ground prep: removal of weeds, turf, debris, and failed rock layers
  • Base work: grading, leveling, compaction, and base material where needed
  • Containment: steel, aluminum, concrete, or paver edging
  • Top layer: evenly spread decorative gravel or rock at the right depth
  • Finishing touches: clean transitions, irrigation adjustments, and debris haul-off

This kind of prep supports long-term performance. It also creates a cleaner final look, with sharper borders, better drainage, and fewer maintenance issues after installation.

Rock and gravel options for desert landscapes

Different materials serve different purposes. Some compact well for walkways and drive areas. Others are best as decorative cover around plants or in dry creek beds. Color matters too, especially in desert landscaping, where natural browns, grays, reds, and blended earth tones usually sit best with the surrounding environment.

Here is a quick look at common choices for El Mirage properties:

Material Best Uses Benefits Things to Know
Decomposed granite Paths, patios, utility zones Natural desert color, compactable, budget-friendly Can break down over time and may need topping off
Pea gravel Beds, walkways, accent areas Good drainage, softer look, comfortable underfoot Shifts more easily without edging
River rock Dry creek beds, focal points, drainage areas Durable, decorative, strong water-flow appearance Higher material cost, heavier to install
Crushed granite Driveways, side yards, utility access Stable, firm surface, works well under traffic Rougher texture than pea gravel
Lava rock Accent beds, cactus gardens Lightweight, porous, strong contrast with plants Needs containment in windy areas
Marble chips Bright accent zones Distinct look, reflective, long-lasting Can be too bright for large open areas

Material choice should reflect how the space will be used, how much sun it gets, and how much movement the surface needs to handle. A front yard display area, a dog run, and a side-yard access path should not all be built the same way.

Drainage, grading, and erosion control

This is where professional installation earns its value. A gravel yard that is not graded correctly can send runoff toward the home, wash material into the street, or create puddling around foundations and walkways. In desert climates, even a short storm can expose a weak installation.

That is why drainage planning comes first, not last. Dry creek beds, shallow basins, controlled slopes, and permeable surfaces all help direct water where it belongs. On sloped properties, terracing, retaining features, or carefully shaped transitions may be needed to slow runoff and keep soil in place.

Weed control matters too. Many property owners ask about landscape fabric, yet fabric is not always the best long-term answer in desert rock beds. It can clog, surface over time, and still allow weeds to grow in the dust and organic matter that collects above it. In many cases, a better strategy is strong site prep, thick rock coverage, and ongoing weed management as needed.

Irrigation should also be worked into the layout from the start. Drip lines can be run below the gravel or placed at planting zones so water goes directly to the root area rather than being wasted across open ground.

Where gravel works especially well

Gravel is one of the most flexible materials in desert landscaping. It works in both simple refresh projects and larger yard transformations, and it pairs easily with pavers, artificial turf, lighting, and low-water planting.

On residential and commercial properties in El Mirage, it is commonly used for:

  • Front yard lawn replacements
  • Side yards and utility corridors
  • RV and gate access areas
  • Decorative plant beds
  • Dry creek features
  • Dog runs and low-maintenance backyards
  • Office entries and commercial frontage

When those spaces are tied together with matching tones and clean edging, the whole property feels more intentional and easier to care for.

A smarter low-water landscape

Replacing turf with gravel can cut outdoor water use in a big way, especially when the new design includes native or drought-tolerant plants and efficient irrigation. That matters in Arizona, where water savings are not just a nice bonus. They are part of responsible property planning.

Gravel also helps reduce day-to-day maintenance. There is no mowing, no fertilizing, and no regular turf repair. Seasonal care is usually limited to blowing off leaves, removing debris, occasional weed treatment, and adding fresh material when needed in high-traffic zones.

The payoff is both visual and practical:

  • Lower water demand: less irrigation than traditional grass yards
  • Cleaner curb appeal: crisp lines and a finished desert look year-round
  • Less upkeep: no weekly mowing or edging
  • Better soil protection: reduced washout during monsoon season
  • Flexible design: works with pavers, lighting, succulents, cacti, and shade trees

Why property owners choose Pro Natural Landscape LLC

Experience matters with gravel installation because the finish is only as good as the grading beneath it. Pro Natural Landscape LLC brings more than 11 years of local landscaping experience to projects across El Mirage and nearby Arizona communities. As a family-owned company, the focus stays on clear communication, dependable scheduling, and results that fit the property rather than forcing a generic template onto it.

The company provides full-service outdoor work, which is helpful when a gravel project includes more than rock alone. A property may need irrigation updates, paver borders, tree removal, land grading, lighting, or cleanup before the new surface goes in. Having one team manage those connected tasks can keep the project moving on time and with fewer gaps between phases.

Free estimates are available, and financing options through Hearth can make larger yard upgrades more manageable. Whether the goal is a simple rock refresh, a new desert front yard, or a full low-maintenance redesign for a home or commercial site, the work starts with the same priority: get the foundation right, choose materials with care, and build a landscape that fits El Mirage’s climate instead of fighting it.